# Skedulo Developers: full content corpus

> The complete text of developer.skedulo.com, the developer portal for the
> Skedulo Pulse Platform, as Markdown, for large language models. This is
> the long-form companion to https://developer.skedulo.com/llms.txt (the curated index).
> Generated from the same structured content the site renders, via the
> llms.txt convention (https://llmstxt.org/). Each section below is one
> page, separated by a horizontal rule, with YAML front matter naming its
> canonical URL.

---

---
url: "https://developer.skedulo.com/"
type: "page"
title: "Skedulo Developers"
---

# Skedulo Developers

## Build on the Skedulo Pulse Platform

APIs for data, location, integration, and events, with full-code, low-code, and no-code paths for extending the platform. Everything you need to build better deskless solutions, faster.

[Start building](https://developer.skedulo.com/start-building/)

[Explore agent skills →](https://developer.skedulo.com/skills/)

## Quickstart guides

Get started with the guide that matches what you’re building.

### Integrate via API

Connect Skedulo to the systems your operation already runs on. Query and change jobs, resources, and availability with GraphQL and REST.

[Make your first call](https://developer.skedulo.com/docs/graphql/)

### Customize the platform

Give schedulers a workspace that matches how they work: custom pages and tailored list views, built from Horizon components.

[Build a Horizon page](https://developer.skedulo.com/docs/horizon/)

### Build for mobile

Put the right form in front of workers in the field: job details, checklists, and signature capture in the Skedulo Plus app.

[Build your first form](https://developer.skedulo.com/docs/mobile/)

### Automate workflows

Keep the day moving without manual handoffs. Webhooks and triggered actions respond the moment a record changes; functions run your custom logic.

[Create a webhook](https://developer.skedulo.com/docs/webhooks/)

## Make your first API call

Generate an API token from your tenant, export it, and query jobs. Every example is copy-paste ready.

### curl

```curl
curl -X POST https://api.skedulo.com/graphql/graphql \
  -H "Authorization: Bearer $SKED_API_TOKEN" \
  -H "Content-Type: application/json" \
  -d '{"query": "{ jobs { edges { node { UID Name JobStatus } } } }"}'
```

### node

```node
const res = await fetch('https://api.skedulo.com/graphql/graphql', {
  method: 'POST',
  headers: {
    Authorization: `Bearer ${process.env.SKED_API_TOKEN}`,
    'Content-Type': 'application/json',
  },
  body: JSON.stringify({ query: '{ jobs { edges { node { UID Name JobStatus } } } }' }),
})
const { data } = await res.json()
```

### python

```python
import os

import requests

token = os.environ["SKED_API_TOKEN"]
res = requests.post(
    "https://api.skedulo.com/graphql/graphql",
    headers={"Authorization": f"Bearer {token}"},
    json={"query": "{ jobs { edges { node { UID Name JobStatus } } } }"},
)
jobs = res.json()["data"]["jobs"]["edges"]
```

### graphql

```graphql
query {
  jobs(filter: "JobStatus == 'Queued'") {
    edges { node { UID Name JobStatus } }
  }
}
```

No tenant yet? [Request a sandbox](https://www.skedulo.com/request-a-demo/)

## Platform tools

Everything you need for development, packaging, and deployment.

### Skedulo CLI

Scaffold, develop, and deploy artifacts from the command line: functions, pages, forms, and packages.

[Install the CLI](https://developer.skedulo.com/docs/cli/)

### Horizon and page builder

Compose custom pages from the Horizon component library, or build them visually with page builder. No deployment required.

[Browse components](https://developer.skedulo.com/docs/horizon/)

### GraphQL explorer

Introspect the schema and run queries against your own tenant, right here in the browser, with your API token.

[Open the explorer](https://developer.skedulo.com/graphql-explorer/)

### Agent-ready docs

Installable agent skills, markdown mirrors of every page, and llms-full.txt, so your coding assistant works from accurate, current context.

[Make your assistant Skedulo-fluent](https://developer.skedulo.com/docs/agent-ready/)

## Latest from the blog

Tutorials and deep dives on programmatic and declarative development across the platform.

- [Introducing the new Skedulo developer site!](https://developer.skedulo.com/blog/introducing-the-new-developer-portal/) (2026-09-09)
- [Skedulo Fall ‘24 Developer Roundup](https://developer.skedulo.com/blog/fall-24-launch-roundup/) (2024-12-20)
- [Developer Docs: June round-up](https://developer.skedulo.com/blog/developer-docs-june-round-up/) (2024-08-05)

## What’s new

Platform and API changes that affect developers.

- [Travel distance and duration in the Swimlane API](https://www.skedulo.com/release-notes/travel-distance-and-duration-in-the-swimlane-api/) (2026-09-17): The Optimization Swimlane API now returns travel distance and duration for every event in a Resource's schedule, so integrations no longer need a separate call to the routes API to get this data.
- [Customizable object labels for standard and custom objects](https://www.skedulo.com/release-notes/customizable-object-labels-for-standard-and-custom-objects/) (2026-09-04): Set distinct singular and plural labels on custom objects, and override defaults for standard objects.
- [Automation Builder is now available in open beta](https://www.skedulo.com/release-notes/automations-is-now-available-in-open-beta/) (2026-08-18): The Automation Builder, our new web based low-code tool for Administrators, is now open for self-service beta testing. Build multi-step, branching automations triggered by record changes, schedules, or platform events.
- [Manage URL Overrides from the Skedulo CLI - now generally available](https://www.skedulo.com/release-notes/manage-url-overrides-from-the-skedulo-cli-now-generally-available/) (2026-06-16): You can now manage URL Overrides as a Skedulo artifact. Define, deploy, and version-control URL overrides through the Skedulo CLI

[See the full list](https://developer.skedulo.com/changelog/)

## Keep building

Code to copy, videos to follow, and skills that teach your AI assistant the platform.

### Example repositories

Deployable examples for every artifact type: functions, pages, mobile forms, webhooks, and optimization extensions.

[Browse the code](https://github.com/SkeduloDevelopers)

### Developer YouTube channel

Getting-started walkthroughs and deep dives from the developer advocacy team.

[Watch the channel](https://www.youtube.com/@skedulo)

### Agent skills

Installable skills that teach AI coding assistants to build on Skedulo.

[Browse the catalog](https://developer.skedulo.com/skills/)

---

---
url: "https://developer.skedulo.com/blog/a-low-code-guide-to-sending-slack-notifications-with-webhooks"
type: "blogPost"
title: "A low code guide to send Slack notifications with Webhooks."
author: "Scott Gassmann"
date: "2022-10-05"
---

# A low code guide to send Slack notifications with Webhooks.

On average, we use 110 SaaS applications to complete our work. Compared to a mere eight in 2015, a whopping 1275% increase! And with 10 million daily users from over 600,000 organisations, there is a good chance that Slack is one of those 110 apps you use. The good news is that there are several ways you can connect Skedulo with Slack to share updates across your organisation. In this post, I will share my low code guide on how you can leverage [Skedulo Webhooks](https://developer.skedulo.com/docs/integration/webhooks/) and [Zapier](https://zapier.com) to quickly send automated [Slack](https://slack.com/) notifications to keep your teams updated with the information they care most about.

![](https://developer.skedulo.com/blog-images/post/221005-a-low-code-guide-to-sending-slack-notifications-with-webhooks/2.png)

## What are webhooks?

[Webhooks](https://developer.skedulo.com/docs/integration/webhooks/) are one of the common ways you can automatically trigger information to be sent to other apps or middleware. In the context of the Skedulo Pulse Platform, they are triggered when specific events or changes occur in your Skedulo environment.

Webhooks send the emitted event information (payload) to a specific URL that takes the payload and performs further processing. In the eyes of a webhook, the moment the webhook sends the event payload to the destination URL and confirms receipt, its job is done. The actual ‘processing’ of the webhook event data is performed by a secondary system/function, and it’s at that point, we will create the Slack automation.

![](https://developer.skedulo.com/blog-images/post/221005-a-low-code-guide-to-sending-slack-notifications-with-webhooks/3.png)

## Creating webhooks

A [webhook](https://developer.skedulo.com/docs/integration/webhooks/webhooks/) is created by sending a `POST` request to the */webhooks* endpoint along with a JSON body that defines the webhook. To build this automation, we will create a webhook where the JSON body contains four mandatory properties:

**Name** The name you want to give your webhook for easy identification.

**URL** The endpoint that will receive the event payload when the webhook is triggered.

**Type** The type of webhook. (The type has behavioural implications.) We will be using the *GraphQL* type.

**Query** [Schema Subscriptions](https://developer.skedulo.com/developer-guides/integration-and-automation/api-overview/graphql/#get-started-with-graphqlgraphql-subscriptions/#schema-subscriptions) define the conditions of when a webhook should fire and the data contained in its payload.

**Headers** *(optional)*

Any headers required when the payload is posted to the URL. (Often used to pass authentication information to the target URL, such as an API key.)

In the below example, I will share a prebuilt example of a GraphQL webhook, but if you want to learn more generally about creating GraphQL webhooks, see the [establishing webhooks](https://developer.skedulo.com/docs/integration/webhooks/webhooks/)* *developer guide.

## Send a Slack notification when unavailability is requested.

In this example, I will show you how to send a Slack channel notification when an unavailability (time off) request is created. Whilst this example explicitly targets unavailability, the same concept can be applied to nearly any object in the Skedulo data model. To set this up in your Skedulo environment, you will need:

 1. A [Zapier](https://zapier.com/) Account (starter or above). If you don’t have one, you can sign up for their free trial to build out this example.

 2. [Insomnia](https://insomnia.rest/download) (or equivalent REST client).

 3. A Skedulo [API token](https://developer.skedulo.com/user-guides/admin-and-config/admin-and-config-webapp/extend-with-extensions/create-api-tokens/).

## Create a Zap

If you’re new to Zapier, a [Zap](https://zapier.com/learn/zapier-quick-start-guide/quick-start-the-basics/) is the name of an automated workflow. It’s the ‘recipe’ for a series of steps in an automation. Once you’re logged in, you will notice the big orange “+ Create Zap” button.

![](https://developer.skedulo.com/blog-images/post/221005-a-low-code-guide-to-sending-slack-notifications-with-webhooks/4.png)

The first step in creating your Zap is to define a trigger. In this instance, we will trigger the Zap when the Skedulo Webhook is invoked. So select the *“Webhooks by Zapier*” trigger and the “*Catch Hook*” event.

![](https://developer.skedulo.com/blog-images/post/221005-a-low-code-guide-to-sending-slack-notifications-with-webhooks/5.png)

Zapier will then generate a URL that will specifically invoke this automation. Copy this URL and place it in your Skedulo Webhook definition, see the example below.

![](https://developer.skedulo.com/blog-images/post/221005-a-low-code-guide-to-sending-slack-notifications-with-webhooks/6.png)

## Create Skedulo Webhook

Once the Zap is ready to test (and you’ve copied the webhook URL), you’re ready to create your Skedulo Webhook. This will notify Zapier every time unavailability is created.

To create a Skedulo Webhook, open your REST client (e.g. Insomnia,Postman, Terminal - for the faint-hearted) and form the following `POST` request:
``` yaml
curl --request POST \
  --url https://api.skedulo.com/webhooks \
  --header 'Authorization: Bearer $Your_API_Token' \
  --header 'Content-Type: application/json' \
  --data '{
  "name": "NewUnavailability",
  "url": "REPLACE_WITH_YOUR_ZAPIER_URL",
  "type": "graphql",
  "query": "\n    subscription {\n      schemaAvailabilities(operation: INSERT, filter: \"IsAvailable == false\" ) {\n        operation\n        timestamp\n        data {\n          UID\n          Notes\n        Type\n        IsAvailable\n        Start\n        Finish\n        ResourceId\n        }\n        previous {\n          UID\n        }\n      }\n    }\n  "
}'
```
**Some important things to keep in mind at this step:**

 1. Ensure you have the correct base URL for your region ([see regional URLs](https://developer.skedulo.com/skedulo-api/#section/Regional-URLs)).

 2. Replace the `URL` property in the JSON body with the `URL` from the previous step.

 3. Update the `Authorization` header (in the headers tab) with your [Skedulo API token](https://developer.skedulo.com/user-guides/admin-and-config/admin-and-config-webapp/extend-with-extensions/create-api-tokens/). (Keep the word ‘Bearer’ as a prefix.)

**TIP:** If you’re new to Insomnia, you can copy this entire request and paste it into the Insomnia request bar and it will set up your request correctly.

![](https://developer.skedulo.com/blog-images/post/221005-a-low-code-guide-to-sending-slack-notifications-with-webhooks/7.png)

Once you’ve got your Webhook creation request finalised, click the **Send** button and you should get a “200 OK” response back indicating your webhook has been successfully created.

For clarity, this is what the unescaped request looks like:

``` yaml
{
  "name": "NewUnavailability",
  "url": "REPLACE WITH YOUR ZAPIER URL",
  "type": "graphql",
  "query": "
    subscription {
      schemaAvailabilities(operation: INSERT, filter: "IsAvailable == false" ) {
        operation
        timestamp
        data {
                   UID
                       Notes
                       Type
                       IsAvailable
                       Start
                       Finish
                       ResourceId
        }
        previous {
          UID
        }
      }
    }
  "
}
```

you will notice that in the `query` property, we are ‘listening’ to the `Availability` object (`schemaAvailabilities`), specifically for `INSERT` operations where the `IsAvailable` attribute is set to `false`. You will also notice that in the `data` object, we are able to specify the attributes included in the payload sent to Zapier.

## Testing your webhook

Now that the webhook is established, click “Test Trigger” in Zapier and immediately [create unavailability](https://docs.skedulo.com/user-guides/manage-scheduling-availability/manage-availability-and-unavailability/in-skedulo-web-app/create-unavailability/) in Skedulo. You ought to quickly see your event sent to your webhook URL.

![](https://developer.skedulo.com/blog-images/post/221005-a-low-code-guide-to-sending-slack-notifications-with-webhooks/8.png)

## Fetching additional Resource information *(optional)*

If you’ve got a keen eye you will notice that we’ve been provided with a `Resource ID` associated with the request. If you want to include the Resource Name in your Slack notification, then you’ll also want to fetch the associated Resource object. This can be easily done by making a request to the Skedulo GraphQL API.

If you are following along, here is the data body for you to copy and paste in the below request:

``` json
{"query":"{resourcesById(UID: \"MERGE_IN_RESOURCE_ID_FROM_STEP_1_HERE\"){UID\nName\nCategory\nPrimaryRegion{\nName}}}"}
```

You will also need to add the following two request headers (seen in the below example)

* **Authorization**: This will be the word *Bearer* followed by your [API token](https://developer.skedulo.com/user-guides/admin-and-config/admin-and-config-webapp/extend-with-extensions/create-api-tokens/)

* **Content-Type:** This will always be set to *application/json*

**Remember**: Just like when we created the Skedulo Webhook above, you’ll need to make sure you have the correct [regional URL](https://developer.skedulo.com/skedulo-api/#section/Regional-URLs) set for your request in the *URL* property.

![](https://developer.skedulo.com/blog-images/post/221005-a-low-code-guide-to-sending-slack-notifications-with-webhooks/9.png)

## Format the unavailability dates (optional)

Dates in Skedulo are stored as UTC values, but often users will want these to be formatted to make them more readable. So you can use the Zapier date/time formatter to update the `Start` and `End` values. In the below example, I convert the format to *MMM DD YYYY HH:mm*, which gives me the following result *Sep 26 2022, 08:00*, but you can set the format to meet your specific requirements. Repeat this step to adjust the finish date too.

![](https://developer.skedulo.com/blog-images/post/221005-a-low-code-guide-to-sending-slack-notifications-with-webhooks/10.png)

## Post notification to Slack

You’re now ready to post the notification to Slack. Simply connect your Slack account to Zapier (if you haven’t already) and construct your new channel message.

![](https://developer.skedulo.com/blog-images/post/221005-a-low-code-guide-to-sending-slack-notifications-with-webhooks/11.png)

Test your action, and you should see a beautiful Slack notification arrive.

![](https://developer.skedulo.com/blog-images/post/221005-a-low-code-guide-to-sending-slack-notifications-with-webhooks/12.png)

By this point, you’ve also likely realised that you could post (send) this content to any app listed on the Zapier marketplace (or direct to a custom API if not listed), and you would indeed be correct!

As always, if you have any questions please feel free to comment below or reach out to me on [@scottgassmann](https://twitter.com/scottgassmann) or the Developer Advocacy team [@SkeduloDevs](https://twitter.com/skeduloDevs) on twitter (We would especially love it if you were to tweet us with your slack notifications all set up!).

Until next time, stay awesome 😎

## References

* [Webhooks overview](https://developer.skedulo.com/docs/integration/webhooks/)
* [Creating webhooks](https://developer.skedulo.com/docs/integration/webhooks/webhooks/)
* [Regional URLs](https://developer.skedulo.com/skedulo-api/#section/Regional-URLs)
* [Schema Subscriptions](https://developer.skedulo.com/developer-guides/integration-and-automation/api-overview/graphql/#get-started-with-graphqlgraphql-subscriptions/#schema-subscriptions)
* [Zapier](https://zapier.com/)
* [Insomnia](https://insomnia.rest/download) (download)

---

---
url: "https://developer.skedulo.com/blog/accessing-the-universe-in-a-single-page-with-related-data"
type: "blogPost"
title: "Episode #6 - Acessing the universe in a single page with related data"
author: "Alison Johnston"
date: "2023-01-24"
---

# Episode #6 - Acessing the universe in a single page with related data

Welcome back, Low Coders! Last time on Mastering low code app development, we built relationships between our objects to be able to show that a particular `part` related to a particular `aircraft`, as well as relating the `aircraft` to a particular `account` and `job` through the `Fleet` object. This episode, we will work through how to display this information in a separate tab on your pages (which we built way back in [episode two](https://developer.skedulo.com/blog/mastering-low-code-app-development-episode-2-putting-your-skedulo-record-pages-into-hyperspace/)). By adding this data to the related object’s page, you’re giving your users the information they want and need without having to hunt for it — yay you!

After following along with [episode two](https://developer.skedulo.com/blog/mastering-low-code-app-development-episode-2-putting-your-skedulo-record-pages-into-hyperspace/), my View page for the aircraft object currently looks like this:

![](https://cdn-images-1.medium.com/max/3200/0*1AuvFs4S0y80nGXH)

All the information about the aircraft itself is stored on this page. I want to add a new tab to this page for all the parts that belong to this aircraft, and another tab that shows which accounts have this aircraft in their fleet. This allows our users to see which parts are required for this specific aircraft, as well as which of our customers have this aircraft as part of their fleet — all the information they need at their fingertips!

Using our favorite [documentation](https://developer.skedulo.com/developer-guides/customize-and-extend/create-and-customize-pages/overriding-pages-example/configure-view-page/) to walk us through this, we can see that adding tabs to the page is pretty straight forward. We simply add the following code snippet to the top of the %block body% section, which establishes the tabs within the page:

```yaml
    <sp-tabs selected="{{_.queryParams.selectedtab}}">
      <platform-component package-name="nav" name="ReflectiveTabs" search-param="selectedtab"
      tabs="{{ [
        {"name":"details","label":"Details"},
        {"name":"aircraft-parts","label":"Aircraft Parts"},
        {"name":"fleet-assignments","label":"Fleet Assignments"}
      ] |dump}}">
    </platform-component>
```
It’s important to close out the tab sections in the page template as well, so below the last section of our body block, we add the following code snippet to close off the Details tab panel:
```yaml
   </sp-responsive-columns>
    </sp-tab-panel>
```
We also need to add in the tabs for Parts and Fleet Assignment, which we can do by pasting the following code snippet below where we closed out the details panel, but before the end of the [block body section](https://gist.github.com/ajohnston-skedulo/82c4a75e970968df6ae2d3b04ce663fe). This is what defines what happens on each of the tabs themselves!

```html
   <sp-tab-panel name="aircraft-parts">
    </sp-tab-panel>
    <sp-tab-panel name="fleet-assignments">
    </sp-tab-panel>
    </sp-tabs>
```

Once we save and refresh the View page, we can now see:

![](https://cdn-images-1.medium.com/max/3200/0*MUUx15gGs-7wYuGj)

Brilliant! However, my Parts and Fleet Assignment panels are blank. So, it’s back to our trusty [documentation](https://developer.skedulo.com/developer-guides/customize-and-extend/create-and-customize-pages/overriding-pages-example/configure-view-page/#linking-to-data-from-a-related-object) where we can see that adding the information is yet another copy-paste-update — which we love!


```yaml
    <sp-tab-panel name="aircraft-parts">
      <div>
        <platform-component
        package-name="recordpage"
        name="RecordTemplate"
        template=" {{ '{% if UID %}
        <platform-eventbus-scope closed>
        <platform-component 
          package-name="listview"
          name="RelatedListView"
          resource-name="aircraft Parts"
          foreign-key="aircraftId"
          foreign-key-value="{{UID}}">
        </platform-component>
        </platform-eventbus-scope>
        {% endif %}'}}" >
        </platform-component>
      </div>
    </sp-tab-panel>
```
🌟Handy hint! The `resource-name` element needs to be set as the Object *Label*, not the Object *Name*. In my example above, there is a space between aircraft and parts — this is because my Object Label is `Aircraft Parts`, while the Object Name is `aircraftParts`.

When I refresh my View page and jump over to the Aircraft Parts tab, I now see my related list — success!! My list could do with a bit of zhooshing up, so back to making my list view pretty using [this post](https://developer.skedulo.com/blog/building-beautiful-list-views-in-pulse/). I add the image of the aircraft to the list view, and hyperlink the Part Name, rather than displaying the UID of the aircraft Part. You could also add an image of the part itself to help out your users!

![](https://cdn-images-1.medium.com/max/3200/0*0bUgCwRkt-PxWdEE)

You can add the ability for your users to add parts from the related list using the below code snippet
```yaml
    <sp-tab-panel name="aircraft-parts">
    <sp-split-row>
    <div slot = "right" style="text-align: right;">
    <sp-header style="margin-bottom: 0">
    <platform-component package-name="recordpage" name="RecordTemplate" template="{{ '<a href="/platform/page/aircraft-parts-create"> <sp-button button-type="secondary">Add Part</sp-button>' }}"></platform-component>
    </sp-header>
    </div>
    </sp-split-row>
```
Adding this code snippet gives you the fancy button on the right of the list view:

![](https://cdn-images-1.medium.com/max/3200/0*OVk6wpIywmwuFAB5)

In episode 8 we will cover off how to pre-populate data which will make your users sing your praises as the time-saving hero that you are!

Now to update my Fleet Assignments using the same code snippet (just changing from Aircraft Parts to Fleet).
```yaml
    <sp-tab-panel name="fleet-assignments">
      <div>
        <platform-component
        package-name="recordpage"
        name="RecordTemplate"
        template=" {{ '{% if UID %}
        <platform-eventbus-scope closed>
        <platform-component package-name="listview"
        name="RelatedListView"
        resource-name="fleet"
        foreign-key="aircraftId"
        foreign-key-value="{{UID}}">
        </platform-component>
        </platform-eventbus-scope>
        {% endif %}' }}" >
        </platform-component>
      </div>
    </sp-tab-panel>
```
A few more tweaks to this list view includes having the Is Active field look a bit more colourful, and adding hyperlinks for both the account and the aircraft, which leaves me with a page view that Rey would be proud of!

![](https://cdn-images-1.medium.com/max/5740/1*V9CV8Z5wbawTrSZUFtbUSw.png)

The full code for my View page is visible here:
```yaml
    {% extends "base-recordview" %}
    {% set resource_name="aircraft" %}
    {% block header %}
    <sp-split-row>
        <div slot="left">
      <sp-header style="margin-bottom: 0">
        <sp-column>
          <sp-heading size="2xl" level="1">
              {% block title %}
                  <platform-component package-name="recordpage" name="RecordDefiner"></platform-component>
              {% endblock title %}
          </sp-heading>
            <sp-row style="--sp-row-spacing: var(--sp-spacing-3);">
              <sp-icon icon="details"></sp-icon>
              <span>Aircraft </span>
          </sp-row>
        </sp-column>
         </sp-header>
        </div>
        <div slot="right" style="text-align: right;">
            <sp-header style="margin-bottom: 0">
            <sp-heading>
        <platform-component package-name="recordpage" name="RecordTemplate" template="{{ '<a href="/platform/page/aircraft-edit?uid={{UID}}"> <sp-button>Edit</sp-button>' }}"></platform-component>
        </sp-heading>
          </sp-header>
        </div>
      </sp-split-row>
    {% endblock header %}
    
    {% block body %}
    <sp-tabs selected="{{_.queryParams.selectedtab}}">
      <platform-component package-name="nav" name="ReflectiveTabs" search-param="selectedtab"
      tabs="{{  [
                  {"name":"details","label":"Details"},
                  {"name":"aircraft-parts","label":"Aircraft Parts"},
                  {"name":"fleet-assignments","label":"Fleet Assignments"}
                ]   |dump}}">
       </platform-component>
        <sp-tab-panel name="details" shown>
          <sp-responsive-columns>
          <div>
            <sp-heading size="base" style="margin-bottom: var(--sp-spacing-4)">Description</sp-heading>
         <sp-record-row>
        <span slot="label">Hyperspace</span>
        <platform-component package-name="recordpage" name="RecordFieldView" field-name="Hyperspace"></platform-component> 
      </sp-record-row>   
      <sp-record-row>
        <span slot="label"># of Seats</span>
        <platform-component package-name="recordpage" name="RecordFieldView" field-name="Seats"></platform-component> 
      </sp-record-row>
         <sp-record-row>
        <span slot="label">Release Date</span>
        <platform-component package-name="recordpage" name="RecordFieldView" field-name="ReleaseDate"></platform-component> 
      </sp-record-row>  
      <sp-record-row>
        <span slot="label">Last Service Date</span>
        <platform-component package-name="recordpage" name="RecordFieldView" field-name="LastService"></platform-component> 
      </sp-record-row>    
        </div>
      <div>
         <sp-record-row>
         <span slot="label">Branding</span>
            <platform-component package-name="recordpage" name="RecordTemplate" 
                                template="{{ '{% if Branding == "Rebellion" %}
    <img src="https://starwarsblog.starwars.com/wp-content/uploads/2015/11/rebel-symbol-536x536.jpg" alt="Rebellion" width="100" height="100">
    {% else %}
    <img src="https://starwarsblog.starwars.com/wp-content/uploads/2016/02/imperialseal-536x536.jpg" alt="Empire" width="100" height="100">
    {% endif %}' }}"></platform-component>
        </sp-record-row>     
        <sp-record-row>
          <span slot="label">Image</span>
          <platform-component package-name="recordpage" name="RecordTemplate" template="{{ '<img src="{{Image}}" alt="{{name}}" width="200" height="200">' }}"></platform-component>
        </sp-record-row>
      </div>
      </sp-responsive-columns>
      </sp-tab-panel>
            
        <sp-tab-panel name="aircraft-parts">
     <sp-split-row>         
          <div slot = "right" style="text-align: right;">
            <sp-header style="margin-bottom: 0">
              <platform-component package-name="recordpage" name="RecordTemplate" template="{{ '<a href="/platform/page/aircraft-parts-create"> <sp-button button-type="secondary">Add Part</sp-button>' }}"></platform-component>
            </sp-header>
          </div>
        </sp-split-row>
    
        <div style="padding-top: var(--sp-spacing-4)">
          <platform-component 
            package-name="recordpage"
            name="RecordTemplate"
            template= " {{ '{% if UID %}
                  <platform-eventbus-scope closed>
                    <platform-component package-name="listview" 
                     name="RelatedListView" 
                     resource-name="aircraft Parts"
                     foreign-key="AircraftId"
                     foreign-key-value="{{UID}}">
                    </platform-component> 
                  </platform-eventbus-scope>
                  {% endif %}' }} " >
          </platform-component>
          </div>
        </sp-tab-panel> 
       
           <sp-tab-panel name="fleet-assignments">
            <sp-split-row>         
          <div slot = "right" style="text-align: right;">
            <sp-header style="margin-bottom: 0">
              <platform-component package-name="recordpage" name="RecordTemplate" template="{{ '<a href="/platform/page/fleet-create"> <sp-button button-type="secondary">Add Fleet Assignment</sp-button>' }}"></platform-component>
            </sp-header>
          </div>
        </sp-split-row>
                <platform-component 
            package-name="recordpage"
            name="RecordTemplate"
            template=" {{ '{% if UID %}
                  <platform-eventbus-scope closed>
                    <platform-component package-name="listview" 
                     name="RelatedListView" 
                     resource-name="fleet"
                     foreign-key="AircraftId"
                     foreign-key-value="{{UID}}">
                    </platform-component> 
                  </platform-eventbus-scope>
                  {% endif %}' }}" >
          </platform-component>
             </div>
        </sp-tab-panel> 
      </sp-tabs>
    
    {% endblock body %}
```
Adding the related data to the `Account` page is a matter of repeating the above steps on your `Account View` page — this lets your users see which aircraft each of your customers have.

![](https://cdn-images-1.medium.com/max/5748/1*8hEhmkXaNCjznwcjEElI2w.png)

Your `Job` page will already have the lookup to the `Fleet` listed in the `Fields` tab, so there is no update required there!

![](https://cdn-images-1.medium.com/max/3200/0*C_EArBbnNJPeyZri)

Now your workers can see which specific vehicle they should be servicing when they’re using their trusty device out in the field!

![](https://cdn-images-1.medium.com/max/2000/0*1JbXlFtSKwJ2Df0x)

Join us here at Low Code Corner next time when we add some filters to our fancy new tabs! And as always, if you have questions, reach out to us via the comments below or on Twitter @SkeduloDevs.

## References

* [Skedulo: Overriding the default View record template](https://developer.skedulo.com/developer-guides/customize-and-extend/create-and-customize-pages/overriding-pages-example/configure-view-page/#adding-tabs)

---

---
url: "https://developer.skedulo.com/blog/automation-101-part-2-create-your-first-webhook"
type: "blogPost"
title: "Automation 101, Part 2: Create your first Webhook"
author: "Sophie Wheeler"
date: "2023-04-14"
---

# Automation 101, Part 2: Create your first Webhook

## Introduction
Welcome to part two in our Automation 101 series! In part one, we covered the options available to builders on the Skedulo Pulse Platform and today we’re going to take a deep dive into the first one: webhooks!

Let’s begin by understanding what a webhook is and what it does. Put simply, a webhook is a piece of configuration that tells the Pulse Platform to make a call out to a web service when something changes. This change could be the creation, update, or deletion of a record, or it could be an incoming SMS.

The web service that can be called could either be internal or external to the Pulse platform (e.g, a connected function, or a third party system of record).

In the webhook configuration, you can define what criteria must be met in order for the webhook to be fired, upon what record event it is fired (e.g update, insert, delete) and what data to include.

We can consider this example:

You have a webhook on the Job object, which is configured to run every time a job is updated **and** if the Job Status changes to “Dispatched” from any other value.

This webhook makes a call to a Skedulo connected function (more on these in an upcoming part of this series), which receives the job information as well as the related customer information, and sends an SMS to the customer informing them that the Job has been dispatched.

## Creating an Object Triggered Webhook
Now that we know what they are for, let’s step through the process for creating one, beginning with an object triggered webhook.

A webhook can be created for any standard or custom object that is tracked. In this example we will use a custom object and first configure tracking.

You can do this using any method you’d like (such as an API client, or from within some code) but be sure to have an authentication token configured.

## Enable tracking
The first thing we need to do is get the ID of the object we want to track. This can be done by making a `GET` request to `https://api.skedulo.com/custom/schemas`

The `GET` request will return information about all of your objects, so simply find the one you wish to use (e.g `MyCustomObject`) and grab its `id`.

Next, we need to enable tracking by making a `POST` request (with no body) to `https://api.skedulo.com/custom/standalone/schema/`<object id>/track (replacing `<object id>` with the `id` from the first step).

Once that’s done, we can go ahead and create our webhook.

## Create the webhook
To create the webhook itself, we need to `POST` a webhook configuration to `https://api.skedulo.com/webhooks`.

Let’s take a look at the configuration to better understand it:
```yaml
{
  "name": "My Webhook",
  "url": "https://path.to/my/endpoint",
  "headers": {
  "Authorization": "Bearer <token>",
    "Content-Type": "application/json"
  }
  "type": "graphql",
  "operation": ["INSERT","UPDATE"],
  "query": "subscription {
      schemaCustomExternalObject {
        operation
        timestamp
        data {
          UID
          Name
          ExternalId
          CreatedDate 
          LastModifiedDate
        }
        previous {
          UID 
          Name 
          ExternalId 
          CreatedDate
          LastModifiedDate
        }
      }
    }"
}
```
We need to give our webhook a `name`, make sure it’s descriptive. This will help when there are multiple webhooks in your Skedulo tenant.

The `url` is, as you may have guessed, the URL to call when the webhook fires.

If we need to provide certain headers, such as for authentication, we can do so with the `headers` object. We simply provide each key and value within it, as per the above example.

If you want to experiment with webhooks, you can use a service like ngrok and a simple express server for this. For more information, check out the developer [documentation here](https://developer.skedulo.com/developer-guides/integration-and-automation/webhooks-and-triggered-actions/webhooks/create-a-webhook/).

The `type`, in the case of object trigger is "`graphql`" .

The `operation` field is optional. It is an array of operations (`INSERT`, `UPDATE`, or `DELETE`) and allows us to choose when our webhook runs (e.g only on INSERT by setting it to [“`INSERT`”]).

Finally, we have the `query`. This is how we tell Skedulo which object to monitor and which data to provide to the web service that the webhook calls. Because this is just a [GraphQL](https://developer.skedulo.com/blog/category/graphql-101/) query, we can use filters and also return data from other related objects.

Once we’ve finished our webhook configuration and pushed it to Skedulo, we will receive a response like the following:

``` json 
{
  "result":{
    "id": "9849cceb-c426-488b-89dc-6ff02b33802d",
    "name": "test",
    "url": "https://b14b2804.ngrok.io",
    "headers": {},
    "query": "\n    subscription {\n      schemaJobs {\n        operation\n        timestamp\n        data {\n          UID\n          Duration\n        }\n        previous {\n          Duration\n        }\n      }\n    }\n  ",
    "customFields": {},
    "type": "graphql"
  }
}
```
Based on the query we’ve configured, whenever we make a change in Skedulo, our web service will receive a `POST` request like the following:

```yaml
"data": {
  "schemaJobs": {
    "data": {
      "UID": "00145d1e-974a-4f97-9cd7-7cd280f824a8",
      "Duration": 60
    },
    "previous": {
      "Duration": 60
    },
    "operation": "INSERT",
    "timestamp": "2019-07-02T03:29:35.969Z"
    }
  }
}
```
As you can see, this will contain data based on the query we specified. We can then use this in our web service to facilitate our business process automation.

## SMS triggered webhook
The other main functionality where webhooks can be used is to respond to incoming SMS messages. This allows us to perform automated actions based on an incoming message. For example we could have an SMS sent to a customer asking them to confirm their Job by asking them to reply with “CONFIRM”.

We could then use a webhook to call a connected function to handle the response to this message and update the Job accordingly.

In order to create an SMS triggered webhook, the process is much the same as an Object triggered one, however we don’t need to enable tracking, nor do we need a GraphQL query.

We simply need to `POST` a webhook configuration, like the following, to: `https://api.skedulo.com/webhooks`

``` json
{
  "name": "Inbound SMS Webhook",
  "url": "https://path.to/my/endpoint",
  "type": "inbound_sms"
}
```
The name and url field are as in the previous example, and the `type` field is now set to "`inbound_sms`" .

When this webhook is triggered, we will receive a `POST` request to our web service like the following:
```json
{
    "key": {
        "id": "message_sid_001",
        "vendor": "twilio"
    },
    "to": "+61411123456",
    "from": "+61411222333",
    "body": "CONFIRM",
    "receivedAt": "2019-09-24T05:57:49.323Z"
}
```
As you can see, we get the number the SMS was sent to, who it was from, the content of the message, and a timestamp of when it was received.

We can then use this information in our connected function, or external web service, to update the Job (as per our example) or perform any other automation required.

## Scheduled and Deferred Webhooks
Both of the previous examples will be run as soon as either the record changes, or the SMS arrives. But what if we want to defer this for a period of time? Or do we want to run a webhook on a schedule?

Well, we can do both of these things! Let’s begin with deferred webhooks.

### Deferred Webhooks
We can defer a webhook in two ways: either by a fixed value (e.g, always run it 60s after a record has changed) or a by dynamic value (e.g, based on the value of a field).

Here’s an example of a webhook configuration that is always deferred by 60s:
``` yaml
{
  "name": "My Webhook",
  "url": "https://path.to/my/endpoint",
  "type": "deferred_graphql",
  "operation": ["INSERT","UPDATE"],
  "offset": 60000
  "field": "LastModifiedDate"
  "query": "subscription { ..." //full query here
}
```
As you can see, we simply need to change the `type` to be "`deferred_graphql`" and add an `offset` field with a value of time in milliseconds by which we want to defer the webhook.

We also need to specify a field to calculate our deferred time from. In this case, it’s when the record was last modified. This field has to be a Date/Time (`instant`) field. In this example, the webhook would fire 60 seconds after the record was last modified.

The other option we have is to dynamically defer a webhook. That is, use the value from a field to determine how long we defer it by. This field has to be of the integer data type.

This is largely the same as a normal deferred webhook (as above), however, rather than specify a numeric value for offset, we give it a field and a default value (in case the field is empty).

For example:
``` json
{
  "offset":{
    "fieldName": "CustomNumber",
    "default": 15000
  }
}
```
This would defer the webhook for the value in the `CustomNumber` field (in milliseconds) and if that field was blank, it would be deferred by 15 seconds.

### Scheduled Webhooks
Finally, we are able to run a webhook on a [schedule](https://developer.skedulo.com/developer-guides/integration-and-automation/webhooks-and-triggered-actions/webhooks/scheduled-webhooks/) (aka. A cron job). These webhooks use a standard cron expression to determine when they are executed.

For example, a cron expression of “`30 8 * * 1`” would run every Monday at 8am. You can use a tool like [crontab.guru](https://crontab.guru/) to help you better understand cron expressions.

As normal, we need to provide a `name`, a `url` and a `type`. The `type` in this case is "`scheduled`". We also need to provide a `cron` expression to tell Skedulo how often to run the webhook:
``` json
{
  "name": "Runs every minute",
  "url": "https://path.to/my/endpoint",
  "headers": {},
  "cron": "* * * * *",
  "type": "scheduled"
}
```
We can then provide a query that will be executed each time the webhook runs and POST the data to the web service it calls.

**CAUTION:** Be careful with your query and cron expression here, as it could result in large volumes of data being queried or sent to your web service.

You could use a scheduled webhook if, for example, you needed to get all of the Jobs in a given status for each day and send them to a connected function or external system.

## Conclusion
I hope you now have a better understanding of webhooks and how you can use them to automate processes. In the next part, we will be covering webhooks’ sibling, triggered actions, as well as when to use one or the other.

We will then cover connected functions and, finally, an example of how you can put all of these features together to build end-to-end automation on the Skedulo Pulse Platform!

If you can’t wait, you can always check out the documentation on automation on our [shiny new docs site](https://developer.skedulo.com/developer-guides/integration-and-automation).

As always, we’d love to hear about what you’re building so please reach out to us on Twitter [@SkeduloDevs](https://twitter.com/skedulodevs) or [LinkedIn](https://www.linkedin.com/showcase/skedulodevs/)!

## References
* [Skedulo Docs — Use Webhooks](https://developer.skedulo.com/developer-guides/integration-and-automation/webhooks-and-triggered-actions/webhooks/)
* [Skedulo Docs — Schedule Webhooks](https://developer.skedulo.com/developer-guides/integration-and-automation/webhooks-and-triggered-actions/webhooks/scheduled-webhooks/)
* [Skedulo Docs — Integration and Automation](https://developer.skedulo.com/developer-guides/integration-and-automation)
* [Skedulo Developer Blog — GraphQL](https://developer.skedulo.com/blog/category/graphql-101/)
* [Crontab.guru](https://crontab.guru/)

---

---
url: "https://developer.skedulo.com/blog/automation-101-what-are-my-options"
type: "blogPost"
title: "Automation 101, Part 1: What are my options?"
author: "Sophie Wheeler"
date: "2023-03-24"
---

# Automation 101, Part 1: What are my options?

So, you want to build a business process or a slick user experience in Skedulo, and you know you need automation to achieve this. You’re probably asking yourself, what are my options when it comes to automation on the Skedulo Pulse Platform?

Well, you’ve come to the right place. That is exactly the question I intend to answer in this post! Skedulo provides you with three options when it comes to automation: webhooks, triggered actions, and connected functions.

Each of these target different use cases, and some can be used together to achieve your desired result, or used for other purposes such as integration. (Stay tuned for our series on integration!)

Let’s take a quick look at each of them now, and then in the next posts in the series, we’ll cover each in more detail.

## Webhooks

Webhooks are the simplest method of automation. They allow you to make a callout when a record changes, or when Skedulo receives a SMS.

This callout can either be to a Connected Function (more on these soon!) or to an external service. You can choose which record changes to listen for, and what record data is sent to the callout endpoint.

To create a webhook, we make a request to the webhooks API with a webhook definition. This definition contains the following items:

* The type of webhook, either ‘graphql’ (for record changes) or ‘inbound_sms’
* The URL to make a callout to (e.g, your connected function or external service)

* For record change webhooks:
– A [GraphQL](https://developer.skedulo.com/blog/category/graphql-101/) query
– Optionally, for record change webhooks you can also choose if they run on `INSERT`, `UPDATE` or `DELETE`.

For record change webhooks, we use the GraphQL query to define what is listened for (e.g the `JobStatus` field changed to ‘Dispatched’) as well as the fields to be sent to the callout URL (e.g, `UID`, `Status`, `StartDate`, etc).

For inbound SMS webhooks, Skedulo will send the content of the message, the *from* and *to* phone numbers, and the date and time it happened to the specified callout URL.

Skedulo also supports the concept of deferred and scheduled webhooks, which means that we can run a webhook after a given time, or by using a cron expression.

A deferred webhook can be run either at a static interval, for example 10s after a record has changed, or it can be offset from a field on the object it is triggered from.

We will cover webhooks in detail in the next post in this series, but for now you can check out the [documentation here.](https://developer.skedulo.com/developer-guides/integration-and-automation/webhooks-and-triggered-actions/webhooks/)

## Triggered Actions

Next up is triggered actions. These are a lot like webhooks but they have some unique benefits (and limitations).

A triggered action can listen for record changes in much the same way that webhook can, although the definition is a little different, and it will send these record changes off to either a connected function or an external web service.

Due to the way triggered actions work, they can retrieve data from Skedulo after the trigger (for example a record changing) has been fired, which may be beneficial in certain use cases.

Unlike webhooks, triggered actions do not have the ability to be scheduled or deferred.

However, triggered actions have the ability to send SMS messages based on a record change. Rather than the ‘call_url’ action, which behaves in the same way as a webhook, we can use the ‘send_sms’ action. For example, we could use this to notify a customer that their Job has been dispatched and someone is on their way.

We’ll be covering triggered actions in detail in a future post, along with when to use them in comparison with webhooks. If you can’t wait, you can check out the developer [documentation here.](https://developer.skedulo.com/developer-guides/integration-and-automation/webhooks-and-triggered-actions/triggered-actions/)

## Connected Functions

Finally, this brings us to connected functions. These are serverless functions that you can write to provide custom APIs within your Skedulo tenant. These APIs can be used to build automations in conjunction with webhooks and triggered actions, build backends for web extensions, or as part of an integration with other systems.

While webhooks and triggered actions contain very little logic, a connected function can contain as much or as little logic as needed to get the job done.

For example, you could build a connected function that is triggered from a webhook or triggered action in order to update another record in Skedulo, send a message to a user or customer, or push data into an external system.

These functions are written in TypeScript and are deployed to Skedulo by using the Skedulo SDK. Connected functions are very powerful and will be covered in more detail in a future post in this series.

In the meantime, you can take a look at the [documentation](https://developer.skedulo.com/developer-guides/integration-and-automation/connected-functions/) on connected functions.

## Conclusion

Now that you’ve got an idea of what your options are when it comes to automation on the Skedulo Pulse platform, stay tuned for the rest of the series, starting with part two where we will be taking a deeper look into webhooks!

As always, we’d love to hear about what you’re building so please reach out to us on Twitter [@SkeduloDevs](https://twitter.com/SkeduloDevs) or [LinkedIn](https://www.linkedin.com/showcase/skedulodevs)!

## References

* [Skedulo Developer Blog — GraphQL](https://developer.skedulo.com/blog/category/graphql-101/)
* [Skedulo Docs — Use Webhooks](https://developer.skedulo.com/developer-guides/integration-and-automation/webhooks-and-triggered-actions/webhooks/)
* [Skedulo Docs — Use Triggered Actions](https://developer.skedulo.com/developer-guides/integration-and-automation/webhooks-and-triggered-actions/triggered-actions/)
* [Skedulo Docs — Develop and deploy custom code using connected functions](https://developer.skedulo.com/developer-guides/integration-and-automation/connected-functions/)

---

---
url: "https://developer.skedulo.com/blog/building-beautiful-list-views-in-pulse"
type: "blogPost"
title: "Building beautiful list views in Pulse"
author: "Alison Johnston"
date: "2022-09-13"
---

# Building beautiful list views in Pulse

## Introduction

You’ve seen the [videos](https://www.youtube.com/watch?v=5UNMDaD7nFY), you’ve read the [press releases](https://www.skedulo.com/blog/introducing-skedulo-pulse-the-next-chapter-in-our-drive-to-support-the-deskless-workforce/?utm_source=google&utm_medium=cpc&utm_campaign=Brand-US-Search%28SP%29&utm_adgroup=&utm_content=Skedulo&utm_term=skedulo&gclid=CjwKCAiA1aiMBhAUEiwACw25MbE7jfTkvy5IxDjABSjvyg66PVWCIaod7dt9p2ePTjXvgqB2jXr70hoC0yQQAvD_BwE), but how do you *actually* pull together your own page on the [Skedulo Pulse Platform](https://www.skedulo.com/product/platform/)? Come with me. I’m Alison, a solution architect here at Skedulo, and I have never been a person who codes. I have come from a pure declarative, clicks-not-code background, and I managed to make my first page in less than an afternoon.

So where to begin? You’ve got your Skedulo tenant, and there’s a view you want to be able to see. For me, it was being able to visualise all [Job Offers](https://docs.skedulo.com/user-guides/create-and-edit-work/create-and-manage-work/in-skedulo-web-app/schedule-and-manage-work-offers/) in a single page. Yes, they can go to see the offers for each Job on separate pages, but I wanted a single list, to allow schedulers to see what needs to be chased up.

To begin, I wanted to see the list view that would be in the system by default. Here’s what we get:

![default-resource-offers-listview-image](https://developer.skedulo.com/blog-images/post/220921-building-beautiful-list-views-in-pulse/2.png)

*Default resource job offers list view*

To make changes to the default, I went to the Settings section of my Skedulo instance. From here I navigated to the Data Objects menu on the left.

I found the Resource Job Offers object by searching for it using the search bar on the right. Clicking on the action icon, I can then Edit the object which gives me a way to add extra fields if I need them. I just wanted to pick which fields would show in a list view, so I went straight to Edit default columns.

## Information, but make it helpful

Adding columns is easy — select the field you want and it appears in the preview, and in this instance, we will absolutely want to add some additional Job Offer attributes such as the Job it relates to and who the offer was sent to. Without the additional fields exposed as columns, the user would only see the record ID which is not likely to get them very far. Enter the Skedulo Support library of handy hints! I went to the [Advanced column configuration for list views](https://docs.skedulo.com/developer-guides/customize-and-extend/list-view-pages/advanced-column-config/) page and thought that I could follow this.

Let’s see how I went, shall we?

I removed the UID of the Job Offer, as it didn’t really help the end user to know the ID of the specific record. Thinking through what would be useful, I chose the Job, the names of who received the offers, the status of both the offer and Job, and a few other bits and pieces.

So, using the Add Column drop down, I could find the Job ID.


![](https://developer.skedulo.com/blog-images/post/220921-building-beautiful-list-views-in-pulse/3.png)

Great! Let’s pop that in. But showing the ID to the user isn’t super helpful, so I thought the Job Number & Job Type would be the most effective visual. So I edited the Column, and put in
```md
<sp-link href=”/job/{{JobOffer.JobId}}”><b>{{JobOffer.Job.Name}}</b> — ({{JobOffer.Job.Type}})</sp-link>
```
But wait! You said you didn’t code! (Or use markup, technically) You are correct dear reader. I am however very good at copy & paste! In the [help article](https://docs.skedulo.com/developer-guides/customize-and-extend/list-view-pages/advanced-column-config/), there is a section on concatenation as well as a section on using hyperlinks, which uses the exact code above. I just put the two bits together, and now my Job Number looks like this:

**JOB-1234 — (Appointment)**

Next up was, who the Offer had been sent to (i.e. the Resources). Again, showing the UIDs of these records is not helpful at all to an end user. Resources definitely have names, so some quick updates to the column template gave me the Name of the resource:

`{{ Resource.Name }}`

But, wouldn’t a user want to click through to the actual record from the list I wondered? And sure enough, using my trusty [help article](https://docs.skedulo.com/developer-guides/customize-and-extend/list-view-pages/advanced-column-config/), I figured I could use the same snippet of code above, but swap out the objects.

```md
<sp-link href=”/resources/{{Resource.UID}}”>{{Resource.Name}}</sp-link>
```

Now my Resource column gives me the name of the Resource, and a handy link to get to their record if I need it:

**Jane Doe**

After that I added the following columns, figuring it would help a scheduler know what to chase up:

* The Resource Response to each offer
* The Offer status
* Job Estimated Start Date & Time
* Job Duration
* Job Status
* Job Region

A few more changes were done to refine the presentation of my data. I updated the format of the Estimated Start Date, again using our trusty [help article](https://docs.skedulo.com/developer-guides/customize-and-extend/list-view-pages/advanced-column-config/) (another copy & paste effort).

`{{ JobOffer.Job.EstimatedStart | date(“ddd D MMM YYYY h:mm”) }}`

Adding the Region Name requires a special trick that I shall unveil for you right before your very eyes. By default, attributes on the current object plus one object away (e.g. Job Offer and Job) are displayed in the column drop-down, but as soon as we set our column template to require region attributes (3 steps away) by using the below template when the page is refreshed we will have access to all the region attributes as well. Impressive huh? Using the same logic as the above snippet for getting the Job Name, I entered the below to show the name of the region, not the UID.

`{{ JobOffer.Job.Region.Name }}`

Now my page looks helpful with the information I think people need.

![](https://developer.skedulo.com/blog-images/post/220921-building-beautiful-list-views-in-pulse/4.png)

## Information, but make it pretty

Last but not least, I wanted to have some colour and images to engage the users more. Our trusty [help article](https://docs.skedulo.com/developer-guides/customize-and-extend/list-view-pages/advanced-column-config/) talks about icons and colours. I was onto a winner! The hardest part was picking which icon to use!

But before we pick an icon, let’s figure out what we’re trying to show. For the Resource response to an offer, there’s 3 options: Accept, Decline or Pending. This seemed like a good use for an icon, instead of words. So I grabbed the snippet from the help article

```md 
{% if status == “Paid” %} {# replace Paid with your value #}
<sp-lozenge leading-icon=”tick”>{{status}}</sp-lozenge>
{% elseif status == “Sent” %} *{# replace Sent with your value #}
<sp-lozenge leading-icon=”notify”>{{status}}</sp-lozenge>
{% elseif status == “Overdue” %} *{# replace Overdue with your value #}
<sp-lozenge leading-icon=”warning”>{{status}}</sp-lozenge>
{% else %} {{ status }}
{% endif %}
```
* I swapped status for Response (and updated the values to the ones listed above)
* I swapped the tick for tickCircle
* I swapped the notify icon for close
* I swapped the warning icon for zoomOut.

It looked good. But I wanted colour! It was all so, well… grey. Back to our trusty [help article](https://docs.skedulo.com/developer-guides/customize-and-extend/list-view-pages/advanced-column-config/) and I found the colours section! The rest was just playing around with colours and shades until I was happy. Green tick in a circle. Looks good, don’t you think? (see screenshot below)

```md
{% if Response == “Accept” %}
<div style=”color:var(—sp-color-green-800);”>
<sp-icon icon=”tickCircle”></sp-icon></div>
 {% elseif Response == “Decline” %}
<div style=”color:var(—sp-color-red-800);”>
<sp-icon icon=”close”></sp-icon></div>
{% else %}
<sp-icon icon=”zoomOut”></sp-icon>
{% endif %}
```
I played around with the Offer Status and the Job Status as well, just to give a bit more oomph to my page.

Again, a copy & paste exercise from our trusty help article, and a few tweaks got me both icons *and* colours for the Offer status. I also swapped out the wording of the status for OfferFilled and ResourceOfferCancelled with something a bit more user friendly, using the quotation marks to make sure the words rendered properly.

```md
{% if Status == “OfferFilled” %}
<sp-lozenge leading-icon=”tick” theme=”solid” color=”green”>”Offer Filled”</sp-lozenge>
{% elseif Status == “Pending” %}
<sp-lozenge leading-icon=”notify” theme =”border” color=”sapphire”>{{Status}}</sp-lozenge>
{% elseif Status == “ResourceOfferCancelled” %}
<sp-lozenge leading-icon=”warning” theme =”border” color=”red”>”Cancelled by Scheduler”</sp-lozenge>
{% elseif Status == “Declined” %}
<sp-lozenge leading-icon=”warningFill” theme =”solid” color=”red”>{{Status}}</sp-lozenge>
{% else %} {{ Status }}
{% endif %}
```

Job Status was more of the same, but without the icons (I didn’t want too much clutter).

```md
{% if JobOffer.Job.JobStatus == “Queued” %}
  <sp-lozenge theme=”border” color=”neutral”>{{JobOffer.Job.JobStatus}}</sp-lozenge>
{% elseif JobOffer.Job.JobStatus == “Pending Allocation” %}
  <sp-lozenge theme =”border” color=”neutral”>{{JobOffer.Job.JobStatus}}</sp-lozenge>
{% elseif JobOffer.Job.JobStatus == “Pending Dispatch” %}
  <sp-lozenge theme =”border” color=”sapphire”>{{JobOffer.Job.JobStatus}}</sp-lozenge>
{% elseif JobOffer.Job.JobStatus == “Dispatched” %}
  <sp-lozenge theme =”solid” color=”sapphire”>{{JobOffer.Job.JobStatus}}</sp-lozenge>
{% elseif JobOffer.Job.JobStatus == “Ready” %}
  <sp-lozenge theme =”solid” color=”sapphire”>{{JobOffer.Job.JobStatus}}</sp-lozenge>
{% elseif JobOffer.Job.JobStatus == “En Route” %}
  <sp-lozenge theme =”solid” color=”purple”>{{JobOffer.Job.JobStatus}}</sp-lozenge>
{% elseif JobOffer.Job.JobStatus == “On Site” %}
  <sp-lozenge theme =”solid” color=”purple”>{{JobOffer.Job.JobStatus}}</sp-lozenge>
{% elseif JobOffer.Job.JobStatus == “In Progress” %}
  <sp-lozenge theme =”solid” color=”purple”>{{JobOffer.Job.JobStatus}}</sp-lozenge>
{% elseif JobOffer.Job.JobStatus == “Complete” %}
  <sp-lozenge theme =”solid” color=”green”>{{JobOffer.Job.JobStatus}}</sp-lozenge>
{% elseif JobOffer.Job.JobStatus == “Cancelled” %}
  <sp-lozenge theme =”solid” color=”Red”>{{JobOffer.Job.JobStatus}}</sp-lozenge>
{% else %} 
  {{ status }}
{% endif %}
```

Here’s my final page:

![](https://developer.skedulo.com/blog-images/post/220921-building-beautiful-list-views-in-pulse/5.png)

## Information for the people

We are almost there! All I needed now was a way to give this fancy new view to my users. Off to the [Global Navigation Bar](https://docs.skedulo.com/user-guides/admin-and-config/admin-and-config-webapp/config-users-and-preferences/configure-navigation-menu/) we go!

Because Job Offers are part of the core Skedulo offering, I knew the list view would exist already, so it was just a matter of adding it to a menu somewhere.

First, I wanted to Add Menu Item. I gave it a name, and then I wanted to make sure I was pointing to the platform page for resource-job-offers. So, selecting Platform Page as the Type, I could find the correct page from the drop down. Reorder the menu and I was done! All my users now have access to a list view of all Job Offers! And no actual coding from scratch — a bit of copy and paste, but if I can do it, anyone can!

## References

* [Advanced column configuration for list views](https://docs.skedulo.com/developer-guides/customize-and-extend/list-view-pages/advanced-column-config/)
* [Skedulo Icon Library](https://skedulo.github.io/platform-web-storybooks/storybook/platform-ui/?path=/docs/components-icon--available-icons)
* [Admin settings: Global Navigation Bar](https://docs.skedulo.com/user-guides/admin-and-config/admin-and-config-webapp/config-users-and-preferences/configure-navigation-menu/)

---

---
url: "https://developer.skedulo.com/blog/change-history-is-now-generally-available"
type: "blogPost"
title: "Change History is now Generally Available"
author: "Sophie Wheeler"
date: "2023-01-09"
---

# Change History is now Generally Available

Do you want to be able to see who changed a record, what they changed, and when? Well, today we have great news for you; Change History can do just that and it’s now generally available (GA) for all Skedulo Pulse Platform customers!

With Change History, you can see changes to the following data:

* Standard data objects and custom objects
* Record data changed by all users, including by resources using the mobile app
* Changes made to record access policies, roles and users
* Scheduling rule violations
* Automatic changes to record data by the system

There are some exclusions that are not covered by Change History. These include:

* Changes made in the Settings (other than users, roles, and record access policies)
* Changes to the data model itself, for example adding or deleting custom objects or fields.

This great new feature is accessible in three ways:

* The settings menu in the Skedulo web app
* The record pages for Jobs, Assets and Resources (by default)
* The changes and transactions APIs

Let’s take a look at each of these ways to use it.

## Administration Settings

In order to be able to see the Change History page in the settings menu of the Skedulo web app you must have administrator privileges (including being able to ‘view change history data’).

Head to the settings menu, which is accessible by clicking your avatar in the top right corner, and choosing ‘Settings’ from the dropdown menu.

In the bar on the left hand side (the Settings menu), select `Change history` under the `Data management` heading.

You will then be able to see the `Change history` screen. This will show all changes for your Skedulo tenant. You can use the sorting and filtering controls to show the specific information you’re interested in.

You can also customise which columns are displayed, as well as the number of records shown per page.

![](https://cdn-images-1.medium.com/max/3200/0*ziRpFGFl8Nn4RBoC)

Some changes, such as GeoLocation are quite verbose and are thus not shown in detail. In order to see the detail you can click the information icon next to the change:

![](https://cdn-images-1.medium.com/max/2112/0*gU_bxiwCCm7MZwbF)

If you want to see the raw data, as it would be returned by using the Change History API, simply click **Columns**, then select **Raw change data** and click **Apply**.

![](https://cdn-images-1.medium.com/max/2856/0*19kpboJN7yiDFEO6)

You will then be able to see the raw change data as a JSON blob from within the Change History list view.

![](https://cdn-images-1.medium.com/max/3200/0*pIYkkjRhrL_Zvmbc)

## Record Pages

The next way you can use Change History is via certain record pages. Currently this is available out of the box on **Jobs**, **Resources,** and **Assets**. However administrators can easily extend other record pages to display record history.

To view change history on a Job, Asset or Resource, open a record and then navigate to the ‘History’ tab. You will then be able to see the change history for that specific record.

![](https://cdn-images-1.medium.com/max/3200/0*nuLhv0wKUOSn5g4Y)

## Change History API

Finally, all of this wonderful change history information is available [via an API](https://developer.skedulo.com/skedulo-api/#tag/Change-history). This allows you to build your own custom interfaces and solutions using this data. For example, you could use this API to synchronise data from Skedulo to a third party system.

Let’s take a quick look at how we can use this API and what it returns.

Of course, you will need an access token and to know the API host of your tenant. For further information on this, take a look at the developer docs [here](https://developer.skedulo.com/developer-guides/deskless-productivity-cloud/authentication-and-authorization/authentication-for-skedulo/authentication-requirements-api-tokens/).

Armed with your token, you can now make requests to the Change History API.

There are two endpoints that return this information, the first is /events/changes and the second is /events/transactions.

The changes endpoint is great if you want a stream of changes as they’ve happened. This could be used to build user interfaces similar to the ones provided out of the box.

The transactions endpoint is geared more towards integrations, not only providing the changes but the broader transaction in which they occurred.

For example, making the following GraphQL request would cause both of these records to appear within a single transaction.

```graphql
    mutation createJobsWithAllocations {
      schema {
        job0: insertJobs(input: {
          RegionId: "0003ef0d-2e08-4e37-8b91-c35ccc36ad84"
          Start: "2023-01-01T08:00:00+00:00"
          End: "2023-01-01T09:30:00+00:00"
          Duration: 90
          Address: "1 Small St, Bristol"
          Description: "fun with idAlias"
        } idAlias: "NEW_JOB_ID0")
       ja0: insertJobAllocations(input: {
          ResourceId: "0005f801-7a9c-40fe-8933-7886e0441e84"
          JobId: "NEW_JOB_ID0"
          Status: "Pending Dispatch"
        })
      }
    }
```
## Changes

Making a GET request to this endpoint will return **all **record ****changes made within your tenant. The API will return pages of 100 records by default, ordered from oldest to newest. However, this can be changed by setting the limit (up to 500 records) and sortOrder parameters.

Here is an example of the response:

```yaml
    {
      "nextCursor": "MTI2NDU1MTJ8MjAyMi0wNy0yMVQxNjo0MjoyOC40MjZa",
      "result": [
        {
          "occurredAt": "2022-06-06T08:52:06.289Z",
          "userId": "000195c2-1cad-409e-aa22-74181732b2c7",
          "entityType": "Preferences",
          "entityId": "00120ccf-4716-43d1-9870-4b73ff0bcc1a",
          "operation": "INSERT",
          "data": {
            "Set": false,
            "UID": "00120ccf-4716-43d1-9870-4b73ff0bcc1a",
            "Name": "AutoDeleteJobAssignments",
            "CreatedById": "000195c2-1cad-409e-aa22-74181732b2c7",
            "CreatedDate": "2022-06-06T08:52:06.289566+00:00",
            "LastModifiedById": "000195c2-1cad-409e-aa22-74181732b2c7",
            "LastModifiedDate": "2022-06-06T08:52:06.289566+00:00"
          },
          "previous": null,
          "metadata": {
            "action": "upsert org prefs"
          }
        },
        {
          "occurredAt": "2022-07-21T09:51:08.630Z",
          "userId": "000195c2-1cad-409e-aa22-74181732b2c7",
          "entityType": "Jobs",
          "entityId": "00149f20-7f8f-4f1f-b3fa-0696687f4504",
          "operation": "UPDATE",
          "data": {
            "End": "2022-07-21T12:07:00+00:00",
            "UID": "00149f20-7f8f-4f1f-b3fa-0696687f4504",
            "Name": "JOB-0034",
            "Type": "Upgrade",
            "Start": "2022-07-21T09:45:00+00:00",
            "Locked": false,
            "Address": "1 Small St, Bristol BS2, UK",
            "Duration": "02:22:00",
            "RegionId": "0003ef0d-2e08-4e37-8b91-c35ccc36ad84",
            "Timezone": "Europe/London",
            "JobStatus": "Pending Allocation",
            "CreatedById": "000195c2-1cad-409e-aa22-74181732b2c7",
            "CreatedDate": "2022-07-21T09:00:00.10242+00:00",
            "Description": "test",
            "GeoLatitude": 51.448745,
            "GeoLocation": "0101000020E610000094FAB2B4539304C02C9FE57970B94940",
            "AutoSchedule": false,
            "EstimatedEnd": "2022-07-21T12:07:00+00:00",
            "GeoLongitude": -2.571937,
            "IsGroupEvent": false,
            "CanBeDeclined": true,
            "EstimatedStart": "2022-07-21T09:45:00+00:00",
            "LastModifiedById": "000195c2-1cad-409e-aa22-74181732b2c7",
            "LastModifiedDate": "2022-07-21T09:51:08.63087+00:00",
            "JobAllocationCount": 0,
            "JobAllocationTimeSource": true
          },
          "previous": {
            "End": "2022-07-21T11:07:00+00:00",
            "Duration": "01:22:00",
            "EstimatedEnd": "2022-07-21T11:07:00+00:00",
            "LastModifiedDate": "2022-07-21T09:42:18.946767+00:00"
          },
          "metadata": {
            "source": "graphql"
          }
        }
      }]
    }
```
As you can see, the data is within the result array. This includes: the type of operation; when it happened; who did it; the previous value (if applicable); and some metadata about the change such as its source.

You will also notice the nextCursor field. This is how we get the next set of changes as well as keep track of where we are up to.

To get the next changes, simply make another request but this time append the cursor parameter to your request.

For example, making the following request would get the next set of records for the above result.

/events/changes?cursor=MTI2NDU1MTJ8MjAyMi0wNy0yMVQxNjo0MjoyOC40MjZa

There are also other parameters you can provide in order to filter the results you get from the API, such as start and end times, operations, users and more! There are details in the API documentation [here](https://developer.skedulo.com/skedulo-api/#tag/Change-history/operation/transactions).

## Transactions

The other endpoint available is /event/transactions. This is largely the same as the /events/changes endpoint but as you may have guessed, the results are grouped by transaction.

However, the number of records returned by default is 10, and this can be set up to 50 by using the limit parameter.

Making a GET request to it would return a result like this:
```yaml
    {
      "nextCursor": "MTI1Njc4ODJ8MjAyMi0wNy0yMVQwOTo0MTo0MC43MTE5MDFa",
      "result": [
        {
          "transactionId": "2358521814",
          "changes": [
            {
              "occurredAt": "2022-06-06T08:52:06.289Z",
              "userId": "000195c2-1cad-409e-aa22-74181732b2c7",
              "entityType": "Preferences",
              "entityId": "00120ccf-4716-43d1-9870-4b73ff0bcc1a",
              "operation": "INSERT",
              "data": {
                "Set": false,
                "UID": "00120ccf-4716-43d1-9870-4b73ff0bcc1a",
                "Name": "AutoDeleteJobAssignments",
                "CreatedById": "000195c2-1cad-409e-aa22-74181732b2c7",
                "CreatedDate": "2022-06-06T08:52:06.289566+00:00",
                "LastModifiedById": "000195c2-1cad-409e-aa22-74181732b2c7",
                "LastModifiedDate": "2022-06-06T08:52:06.289566+00:00"
              },
              "previous": null,
              "metadata": {
                "action": "upsert org prefs"
              }
            },
            {
              "occurredAt": "2022-06-06T08:52:06.289Z",
              "userId": "000195c2-1cad-409e-aa22-74181732b2c7",
              "entityType": "Preferences",
              "entityId": "0012dc09-4ed2-4b79-a7c1-dad5284e88ec",
              "operation": "INSERT",
              "data": {
                "Set": false,
                "UID": "0012dc09-4ed2-4b79-a7c1-dad5284e88ec",
                "Name": "TeamLeader",
                "CreatedById": "000195c2-1cad-409e-aa22-74181732b2c7",
                "CreatedDate": "2022-06-06T08:52:06.289566+00:00",
                "LastModifiedById": "000195c2-1cad-409e-aa22-74181732b2c7",
                "LastModifiedDate": "2022-06-06T08:52:06.289566+00:00"
              },
              "previous": null,
              "metadata": {
                "action": "upsert org prefs"
              }
          }
        {
          "transactionId": "2358721502",
          "changes": [
            {
              "occurredAt": "2022-06-06T10:37:59.977Z",
              "userId": "000195c2-1cad-409e-aa22-74181732b2c7",
              "entityType": "RollupMappings",
              "entityId": "03e84acd-3fb1-429f-b4df-b3b8820f033d",
              "operation": "INSERT",
              "data": {
                "UID": "03e84acd-3fb1-429f-b4df-b3b8820f033d",
                "Operation": "COUNT",
                "CreatedById": "000195c2-1cad-409e-aa22-74181732b2c7",
                "CreatedDate": "2022-06-06T10:37:59.9771+00:00",
                "ParentObject": "Jobs",
                "ChildToRollup": "JobAllocations",
                "RollupFieldName": "JARollup",
                "LastModifiedById": "000195c2-1cad-409e-aa22-74181732b2c7",
                "LastModifiedDate": "2022-06-06T10:37:59.9771+00:00"
              },
              "previous": null,
              "metadata": {
                "source": "graphql"
              }
            }
          ]
        }
      }]
    }
```
The main difference here is that under the result array, we have a transactionId and an array of changes. The data returned is otherwise in the same format as /events/changes, you can also provide the same parameters to the API in order to get the next page, or filter the results.

This API is useful if you want to be able to see all of the changes that occurred within a single transaction for example if you’re building an event driven integration to Skedulo.

## Conclusion

We hope that you find the Change History functionality useful. We certainly believe that it will make keeping track of changes in your Skedulo tenant much easier and allow you to have a better overall picture of your data.

As always, we’d love to hear about what you’re building on the Skedulo Pulse Platform, and how Change History is a part of that, so please reach out to us on Twitter [@SkeduloDevs](https://twitter.com/skedulodevs) or [LinkedIn](https://www.linkedin.com/showcase/skedulo-devs/)!

## References

* [Skedulo Support Docs — Admin Settings: Change History](https://docs.skedulo.com/user-guides/admin-and-config/admin-and-config-webapp/view-change-history/)
* [Skedulo Developer Docs — Change History API](https://developer.skedulo.com/skedulo-api/#tag/Change-history)
* [Skedulo Developer Docs — Authentication requirements and API Tokens](https://developer.skedulo.com/developer-guides/deskless-productivity-cloud/authentication-and-authorization/authentication-for-skedulo/authentication-requirements-api-tokens/)

---

---
url: "https://developer.skedulo.com/blog/custom-user-roles-are-now-generally-available"
type: "blogPost"
title: "Custom User Roles are now Generally Available (GA)"
author: "Scott Gassmann"
date: "2022-11-02"
---

# Custom User Roles are now Generally Available (GA)

## Introduction

Today, we are happy to announce the General Availability of [Custom User Roles](https://developer.skedulo.com/user-guides/admin-and-config/admin-and-config-webapp/permissions-and-data-access-control/user-roles-and-permissions/functional-permissions/). With Custom User Roles, Administrators can [configure and control access](https://developer.skedulo.com/user-guides/admin-and-config/admin-and-config-webapp/permissions-and-data-access-control/user-roles-and-permissions/functional-permissions/) beyond the standard user roles of Administrator, Scheduler, and Resource to support the ever-increasing spectrum of User types that need access to the Skedulo Pulse Platform. In the same stroke, this maximises security by ensuring Users only have access to the functionality they require through leveraging new fine-grained control capabilities of Custom User Roles.

## Fine-grained control

As an Administrator, when it comes to access control, you’re often trying to lower the ‘risk profile’ as much as possible by ensuring your users only have access to functionality they are permitted to use. But it’s not always about lowering the risk profile either; another important aspect is removing unnecessary ‘noise’ for users.

You’ve probably experienced this yourself at some point in your career: logging into an app feeling overwhelmed with menus of features and functionality that you’ll never use, but still needing to work out the bits of functionality that make sense to your role and which bits to ignore. As such, the noise is a byproduct of not being able to limit your experience. Sometimes less, truly is more.

Custom User Roles comes with over 75 fine-grained permissions enabling Administrators to craft personalised user experiences by controlling the following aspects of the Pulse Platform:

* [Application features](https://developer.skedulo.com/user-guides/admin-and-config/admin-and-config-webapp/permissions-and-data-access-control/user-roles-and-permissions/create-custom-roles/), e.g. the ability to dispatch a job or create messaging channels.
* Menu items in the [Global Navigation Bar](https://docs.skedulo.com/user-guides/admin-and-config/admin-and-config-webapp/permissions-and-data-access-control/role-based-nav-menu/).
* Administrative controls, e.g. creating users and modifying their permissions.
* Programmatic controls, e.g. access to APIs.

![](https://cdn-images-1.medium.com/max/6704/1*Y_x93lvSByasL0JTaxggMA.png)

## Control what’s visible in the Global Navigation Bar

Flexibility to configure the [Global Navigation Bar](https://docs.skedulo.com/user-guides/admin-and-config/admin-and-config-webapp/config-users-and-preferences/configure-navigation-menu/) has always been important to Administrators. We had already built customisation features to declaratively extend and reorder every aspect of the Global Navigation Bar, and today; we’re pleased to announce that with Custom User Roles, Administrators can control the visibility of menu items based on the Role(s) that have been assigned to Users.

For example, say you want to limit who can access the [Regions](https://docs.skedulo.com/user-guides/admin-and-config/load-and-manage-data/manage-regions/) list view, as this is functionality you want only senior schedulers to access. You can [remove the Regions menu items from the Scheduler Role](https://docs.skedulo.com/user-guides/admin-and-config/admin-and-config-webapp/permissions-and-data-access-control/role-based-nav-menu/), which will remove the Regions menu item from the Global Navigation Bar. This doesn’t restrict users from being able to access the data in the Regions object. For example, they are still able to populate Region lookup fields when creating records.

![](https://cdn-images-1.medium.com/max/6708/1*AZy-sd2i0CXjylDfobxmpQ.png)

## Multiple role assignments

A great feature bundled with Custom User Roles is [Multiple Role Assignments](https://developer.skedulo.com/user-guides/admin-and-config/admin-and-config-webapp/permissions-and-data-access-control/user-roles-and-permissions/manage-and-delete-roles/). As you’ve likely already guessed, this gives Administrators the ability to assign more than one role to a given user. This significantly increases the flexibility and power afforded to Administrators to construct reusable bundles of permissions, which reduces the overall number of unique custom roles an Administrator needs to manage (and trust me, they can start to add up quickly!).

Let me give you an example: imagine you have a group of senior schedulers who operate in a hybrid capacity, part Scheduler and part power user. They need the same access as the rest of the scheduling team, but some senior schedulers are responsible for managing messaging channels. Instead of creating a custom role for “senior schedulers”, an Administrator can create a custom role to “Manage messaging channels” and assign that to the group of schedulers that need to perform this function.

You might be thinking, ‘how is that any different to creating a custom user role for “senior schedulers”?’ and it’s an absolutely logical thought. The benefit is that when you’re asked to also give an exec the ability to manage channels as well as three operations managers. You don’t need to create a custom role for each of those functions but rather assign your already created “Manage messaging channels” custom role.

![](https://cdn-images-1.medium.com/max/6716/1*Hd-8H_v25pSxAO-9qkns-Q.png)

## No-code set-up and maintenance

Every aspect of Custom User Role management can be configured through an intuitive UI within the Settings menu, increasing the productivity of Administrators whilst also reducing the effort required to maintain changes over time. This is not only important to empower Administrator productivity, but when it comes to security and access control, it’s critical to be able to make changes quickly and, therefore, declaratively. It also means there is nothing stopping you from going off and exploring (and maybe even start creating 😉) Custom User Roles for your organisation.

As always, if you have any questions please feel free to comment below or reach out to us [@SkeduloDevs](https://twitter.com/SkeduloDevs) (We would especially love it if you were to send us screenshots of some Custom User Roles that you’ve created!)

Until next time, stay awesome 😎

## References
* [Custom User Roles overview](https://developer.skedulo.com/user-guides/admin-and-config/admin-and-config-webapp/permissions-and-data-access-control/user-roles-and-permissions/functional-permissions/)
* [Configuring the Global Navigation Bar](https://docs.skedulo.com/user-guides/admin-and-config/admin-and-config-webapp/config-users-and-preferences/configure-navigation-menu/)
* [Role-based customization of the global navigation bar](https://docs.skedulo.com/user-guides/admin-and-config/admin-and-config-webapp/permissions-and-data-access-control/role-based-nav-menu/)
* [Managing and deleting roles](https://developer.skedulo.com/user-guides/admin-and-config/admin-and-config-webapp/permissions-and-data-access-control/user-roles-and-permissions/manage-and-delete-roles/)

---

---
url: "https://developer.skedulo.com/blog/developer-docs-april-roundup"
type: "blogPost"
title: "Developer Docs: April round-up"
author: "Corinne Boyle"
date: "2023-05-02"
---

# Developer Docs: April round-up

Hello, and welcome to the April round-up of updates and additions to the Skedulo Developer Guides. We’ve made some great changes to make these guides more complete and easier to use!

## Breeze UI
The template and column editing examples in the [Overriding system-generated pages][1] and [Create and customize list views][2] sections so that they use our Breeze components. View the [Design System documentation][3] to view the full range of interactive Breeze components and tokens and discover how you can build and enhance your Skedulo Pulse platform pages.

## List Views
The Create and customize section has been restructured to make it easier to navigate.

* The Filter and sort list views article has now been split into three articles: Sort list views, Filter list views, and List view columns.This reflects the order of the three options available on the header of a default list view.
* There is a new Customize list views article that provides some tips and suggestions for editing your list view templates.

## Record Access Policies
Record Access Policies (RAP) is a very powerful feature that gives you the ability to control the records that are visible to users based on a set of flexible rules of your choosing. The feature is still in beta, but [the user guide has been updated][4] to explain the template and associated functionality that is available in the web app.

## Triggered actions
Two new articles have been added to the [Triggered actions documentation][5] about updating and deleting triggered actions:

* Update a triggered action to change the object and filters used to identify the trigger, or the configuration of the action, such as the template of the SMS message being sent or the URL of the external web service being called.
* Delete a triggered action that you no longer need to keep running.

## Ongoing upliftment
As part of our ongoing efforts to improve the usability of the developer guides and to help ensure that the content is up to date and complete, we are making incremental upgrades to each section. This month it was the turn of the [Deskless Productivity Cloud fundamentals section][5]. You may notice very small changes to the structure of the section, including consolidation and refreshing of content pertaining to the use of the REST APIs and GraphQL. We hope these changes aren’t disruptive to any of our readers. Please let us know if they are, or any other feedback you have about the changes!

## Bug squashing
We have ironed out some small bugs that crept in during the recent migration of all documentation to a single tool, including fixing links, smoothing over inconsistent styles, and catching some cases of outdated content. This included clarifying in the developer guide that the `standalone/permissions/role` and `/custom/permissions` endpoints are deprecated as was already indicated in the [API docs][8].

## Coming soon
Record Access Policy developer docs will be available soon, when this feature becomes generally available. These aim to help you gain a deeper understanding of when records will be accessible to users and when they will be hidden, based on the rules that you set up. They also go through the record access policy functionality that is available through the APIs.

## References
* [Create and customize pages][1]
* [Create and customize list views][2]
* [Design system documentation][3]
* [Record access policies][4]
* [Triggered actions][5]
* [Deskless Productivity Cloud fundamentals][6]
* [Skedulo permissions and access control (deprecated)][7]

[1]: https://developer.skedulo.com/developer-guides/customize-and-extend/create-and-customize-pages/overriding-pages-example/configure-view-page/
[2]: https://developer.skedulo.com/developer-guides/customize-and-extend/list-view-pages/advanced-column-config/
[3]: https://skedulo.github.io/breeze-ui/?path=/story/getting-started-introduction--page
[4]: https://docs.skedulo.com/user-guides/admin-and-config/admin-and-config-webapp/permissions-and-data-access-control/use-record-access-policies-to-control-data-access/record-access-policies/
[5]: https://docs.skedulo.com/developer-guides/integration-and-automation/webhooks-and-triggered-actions/triggered-actions/
[6]: https://docs.skedulo.com/developer-guides/deskless-productivity-cloud
[7]: https://docs.skedulo.com/developer-guides/deskless-productivity-cloud/authentication-and-authorization/authorization/skedulo-permissions-and-access-control
[8]: https://docs.skedulo.com/skedulo-api/

---

---
url: "https://developer.skedulo.com/blog/developer-docs-june-round-up"
type: "blogPost"
title: "Developer Docs: June round-up"
author: "Corinne Boyle"
date: "2024-08-05"
---

# Developer Docs: June round-up

Hello, and welcome to the June round-up of updates and additions to the Skedulo Developer Guides. As usual, we’ve been working hard to keep our developer docs up-to-date and easy to use!

## API documentation: now with added interactivity for developers

The API documentation has undergone improvements to facilitate a more functional and complete experience for developers. Now, it’s possible to edit examples and execute API requests directly from within the documentation simply by providing an Authentication token in the API Key and Bearer fields. [Explore the updated API docs today][1] and experience the new features firsthand!

![](https://developer.skedulo.com/blog-images/post/230705-developer-docs-june-roundup/authenticate-api.png)

## Pages documentation 

The structure of the articles in the [Create and customize pages][2] area has been flattened to enable easier browsing from the sidebar and make it more obvious where to find the help you need.

![](https://developer.skedulo.com/blog-images/post/230705-developer-docs-june-roundup/pages-flat-structure.png)

In addition, a new article called [Manage pages][3] has been added to explain features available from the Platform page, including the new Select all functionality.

## Error codes

The [Error codes][4] article has been updated with the latest error codes that might be encountered when creating and customizing pages. 

## New feedback form
	
Love what you see? Or have you encountered an issue with the documentation that you want to inform us of? All feedback is welcome, good or bad, and it’s now easier than ever with the new feedback form at the bottom of each article in the developer guide. Click Yes or No, and then just pop in your email address and your comment and click Submit and we’ll be able to take action (or bask in the praise).

![](https://developer.skedulo.com/blog-images/post/230705-developer-docs-june-roundup/new-feedback-form.png)

## References

* [Skedulo API documentation][1]
* [Create and customize pages][2]
* [Manage pages][3]
* [Error codes][4]


[1]: https://docs.skedulo.com/skedulo-api/
[2]: https://docs.skedulo.com/developer-guides/customize-and-extend/create-and-customize-pages/
[3]: https://docs.skedulo.com/developer-guides/customize-and-extend/create-and-customize-pages/access-pages/
[4]: https://docs.skedulo.com/developer-guides/customize-and-extend/create-and-customize-pages/error-codes/

---

---
url: "https://developer.skedulo.com/blog/developer-docs-march-round-up"
type: "blogPost"
title: "Developer Docs: March round-up"
author: "Corinne Boyle"
date: "2023-03-30"
---

# Developer Docs: March round-up

Hello, and welcome to the first of our monthly round-ups of updates and additions to the Skedulo Developer Guide. We’ve made some great changes to make these guides more complete and easier to use!

## Filtering list views

Work on the Pulse Platform is ongoing to improve filtering and sorting capabilities in list views, and we’ve now added the first of these updates to the Developer Guide. See the following sections in the Filter and sort list views article for more information:

* [Filter on relative date](https://developer.skedulo.com/developer-guides/customize-and-extend/list-view-pages/filter-list-views/#filter-on-relative-date)
* [Filter on current user](https://developer.skedulo.com/developer-guides/customize-and-extend/list-view-pages/filter-list-views/#filter-on-the-current-user)
* [Filter on null or empty values](https://developer.skedulo.com/developer-guides/customize-and-extend/list-view-pages/filter-list-views/#filter-on-null-or-empty-values)

## Rules Service

We’ve made quite a few updates to documentation for the Rules Service, however, please note this feature is still in beta.

### API

The [API documentation](https://developer.skedulo.com/skedulo-api/#tag/Rule-violations-(conflicts)) is updated to include the Rules Service API. This API enables you to manage core and custom rule violation records, and implement custom rules to identify and manage when schedules are in violation of specific use-case requirements.

### Rule conflicts

If you want to understand more about rule conflicts, you can check out the new [Schedule rules and violations (conflicts)](https://docs.skedulo.com/developer-guides/manage-and-schedule-work/manage-scheduling-rules-and-exceptions/schedule-rules/) article, which covers things like how rules work, the types of rules that are available, and where to find violations that have been detected.

### Custom rules

Learn how to extend and customize Rules service functionality to suit specific organizational requirements. See the following articles for guidance on how to achieve this:

* [Integrate with the Rules service](https://docs.skedulo.com/developer-guides/manage-and-schedule-work/manage-scheduling-rules-and-exceptions/integrating-rules-service/)
* [Implement custom schedule rules](https://docs.skedulo.com/developer-guides/manage-and-schedule-work/manage-scheduling-rules-and-exceptions/custom-schedule-rules/)
* [Implement fatigue and time-interval-based rules](https://docs.skedulo.com/developer-guides/manage-and-schedule-work/manage-scheduling-rules-and-exceptions/fatigue-and-interval-based-rules/)

## Documentation styling

There has been a lot going on behind the scenes this month as we work to firm up our in-house style guide so that we can improve styling consistency and provide a smooth customer experience across our whole range of documentation. Some of these changes have already started trickling through, but rest assured that there is more coming!

## Coming soon

Look forward to new articles about record access policies, and custom actions, as well as further updates to the list view and template editing documentation, ongoing style improvements, and a levelling-up of the GraphQL documentation.

## References

* [Filter and sort list views](https://developer.skedulo.com/developer-guides/customize-and-extend/list-view-pages/use-list-views/)
* [API documentation](https://developer.skedulo.com/skedulo-api/#tag/Rule-violations-(conflicts))
* [Schedule rules and violations (conflicts)](https://docs.skedulo.com/developer-guides/manage-and-schedule-work/manage-scheduling-rules-and-exceptions/schedule-rules/)
* [Integrate with the Rules service](https://docs.skedulo.com/developer-guides/manage-and-schedule-work/manage-scheduling-rules-and-exceptions/integrating-rules-service/)
* [Implement custom schedule rules](https://docs.skedulo.com/developer-guides/manage-and-schedule-work/manage-scheduling-rules-and-exceptions/custom-schedule-rules/)
* [Implement fatigue and time-interval-based rules articles](https://docs.skedulo.com/developer-guides/manage-and-schedule-work/manage-scheduling-rules-and-exceptions/fatigue-and-interval-based-rules/)

---

---
url: "https://developer.skedulo.com/blog/developer-docs-may-roundup"
type: "blogPost"
title: "Developer Docs: May round-up"
author: "Corinne Boyle"
date: "2023-06-01"
---

# Developer Docs: May round-up

Hello, and welcome to the May round-up of updates and additions to the Skedulo Developer Guides. We’ve made some great changes to make these guides more complete and easier to use!

## Create duplicate pages

You can now duplicate platform pages with just the click of a button. Easily customize your pages or experiment with new ideas safe in the knowledge that you have a good backup. Visit the [Create and customize pages][1] article in the Customize and extend section of our developer guide to learn more about how to use this new feature.

![](https://developer.skedulo.com/blog-images/post/230601-developer-docs-may-roundup/duplicate-page-button-visible.png)

## Node.js v14

Skedulo’s Packages SDK has been updated in line with AWS’s plans to end support for Node.js v12. Skedulo Packages and Connected Functions now only support v14 and you can [read more][2] about how to upgrade your existing packages in our developer documentation.

The latest version of the SDK can be downloaded from the Skedulo web app and we recommend upgrading existing packages to run on v14 as soon as possible. 

## Copy code snippets

We’ve taken the hassle out of copying and pasting code from our docs by adding a Copy button above each snippet. This makes it much easier for you to test the examples provided in our documentation, so go forth and experiment!

![](https://developer.skedulo.com/blog-images/post/230601-developer-docs-may-roundup/copy-code-snippets_2.png)

## Record Access Policies 

Record access policies, the feature that allows you to control what data is visible to different users based on highly customizable rules, now has [developer docs][3] to help administrators understand how the rules work and how to use the feature to meet complex business needs.


## References

* [Create and customize pages][1]
* [Install and set up Skedulo Packages SDK][2]
* [Understanding record access policy rules][3]

[1]: https://docs.skedulo.com/developer-guides/customize-and-extend/create-and-customize-pages/
[2]: https://developer.skedulo.com/developer-guides/customize-and-extend/skedulo-sdk/sdk-install/
[3]: https://developer.skedulo.com/developer-guides/manage-and-control-access/create-and-use-record-access-policies/understand-record-access-policy-rules/

---

---
url: "https://developer.skedulo.com/blog/enhancing-platform-pages-with-web-extensions"
type: "blogPost"
title: "Enhancing Platform Pages with Web Extensions"
author: "Sophie Wheeler"
date: "2022-09-05"
---

# Enhancing Platform Pages with Web Extensions

So you want to build an amazing user experience in Skedulo? [Platform pages](https://developer.skedulo.com/docs/customization/platform/#what-is-a-page) will give you most of what you need, but what if you need to go just that little bit further?

Perhaps you need a completely custom component that doesn’t yet exist in the component library, for example you want to embed a map that can show an address based on url parameters in your platform page. Or maybe you want to leverage some of your existing web extensions within your shiny new platform pages.

Well, enter our old friend, [web extensions.](https://developer.skedulo.com/docs/customization/skedulo-sdk/web-extensions/) Did you know, you can embed a web extension inside of a platform page? Not only that, you can pass data to it in a number of ways!

Before we begin, this blog will cover embedding and passing data to a custom web extensions from within platform pages, and assumes you are familiar with both the development of web extensions and platform pages.

## Let’s start with the Web Extension

The first thing you need to know is; your web extension needs to be part of a package for this to work, so if it’s a standalone extension you will need to redeploy it as part of a package.

With that out of the way, we will take a look at the web extension part first.

Web extensions have a number of injected variables you can use to interact with the Skedulo Pulse Platform, the one we are concerned with today is the params variable.

Normally, this is used to get the URL parameters provided to your web extension, and that is how we will use it here, but with a twist.

Here is an example of a very simple map component, that simply takes an address URL parameter and provides an iframe’d google map for it.
``` typescript
    import * as React from 'react'
    import {context, params} from './Services/Services'

    interface AppState {
      data: any,
      context: any,
      params: any
    }

    export class App extends React.PureComponent<{}, AppState> {

    constructor(props: {}) {
        super(props)
        this.state = {
          data: {},
          context: context,
          params: params
        }
      }

    async componentDidMount() {
        const parsedParams = JSON.parse(JSON.stringify(params));
        if(parsedParams.address) {
          this.setState({ data: { address: parsedParams.address } });
        }
      }

    render() {
        return (
          <div className="App">
            <iframe className="map-box"
            height="1000"
            width="100%"
              src={`[https://www.google.com/maps/embed/v1/place?key=apikey&q=${this.state.data.address}`](https://www.google.com/maps/embed/v1/place?key=AIzaSyCYSwhlik5hY55X1fRTaxLy_cGN5nC963M&q=${this.state.data.address}`)}
              >
            </iframe>
          </div>
        )
      }
    }
```
Once you’ve got a web extension that handles URL parameters, let’s now go back to platform pages to see how we can interact with it.

## Embedding the web extension in a platform page

Within your platform page, you want to add the <platform-component> tag. This tag will let you embed your web extension directly into the platform page.

Here is an example of this:
``` html
    <platform-component
      package-name="skedulo-web-extension"
      name="WebExtension"
      pkg-name="mappackage"
      page-url="map"
      context-a="C"
      reference-uid="{{ _.queryParams.address }}">
    </platform-component>
```
Looking at the properties for this component, we have package-name and name, these both tell the component that we want to embed a web extension.

Next we have `pkg-name` and `page-url` the first one refers to the package name (as displayed in the packages menu or the SDK) and the second one refers to the actual name of the web extension specified in the SDK.

The property `context-a` is always set to C and finally we have the most important property;

`reference-uid` This is what lets us pass information into the web extension.

Now normally, the value of the param variable in a web extension is whatever is passed in when it is accessed directly via its URL

`https://mwheeler2-dev.my.skedulo.com/c/g/map?address=sw11aa`

But, because we are embedding the web extension in a platform page, we need to first pass data from the platform page, into the web extension.

This is where `reference-uid` comes in. Obviously, you could use this to pass in the `UID` of a record, for example the one that is opened in the platform page and then use the data services in your web extension to look up the records details.

However, despite its name, you can actually pass in any string you like, and that string will be provided to the web extension as if it was in it’s URL, via its injected params variable!

Taking our example map web extension, if you wanted to pass in the address from the platform page’s url, it might look something like this (note how it’s now `/platform/page/map` rather than `/c/g/map`)

`https://my-tenant.my.skedulo.com/platform/page/map?address=sw11aa`

![](https://developer.skedulo.com/blog-images/post/220905-enhancing-platform-pages-with-web-extensions/2.png)

Now because we’re passing that value from the platform page, to the web extension via the `reference-uid` property, the web extension now has access to an object with a key of “address” and a value of “sw11aa” which, just like it would if you were accessing it directly!

You can use multiple `URL` parameters as needed, as well as pass multiple values to a single parameter.

For example:

`reference-uid=”{{ _.queryParams.address }}&{{ _.queryParams.firstname }}”`

Would look like `/map?address=foo&firstname=bar` to your web extension, and you’d have both `address` and `firstname` keys within the params object.

And going to:

`https://my-tenant.my.skedulo.com/platform/page/map?address=foo,bar`
Would result in address being equal to foo,bar

Now you know how to enhance your platform pages with web extensions! We’d love to see what you come up with, or if you have any questions you can reach out to us on twitter @[SkeduloDevs](https://twitter.com/SkeduloDevs)

## References

* [Pages Overview](https://developer.skedulo.com/docs/customization/platform/#what-is-a-page)
* [Skedulo Developer Docs — Web Extensions](https://developer.skedulo.com/docs/customization/skedulo-sdk/web-extensions/)
* [Google Maps Embed API Docs](https://developers.google.com/maps/documentation/embed/get-started)

---

---
url: "https://developer.skedulo.com/blog/episode-3-adding-some-extra-zhoosh-to-your-list-views"
type: "blogPost"
title: "Episode #3 - Adding some extra zhoosh to your list views"
author: "Alison Johnston"
date: "2022-11-15"
---

# Episode #3 - Adding some extra zhoosh to your list views

Welcome back, Low Coders! Today we’re looking at how to edit records from your list views to help save on clicks. Your users are busy. They are important people servicing the whole galaxy and they rely on Skedulo to get their jobs done. We all know that the best data is both up-to-date and cleanly presented so we want to make it as easy as we can for you to achieve this. Your schedulers are looking at the list of fictitious aircraft that you service and they realise that there’s something not quite right. A simple click and they are in the record, ready to edit. It’s much easier than clicking into the aircraft record and clicking Edit to do the same task. Happier schedulers, and you get to look like the rebel who flew the Kessel Run in 12 parsecs.

So, we know that our aircraft can be accessed from the handy list view that is provided by Skedulo when you create a new object. However, when I go to look at my list, it’s pretty simple, even after I’ve added the columns I want (following along from [this post](https://developer.skedulo.com/post/221107-mastering-low-code-app-development-episode-2-putting-your-skedulo-record-pages-into-hyperspace)) .

![](https://cdn-images-1.medium.com/max/3200/0*etjjnLaKdIS4e_e3)

What I really want to do is allow my users to be able to edit or delete a record from the list, and I also want to allow them to add new records from this page as well. Just call me the time saving protagonist. (On another note, the title of this page bugs me. Bringing back my proper case is also covered today 🤷🏻‍♀️)

## Adding Actions to your list view rows

Adding an Edit button to your list view rows is quite simple. Our trusty [documentation](https://developer.skedulo.com/docs/customization/platform/pages/overriding-pages-example/configure-column-templates/) shows us it’s as easy as adding a custom column to the default columns:

![](https://cdn-images-1.medium.com/max/3200/0*2ax5_fZ6UoG8MlBB)

In yet another copy-and-paste stroke of excellence (with a quick update to the object name) I have a sparkly edit button on my list view!

![](https://cdn-images-1.medium.com/max/3200/0*n4dp2rG-KymI9Yld)

Now, if you’re working with records where they should NEVER be deleted (think contracts or agreements) this is absolutely an excellent way to speed up the data entry for your users. But for my situation, that’s not enough! I want my users to keep their data clean and up to date, so I want them to be able to delete records as well.

So, I head to the fabulous documentation to [override the list view templates](https://developer.skedulo.com/developer-guides/customize-and-extend/list-view-pages/config-default-columns-listviews/). This shows us how to Add Row Actions, which is exactly what I want to do.

To make this change I need to edit the List View Template. To do this, I navigate to Platform settings (Beta) from the Settings menu and locate the aircraft-list page in the list.

![](https://cdn-images-1.medium.com/max/3200/0*QwWDqUYghZOr1XGt)

In the Template Content section, I can see that pesky ‘aircraft’ word. A simple update to proper case and clicking on Save gets me a nicer Title!

![](https://cdn-images-1.medium.com/max/3200/0*lIyiAffQNaT5c7Gu)

Well, that was a quick win! Onto adding row level actions.

Copying the example from the [documentation](https://developer.skedulo.com/developer-guides/customize-and-extend/list-view-pages/config-default-columns-listviews/#adding-row-actions) on adding row level actions, I can now have the delete option next to my Edit button. This is ok, but I’d rather have the Edit & Delete as a single menu, not as two separate things:

![](https://cdn-images-1.medium.com/max/3200/0*nbDziImqMNB2JVRE)

To get more than one action in the row level actions, you need to separate the actions using a comma, as below

 <iframe src="https://medium.com/media/81dd0222a770c0e23bc7b81d1f52cfec" frameborder=0></iframe>

Now that I have both the actions in the row, I can go and remove the Edit button (as this is now completely redundant). Back to your default columns, and when you edit the custom column we created earlier, you can use the Delete button to remove the column altogether.

![](https://cdn-images-1.medium.com/max/3200/0*eAKp_XKmrknbtr92)

Look at that. It’s a thing of beauty!

![](https://cdn-images-1.medium.com/max/3200/0*Y-mhSAIDFaML7na4)

## Adding an Edit button to your list view page

Our trusty [documentation](https://developer.skedulo.com/developer-guides/customize-and-extend/list-view-pages/config-default-columns-listviews/#adding-row-actions) shows us very clearly how to add a button to the list view page to allow users to add new records. It’s a matter of copy-and-paste and then applying your updates (i.e. changing the Object name, maybe swapping the wording of the button if you’re feeling frisky) to make the button your own. Here’s the code I ended up with

```yaml
{% set row_actions="[{\"action\":\"edit\",\"label\":\"<a href=\\\"/platform/page/aircraft-edit?uid={{ UID }}\\\"><sp-row vertical-align=\\\"middle\\\"><div><sp-icon icon=\\\"edit\\\"><\/sp-icon><\/div><div>&nbsp; Edit<\/div><\/sp-row><\/a>\"},
{\"action\": \"delete\", \"label\": \"<sp-row vertical-align=\\\"middle\\\"><div><sp-icon icon=\\\"trash\\\"></sp-icon></div><div>&nbsp; Delete</div></sp-row>\", \"confirmationMessage\": \"Are you sure you want to delete?\", \"successMessage\": \"Aircraft deleted successfully!\" }]" %}
 ```

Look at our fancy page! Adding new records, as well as editing and deleting from each row! You go, you good thing.

```md
{% extends "base-listview" %}

{% set view_uid="aircraft-list" %}
{% set resource_name="aircraft" %}

{% block header %}
<sp-split-row>
  <div slot="left">
    <sp-column>
      <sp-heading size="2xl" level="1">
        {% block title %}
          Aircraft
        {% endblock title %}
      </sp-heading>
    <sp-row style="--sp-row-spacing: var(--sp-spacing-3); color: var(--sp-color-neutral-600);">
      <sp-icon icon="details"></sp-icon>
      <span>List of machines</span>
    </sp-row>
    </sp-column>
  </div>
  <div slot="right" style="text-align: right;">
    <sp-heading>
      <a href="/platform/page/aircraft-create">
        <sp-button>Add new record</sp-button>
      </a>
    </sp-heading>
  </div>
</sp-split-row>
{% endblock header %}
```

One thing to remember is that if you start changing the header (to include your fancy button), make sure you remove the Title block (which we updated earlier). If you leave it in as well as changing the header, your whole page won’t render at all!

Join us here at Low Code Corner next time when we explore adding images to make your pages pop. And as always, if you have questions, reach out to us via the comments below or on Twitter @SkeduloDevs

## References

* [Editing the Column Templates](https://developer.skedulo.com/docs/customization/platform/pages/overriding-pages-example/configure-column-templates/)
* [Overriding the default List View Template](https://developer.skedulo.com/developer-guides/customize-and-extend/list-view-pages/config-default-columns-listviews/#adding-row-actions)
* [Advanced column configuration for list views](https://docs.skedulo.com/developer-guides/customize-and-extend/list-view-pages/advanced-column-config/)
* [Skedulo Icon Library](https://skedulo.github.io/breeze-ui/?path=/docs/breeze-tokens-icons--available-icons)

---

---
url: "https://developer.skedulo.com/blog/episode-8-prepopulating-data-to-win-hearts-and-minds"
type: "blogPost"
title: "Episode #8 - Pre populating data to win hearts and minds"
author: "Alison Johnston"
date: "2023-03-16"
---

# Episode #8 - Pre populating data to win hearts and minds

Welcome back, Low Coders! In this episode we are looking into how to absolutely become a hero for your workers. You’ve created pages with beautiful pictures, related lists with meaning and now we will remove one more click from the lives of our amazing teams by pre-populating data for them. Are you the rebel who will save the universe with this move? Well, yes. You might just be. No one likes extra clicks and typing when keeping their data up to date. Your mission today is to make life easier for your team.

When you [created your aircraft records](https://developer.skedulo.com/blog/mastering-low-code-app-development-episode-2-putting-your-skedulo-record-pages-into-hyperspace/), you gave your users the ability to not only view the related parts and fleet assignments, but a way to add new parts or assignments. However when you click on the Add button, none of the data is pre-populated.
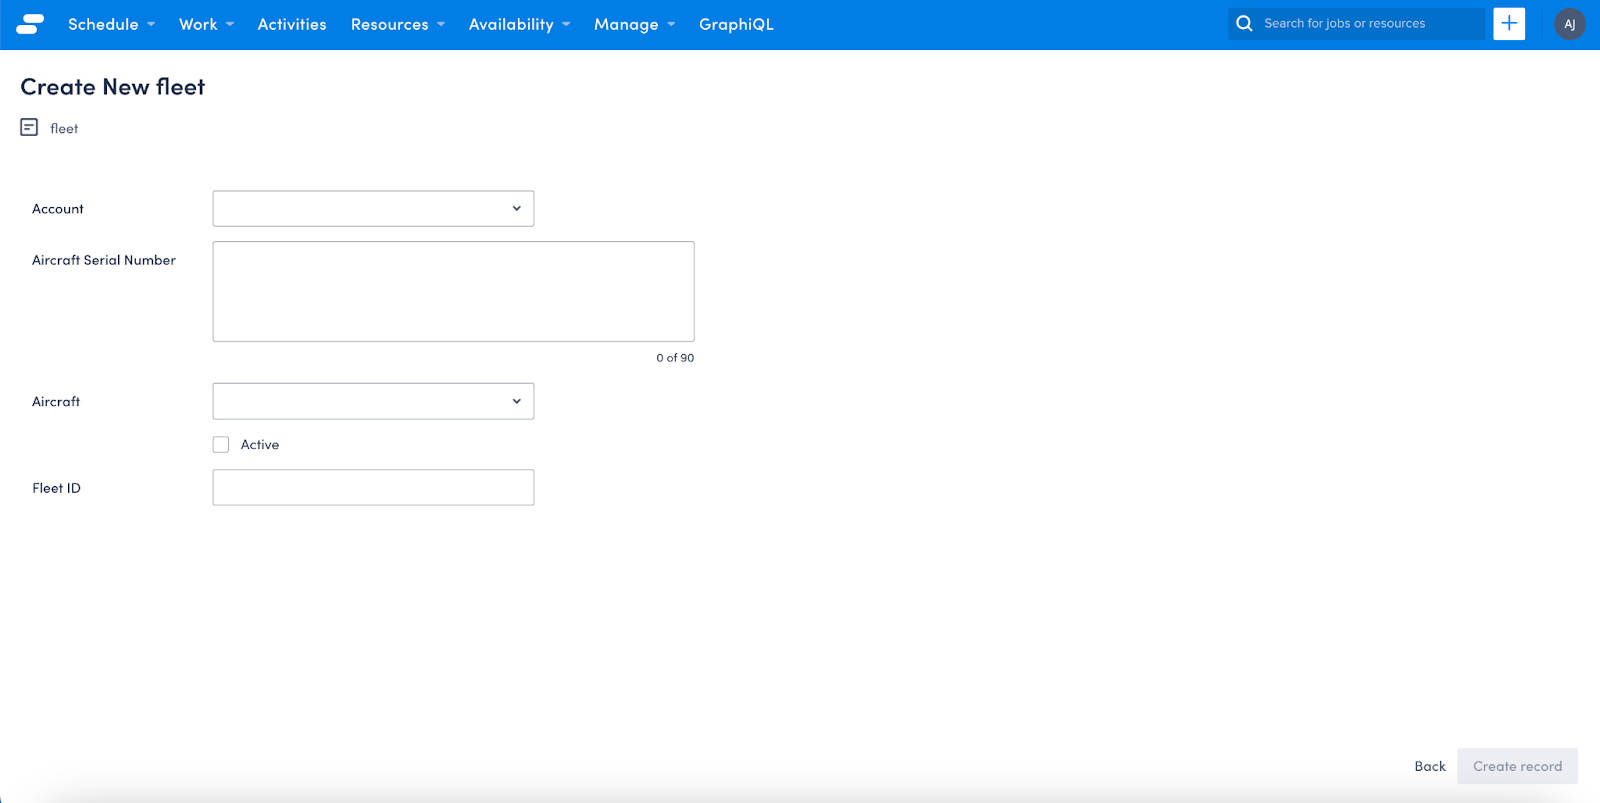
![](https://cdn-images-1.medium.com/max/3200/0*Sdp88gHO_8fdj6-J)

What if we had a way to populate the Aircraft field with the information needed without having to search for it? Well dear reader, Skedulo gives you that option! We simply need to add a few tweaks to our page for the Aircraft View and we can make data entry just that little bit more special (pew pew).

There are two key parts to pre-populating the data. The first is to tell the page that you’re passing the data to (i.e. the Fleet Create page shown above) what data will be going where. The second is to update your Add button to include the parameter of the value you want to send over. The example below looks at populating the Aircraft value when adding a new Fleet Assignment, however there is nothing stopping you from pre-populating other fields (you may want to automatically set the IsActive field to True, or populate the date on a new record). You simply follow the steps to let the target page know what to expect, and update the button or link to pass through the parameter.

Let’s dive in! First of all we want to tell the target page what we are expecting to be populated. To do this, we want to update the Fleet Create page. Underneath `{% set validation_schema=”fleetCreate” %}` we want to add the following code snippet:

```yaml
    {% extends "base-recordcreate" %}
    {% set resource_name="fleet" %}
    {% set validation_schema="fleetCreate" %}
    {% set default_value %} {"AircraftId" : "{{_.queryParams.Aircraft}}"} {% endset %}
```

Let’s break down the new snippet, shall we? First up we’re setting a default value. Excellent. That’s pretty straight forward. After that you’re telling the create page of the Fleet object that someone is going to pass through the Aircraft ID to the page, using a query parameter of Aircraft (this means that when you’re updating the button code later, you can simply use Aircraft rather than Aircraft ID).

One handy reminder to point out here is that whenever you create a lookup relationship between two objects, Skedulo will always append Id to the end of your field (even though it doesn’t display on the screen). If you had called your field Aircraft Id, Skedulo would automatically update the field to AircraftIdId. If you called your field Aircraft (as I did), the field will be AircraftId when you’re using it in this scenario.

If you want to add more than one parameter, you simply update the code snippet to be similar to the below, with each parameter separated by a comma.

`{% set default_value %} {"AircraftId" : "{{_.queryParams.Aircraft}}", "IsActive" : "{{_.queryParams.Active}}"} {% endset %}`

So now your Create page knows you want to send data to it. Huzzah! On to updating the page that will send the data across! Open up your Aircraft View page, and scroll down to where you have your list for Fleet Assignments. The button code should look like this
```yaml
    <platform-component 
      package-name="recordpage" 
      name="RecordTemplate" 
      template="{{ '<a href="/platform/page/fleet-create"> 
                    <sp-button button-type="secondary">
                      Add Fleet Assignment
                    </sp-button>' }}">
    </platform-component>\
```

Within the button code we want to add the two fields we told the Fleet Create page we want to populate. The Aircraft field will be populated with the UID of the Aircraft record your users are looking at when adding the assignment, and the Is Active field will be set to True. Using the below code snippet we can populate both these fields.

```yaml
    <platform-component 
      package-name="recordpage" 
      name="RecordTemplate" 
      template="{{ '
                    <sp-link href="{{_.host.buildPlatformUrl("fleet-create?Active=True&Aircraft="+ _.queryParams.uid)}}">
                    <sp-button 
                      button-type="secondary">
                      Add Fleet Assignment
                    </sp-button>' }}">
      </platform-component>
```

One thing to note in the above snippet is that we have swapped the base URL from `<a href=”/platform/page/` to `href=”{{_.host.buildPlatformUrl(` and added the `_.queryParams.uid` to the end of the URL construct. This will safeguard against any changes in the base URL in the future, and is considered best practice.

![](https://cdn-images-1.medium.com/max/3200/0*Cxfz3M0R_H-mPRie)

Updating the Aircraft Parts button is more of the same — update the Aircraft Parts Create page with the parameters to expect, and then update the Aircraft View page to send the parameters through the button!
``` yaml
    <platform-component 
      package-name="recordpage" 
      name="RecordTemplate" 
      template="{{ 
                  '<sp-link href="{{_.host.buildPlatformUrl("aircraft-parts-create?Aircraft="+ _.queryParams.uid)}}"> 
                  <sp-button 
                    button-type="secondary">
                    Add Part
                  </sp-button>' }}">
      </platform-component>
```
Now, when your users are accessing the Aircraft page, they can look at the details of the aircraft, the parts needed to service the aircraft, which customers have the aircraft in their fleet (either actively or as a retired vehicle) and add new parts or fleet assignments with less clicking, now that you have *incredibly* helpfully pre-populated the data for them! You are an absolute rock star of a freedom fighter!

Join us here at Low Code Corner next time for our final episode when we discover how to add redirects to your create and edit pages, removing extra clicks once again! And as always, if you have questions, reach out to us via the comments below or on Twitter @SkeduloDevs.

## References

* [Skedulo: Overriding the default View record template](https://developer.skedulo.com/developer-guides/customize-and-extend/create-and-customize-pages/overriding-pages-example/configure-view-page/#adding-tabs)
* [Mastering low code app development: Episode 2 — Putting your Skedulo record pages into Hyperspace](https://developer.skedulo.com/blog/mastering-low-code-app-development-episode-2-putting-your-skedulo-record-pages-into-hyperspace/)

---

---
url: "https://developer.skedulo.com/blog/episode-9-adding-redirects-to-keep-your-users-where-they-want-to-be"
type: "blogPost"
title: "Episode #9: Adding redirects to keep your users where they want to be"
author: "Alison Johnston"
date: "2023-04-24"
---

# Episode #9: Adding redirects to keep your users where they want to be

Welcome back, Low Coders! We’ve come so far together over the last 8 episodes! Look at what we can now do using the Skedulo Pulse Platform:

* Create new objects
* Update the view and edit pages of objects
* Edit records straight from your list view
* Add images to pages for visual spectacle
* Add relationships between object
* Put tabs on your pages
* Add filters to your tabs
* Pre-populate data for your users

You’ve reduced clicks, made pages beautiful, and made sure your users have an easier time at work, each and every day. No more will there be a cry of ‘Help me, you’re my only hope’! You have done the Kessel Run in 12 parsecs! In this episode we’re going to tackle adding a redirect to the Fleet Create page which will return the user back to the Aircraft View page after they add a Fleet Assignment record. This will again save your users a few extra clicks, which adds up to a better all-round experience.

To add this redirect in, you simply navigate to the Fleet Create page and add the following code snippet underneath `{% set validation_schema=”fleetCreate” %}`

``` yaml
    {% set back_url = _.host.buildPlatformUrl('aircraft-view?uid=' + _.queryParams.Aircraft + '&selectedtab=fleet-assignments') %}
```
Breaking down this snippet, you can see we’re setting the `Back URL` to redirect the `Aircraft View` page of the aircraft associated with the `Fleet` record being created, and landing on the `Fleet Assignments` tab. This will work perfectly, if the only way to create a Fleet record is from the `Aircraft View` page, passing through the `Aircraft ID` as a parameter. 

In our scenario, we would also want to be able to create a `Fleet` record from the `Account` page, as well as from the list view. With the above snippet in place, if the `Fleet` record was created from any place *other* than `Aircraft` record, you’d receive an error (as there would be no `Aircraft ID` to send to the URL). There are a couple of ways we can fix this. One way is to include additional options for the return URL using some `IF` statements. 

This works well if your data model is pretty static, and you’re unlikely to add new ways to add Fleet records in the future. Another way, which is more dynamic and allows for greater flexibility in the long run is to add both return URLS and return IDs as parameters, meaning that should you need to add additional options, these can be handled through the button, rather than updating the Create page with more and more `IF` statements as time goes by.

We’ll cover off the `IF` statement option first. One thing to remember is that if you want to redirect your users back to a specific record (i.e. a specific Account) then you will need to include the `Account ID` as a parameter being passed through to the `Fleet` page. (If you can’t remember how we did this, it was back in [Episode 8](https://developer.skedulo.com/blog/episode-8-prepopulating-data-to-win-hearts-and-minds/))

When using an `IF` statement, it’s important to think about the order of your statements. In our scenario, we want to direct users to the `Aircraft` or `Account` record they were on prior to creating the `Fleet` record, or if creating the `Fleet` record from somewhere else, return them to the `Fleet List` view. To do this, we want to put the *default* return URL as the list view.

After that, we can then redirect to the `Aircraft` page if the `Aircraft UID` is sent as a parameter, or to the Account page if the Account UID is sent as a parameter.
``` yaml
    {% set back_url = _.host.buildPlatformUrl('fleet-list') %}
    {% if _.queryParams.Account != null %}
    {% set back_url = _.host.buildPlatformUrl('account-view?uid=' + _.queryParams.Account + '&selectedtab=fleet-assignments') %}
    {% endif %}
    {% if _.queryParams.Aircraft != null %}
    {% set back_url = _.host.buildPlatformUrl('aircraft-view?uid=' + _.queryParams.Aircraft + '&selectedtab=fleet-assignments') %}
    {% endif %}
```
This code snippet will check to see if either the `Account UI`D or the `Aircraft UID` is sent as a parameter — if it is, then the user will be redirected to the appropriate page (and the right tab on the page — fancy!). If there is no UID sent, the user will go back to the *default* page, which in our case is the list view. Neat!!

To make the solution more dynamic, we can set the `Return URL` and the `Return UID` as parameters in the `Fleet Create` page, and then send these parameters through the button initiating the create record (in our case the Add `Fleet Assignment` button on the `Aircraft View` page).

Let’s start with setting the dynamic parameters on the `Fleet Create` page, shall we? Underneath `{% set validation_schema=”fleetCreate” %}` we want to add in the below snippet (if you’ve followed along above, you’ll need to remove your `IF` statements and the other `Back URL` statements).

`{% set back_url = _.host.buildPlatformUrl(_.queryParams.retPage + '?uid=' + _.queryParams.retUID) %}`

This snippet says that the return page and return `UID` will be sent as parameters. Now these values can be sent from any button through the whole system! For this to work, we need to update the button (or buttons) that actually sends the parameters to the `Fleet Create` page — we’ll work through the Add Fleet Assignment button on the Aircraft View page, but this should also be done through the Add Fleet Assignment button on the `Account View` page (so our users can create an Assignment from either place and still end up back in the right spot when they’re done!)

In the `Aircraft View` page, navigate to the section where we have the button to Add Fleet Assignment in the `Fleet Assignment` tab. We want to add in the return URL and the `UID` of the record we want our users to return to — this will then be passed through to the Fleet Create page!

```yaml
<platform-component 
  package-name="recordpage" 
  name="RecordTemplate" 
  template="{{ '
    <sp-link 
      href="{{_.host.buildPlatformUrl("fleet-create?retPage=aircraft-view&Active=True&Aircraft="+ _.queryParams.uid+ "&retUID=" + _.queryParams.uid)}}">
        <sp-button 
          button-type="secondary">
          Add Fleet Assignment
        </sp-button>' }}">
</platform-component>
```

Amazing!!

All the tips and tricks we’ve covered in this series can be applied throughout your Skedulo tenant. The only limit is your imagination. Think your account page looks a little bland? Add some images. List view looks a bit grey? Add some colour and icons to engage your users. Save clicks where you can, and your users will be singing your praises all day long.

Thank you for following along in this crazy journey — the skills you now have in your arsenal will set you up to conquer the galaxy!

![](https://developer.skedulo.com/blog-images/post/230424-episode-9-adding-redirects-to-keep-your-users-where-they-want-to-be/star-wars-death-star.gif)
 

As always, if you have questions, reach out to us via the comments below or on Twitter @SkeduloDevs.

## References

* [Skedulo: Overriding the default Create record template](https://developer.skedulo.com/developer-guides/customize-and-extend/create-and-customize-pages/overriding-pages-example/configure-view-page/#adding-tabs)
* [Mastering low code app development: Episode 8 — Pre-populating data to win hearts and minds](https://developer.skedulo.com/blog/episode-8-prepopulating-data-to-win-hearts-and-minds/)

---

---
url: "https://developer.skedulo.com/blog/episode7-filtering-related-data-show-what’s-important"
type: "blogPost"
title: "Episode #7 - Filtering related data to only show what’s important"
author: "Alison Johnston"
date: "2023-02-23"
---

# Episode #7 - Filtering related data to only show what’s important

Welcome back, Low Coders! [Last time](https://developer.skedulo.com/blog/accessing-the-universe-in-a-single-page-with-related-data/) on Mastering low code app development, we built out our pages with new tabs to show related data, giving our users access to all the information they need in a single screen. In this episode we look at how to filter the information displayed on the page to make sure our users are only getting the information they need when they need it!

Users don’t want to be scrolling through records that offer limited value — they want the information they need without any fuss or muss. Our fictitious company services aircraft throughout the galaxy, and while it’s important for them to know which customers have which aircraft in their fleet, they probably don’t need to see inactive aircraft clogging up their Fleet Assignment records.

This data is not invaluable (after all, all data is good data). Some of your team may want to know which aircraft used to make up the fleet but have since been retired — this may help them to identify if there are spare parts available on-site that may be hard to source elsewhere. By adding static filters to your list views, you can give your users a list of the current fleet assignments, and separate out the Retired Fleet into a new tab on the page. This keeps the data available for your users, but gives them more targeted and focussed information, making their days more beautiful, all thanks to you!

There are a few things to keep in mind when looking at adding filters to your list views. Including a filter on the standard Related List View component that we added to the page in Episode 6 is not currently supported, as the data in a *related* list view is designed to show all data related to the parent record (in this example, all fleet data related to the aircraft). So when we want to add in a static filter, we will need to change the *related *list view to a standard list view and then add the filter criteria into the page making life easy for your users! Let’s do it.

Our existing code block for the Fleet Assignment details on our Aircraft View page looks like the below:
```yaml "hl_lines=8"
    <platform-component
      package-name="recordpage"
      name="RecordTemplate"
      template=" {{ '{% if UID %}
        <platform-eventbus-scope closed>
          <platform-component 
            package-name="listview"
            name="RelatedListView"
            resource-name="fleet"
            foreign-key="AircraftId"
            foreign-key-value="{{UID}}">
          </platform-component>
        </platform-eventbus-scope>
        {% endif %}' }}" >
    </platform-component>
```

```yaml
    <platform-component
      package-name="recordpage"
      name="RecordTemplate"
      template=" {{ '{% if UID %}
        <platform-eventbus-scope closed>
          <platform-component 
            package-name="listview"
            name="RelatedListView"
            resource-name="fleet"
            foreign-key="AircraftId"
            foreign-key-value="{{UID}}">
          </platform-component>
        </platform-eventbus-scope>
        {% endif %}' }}" >
    </platform-component>
```


When we look at the Fleet Assignment tab of our aircraft, we can see *all* the assignments, both active and inactive:

![](https://cdn-images-1.medium.com/max/3200/0*LX8g-cSj0cQMiRTP)

This is great, but it would be more helpful for our fabulous team to be able to quickly identify which aircraft are actively in service at our customers, without needing to scroll or filter each time they reach the page. To do this, I want to put a static filter on the Fleet Assignment tab to only display Active assignments.

We want to change the RelatedListView to a ListView in the name row of our code. From here we can add a query to restrict the data being displayed, and remove the foreign key lines. Because we are removing the foreign key lines of the code, we need to ensure that the query includes a way to only display the relevant records for the record we are viewing. To do this, I want to add a query that will only show Active fleet records for the Aircraft we are viewing.

To do this, we update the code to the below snippet.
```yaml
    <platform-component
    package-name="recordpage"
    name="RecordTemplate"
    template=" {{ '{% if UID %}
    <platform-eventbus-scope closed>
    <platform-component package-name="listview"
    name="ListView"
    query="IsActive:true AND AircraftID:{{ UID }}"
    resource-name="fleet">
    </platform-component>
    </platform-eventbus-scope>
    {% endif %}' }}" >
    </platform-component>
```
When viewing our Fleet Assignments tab now, we can see only the Active assignments:

![](https://cdn-images-1.medium.com/max/3200/0*ya-krH36g0Yf5c5_)

Because all data is good data, I want to add another tab to the page that displays the retired fleet assignments as well. Following along from the last episode of adding tabs, I can add in an additional tab, with a query to display inactive fleet assignments for the vehicle, which gives our users the full information they may require.
```yaml
<platform-component
   package-name="recordpage"
   name="RecordTemplate"
   template=" {{ '{% if UID %}
   <platform-eventbus-scope closed>
   <platform-component package-name="listview"
   name="ListView"
   query="IsActive:false AND AircraftID:{{ UID }}"
   resource-name="fleet">
</platform-component>
</platform-eventbus-scope>
{% endif %}' }}" >
</platform-component>
```
Now, I can see both the active and retired vehicles for our X-Wing:

![](https://cdn-images-1.medium.com/max/3200/0*Wp88ylfl3QTJS6ri)

The full code for the page now looks like this:
```text
{% extends "base-recordview" %}
{% set resource_name="aircraft" %}
{% block header %}
<sp-split-row>
   <div slot="left">
      <sp-header style="margin-bottom: 0">
         <sp-column>
            <sp-heading size="2xl" level="1">
               {% block title %}
               <platform-component package-name="recordpage" name="RecordDefiner"></platform-component>
               {% endblock title %}
            </sp-heading>
            <sp-row style=" - sp-row-spacing: var( - sp-spacing-3);">
               <sp-icon icon="details"></sp-icon>
               <span>Aircraft </span>
            </sp-row>
         </sp-column>
      </sp-header>
   </div>
   <div slot="right" style="text-align: right;">
      <sp-header style="margin-bottom: 0">
         <sp-heading>
            <platform-component package-name="recordpage" name="RecordTemplate" template="{{ '<a href="/platform/page/aircraft-edit?uid={{UID}}"> 
            <sp-button>Edit</sp-button>
            ' }}"></platform-component>
         </sp-heading>
      </sp-header>
   </div>
</sp-split-row>
{% endblock header %}
{% block body %}
<sp-tabs selected="{{_.queryParams.selectedtab}}">
   <platform-component package-name="nav" name="ReflectiveTabs" search-param="selectedtab"
   tabs="{{ [
   {"name":"details","label":"Details"},
   {"name":"aircraft-parts","label":"Aircraft Parts"},
   {"name":"fleet-assignments","label":"Fleet Assignments"},
   {"name":"retired-fleet","label":"Retired Fleet"}
   ] |dump}}">
   </platform-component>
   <sp-tab-panel name="details" shown>
      <sp-responsive-columns>
         <div>
            <sp-heading size="base" style="margin-bottom: var( - sp-spacing-4)">Description</sp-heading>
            <sp-record-row>
               <span slot="label">Hyperspace</span>
               <platform-component package-name="recordpage" name="RecordFieldView" field-name="Hyperspace"></platform-component>
            </sp-record-row>
            <sp-record-row>
               <span slot="label"># of Seats</span>
               <platform-component package-name="recordpage" name="RecordFieldView" field-name="Seats"></platform-component>
            </sp-record-row>
            <sp-record-row>
               <span slot="label">Release Date</span>
               <platform-component package-name="recordpage" name="RecordFieldView" field-name="ReleaseDate"></platform-component>
            </sp-record-row>
            <sp-record-row>
               <span slot="label">Last Service Date</span>
               <platform-component package-name="recordpage" name="RecordFieldView" field-name="LastService"></platform-component>
            </sp-record-row>
         </div>
         <div>
            <sp-record-row>
               <span slot="label">Branding</span>
               <platform-component package-name="recordpage" name="RecordTemplate"
               template="{{ '{% if Branding == "Rebellion" %}
               <img src="https://starwarsblog.starwars.com/wp-content/uploads/2015/11/rebel-symbol-536x536.jpg" alt="Rebellion" width="100" height="100">
               {% else %}
               <img src="https://starwarsblog.starwars.com/wp-content/uploads/2016/02/imperialseal-536x536.jpg" alt="Empire" width="100" height="100">
               {% endif %}' }}"></platform-component>
            </sp-record-row>
            <sp-record-row>
               <span slot="label">Image</span>
               <platform-component package-name="recordpage" name="RecordTemplate" template="{{ '<img src="{{Image}}" alt="{{name}}" width="200" height="200">' }}"></platform-component>
            </sp-record-row>
         </div>
      </sp-responsive-columns>
   </sp-tab-panel>
   <sp-tab-panel name="aircraft-parts">
      <sp-split-row>
         <div slot = "right" style="text-align: right;">
            <sp-header style="margin-bottom: 0">
               <platform-component package-name="recordpage" name="RecordTemplate" template="{{ '<a href="/platform/page/aircraft-parts-create"> 
               <sp-button button-type="secondary">Add Part</sp-button>
               ' }}"></platform-component>
            </sp-header>
         </div>
      </sp-split-row>
      <div style="padding-top: var( - sp-spacing-4)">
         <platform-component
            package-name="recordpage"
            name="RecordTemplate"
            template= " {{ '{% if UID %}
            <platform-eventbus-scope closed>
            <platform-component package-name="listview"
            name="RelatedListView"
            resource-name="aircraft Parts"
            foreign-key="AircraftId"
            foreign-key-value="{{UID}}">
         </platform-component>
         </platform-eventbus-scope>
         {% endif %}' }} " >
         </platform-component>
      </div>
   </sp-tab-panel>
   <sp-tab-panel name="fleet-assignments">
      <sp-split-row>
         <div slot = "right" style="text-align: right;">
            <sp-header style="margin-bottom: 0">
               <platform-component package-name="recordpage" name="RecordTemplate" template="{{ '<a href="/platform/page/fleet-create?Aircraft={{UID}}"> 
               <sp-button button-type="secondary">Add Fleet Assignment</sp-button>
               ' }}"></platform-component>
            </sp-header>
         </div>
      </sp-split-row>
      <div style="padding-top: var( - sp-spacing-4)">
         <platform-component
            package-name="recordpage"
            name="RecordTemplate"
            template=" {{ '{% if UID %}
            <platform-eventbus-scope closed>
            <platform-component package-name="listview"
            name="ListView"
            query="IsActive:true AND AircraftId:{{ UID }}"
            resource-name="fleet">
         </platform-component>
         </platform-eventbus-scope>
         {% endif %}' }}" >
         </platform-component>
      </div>
   </sp-tab-panel>
   <sp-tab-panel name="retired-fleet">
      <sp-split-row>
         <div slot = "right" style="text-align: right;">
            <sp-header style="margin-bottom: 0">
               <platform-component package-name="recordpage" name="RecordTemplate" template="{{ '<a href="/platform/page/fleet-create?Aircraft={{UID}}"> 
               <sp-button button-type="secondary">Add Fleet Assignment</sp-button>
               ' }}"></platform-component>
            </sp-header>
         </div>
      </sp-split-row>
      <div style="padding-top: var( - sp-spacing-4)">
         <platform-component
            package-name="recordpage"
            name="RecordTemplate"
            template=" {{ '{% if UID %}
            <platform-eventbus-scope closed>
            <platform-component package-name="listview"
            name="ListView"
            query="IsActive:false AND AircraftId:{{ UID }}"
            resource-name="fleet">
         </platform-component>
         </platform-eventbus-scope>
         {% endif %}' }}" >
         </platform-component>
      </div>
   </sp-tab-panel>
</sp-tabs>
{% endblock body %}
```
Join us here at Low Code Corner next time when we uncover how to pre-populate data for your users making them love you even more! And as always, if you have questions, reach out to us via the comments below or on Twitter @SkeduloDevs.

## References

* [Skedulo: Overriding the default View record template](https://developer.skedulo.com/developer-guides/customize-and-extend/create-and-customize-pages/overriding-pages-example/configure-view-page/#adding-tabs)
* [Mastering low code app development: Episode 6 Accessing the universe in a single page with related data](https://developer.skedulo.com/blog/accessing-the-universe-in-a-single-page-with-related-data/)

---

---
url: "https://developer.skedulo.com/blog/fall-24-launch-roundup"
type: "blogPost"
title: "Skedulo Fall ‘24 Developer Roundup"
author: "Sophie Wheeler"
date: "2024-12-20"
---

# Skedulo Fall ‘24 Developer Roundup

It’s time for the Skedulo Fall ‘24 release, and there are so many exciting things to talk about. I’m going to be covering all of the new features aimed at developers, but if you want to see a broader overview, check out the post [here](https://www.skedulo.com/blog/skedulos-newest-product-release-is-here/).


For now, let’s start with the big one: The release of the Skedulo CLI!

## Skedulo CLI

The Skedulo CLI is finally available! Now you can interact with, and develop, on Skedulo with a single command line tool. No more disparate API calls or complex SDK!

It enables you to manage the entire lifecycle of your applications using source control as the source of truth and allows you to manage your software development lifecycle using continuous integration and delivery.

With the Skedulo CLI, developers can:

* Manage access credentials to multiple environments or teams.
* Create, retrieve, update, and delete Pulse Platform solution capabilities.
* Provide specialty tooling to aid the development of specialized platform capabilities.
* Use scripts and other standard developer toolchains to automate various tasks.
* Support both the Skedulo Pulse Platform and Skedulo for Salesforce.

The Skedulo CLI supports logging into multiple tenants, such as your dev, UAT, and production teams. 

Core to the process of developing solutions using the Skedulo CLI is the concept of artifacts. An artifact represents an instance of a configuration element, such as a definition of custom objects and fields for storing data, or custom pages and templates to build specialized user interfaces.

For a full list of supported artifacts, check out the documentation [here](https://docs.skedulo.com/developer-guides/cli/artifact-availability/).

The Skedulo CLI not only allows you to deploy, but also run and debug connected functions and web extensions locally, which greatly speeds up the development process.

If you want to learn more about the Skedulo CLI, you can visit our [docs site](https://docs.skedulo.com/developer-guides/cli/skedulo-cli-introduction/), or you can check out our getting started [video](https://youtu.be/gxvs-KezZvc) below.

You can also check out or [artifact example repo](https://github.com/Skedulo/SkeduloCLIExamples) This contains examples of every available artifact that you can leverage to begin building new things or expand on existing solutions to make them your own!

[▶ Watch on YouTube](https://www.youtube.com/watch?v=gxvs-KezZvc)

## Skedulo Plus Mobile Extensions

There have also been a lot of exciting changes to Skedulo Plus mobile extensions! We are now making the development of these generally available to customers, and they are deployable using the Skedulo CLI.

If you want to learn about all of the awesome existing functionality that you can now directly leverage, check out the documentation [here](https://developer.skedulo.com/developer-guides/customize-and-extend-mobile/skedulo-plus-extensions/mex-intro/). Or check out my colleague Scott’s [video series](https://youtu.be/B8KAec6iYsI) on building your first mobile extension.

## Optimization Extensions

Optimization extensions enable you to create custom scheduling logic to meet the specific needs of your organization. These extensions are built using the existing custom function feature, meaning they can be created and deployed simply using the [Skedulo CLI](https://developer.skedulo.com/cli).

These extensions are integrated into Skedulo’s optimization recipes. Once created and deployed, your scheduling teams can easily use them within the web app to optimize scheduling processes.

For more information on how to take advantage of this powerful new feature, check out the documentation [here](https://developer.skedulo.com/user-guides/manage-scheduling-availability/optimization-of-schedule/manage-and-use-route-optimization/optimization-extension/optimization-extension-overview/).

## Conclusion

I hope you are as excited as we are about all of these great new features! Over the coming weeks we will be releasing more dedicated content about each of them and they will all also be covered over on our docs site.

As always, we’d love to hear about what you’re building, so please reach out to us on [LinkedIn](https://uk.linkedin.com/showcase/skedulodevs/)!

## References

* [Skedulo CLI - Artifact Availability](https://docs.skedulo.com/developer-guides/cli/artifact-availability/)
* [Skedulo CLI - Introduction](https://docs.skedulo.com/developer-guides/cli/skedulo-cli-introduction/)
* [Video: Getting Started with the Skedulo CLI](https://youtu.be/gxvs-KezZvc)
* [Video: Getting Started with Mobile Extension Development - Part 1](https://youtu.be/B8KAec6iYsI)
* [GitHub: Skedulo CLI Example Artifacts](https://github.com/Skedulo/SkeduloCLIExamples)
* [Skedulo Blog - Latest release](https://www.skedulo.com/blog/skedulos-newest-product-release-is-here/)
* [Docs: Skedulo Plus Mobile Extensions](http://localhost:1313/developer-guides/customize-and-extend-mobile/skedulo-plus-extensions/mex-intro/)
* [Docs: Optimisation Extensions](https://developer.skedulo.com/user-guides/manage-scheduling-availability/optimization-of-schedule/manage-and-use-route-optimization/optimization-extension/optimization-extension-overview/)

---

---
url: "https://developer.skedulo.com/blog/graphql-101-part-1-accessing-data-on-the-pulse-platform"
type: "blogPost"
title: "GraphQL 101, Part 1: Accessing Data on the Pulse Platform"
author: "Sophie Wheeler"
date: "2022-10-24"
---

# GraphQL 101, Part 1: Accessing Data on the Pulse Platform

Welcome to the first part in this series on using GraphQL with the Skedulo Pulse Platform!

I have touched on GraphQL in an earlier post, so if you’ve not already read it, you can check it out [here](https://developer.skedulo.com/blog/quick-and-easy-graphql-exploration-in-skedulo/). This includes a bit about what GraphQL *is*, and how to use inbuilt tools to explore, so I’d recommend reading it first!

Today, we are going to cover basic data access, simple filtering, and pagination. I’ll be providing example queries which you can use in an API client like Insomnia, in a Web Extension, or within Skedulo by using GraphiQL

First things first, a quick introduction. GraphQL is a query language for APIs. We use it on the Skedulo Pulse Platform for both retrieving and changing data. It is very powerful and allows us to retrieve or change only the data we need within a call, rather than getting too much, or having to make multiple calls as is common with RESTful APIs.

GraphQL calls are made in the form of queries. These tell the Pulse Platform exactly what information you’re requesting. This means, for example, that you can ask for only the specific fields you need, or you can get information from related records within a single call.

Like query languages you may be used to (e.g SQL), you can filter and paginate within a GraphQL query and, of course, the criteria within these filters can be dynamic. We will go into more depth on filtering in a future post in this series.

With that out of the way, let’s begin with a simple use case to help explain how GraphQL works: Getting all of the region records within a tenant

We will use Insomnia (an API client) in these examples. However, the process will be very similar for other clients like Postman or cURL.

The first thing we need in order to make calls is an API token. If you don’t already have a token handy, check out the developer docs [here](https://developer.skedulo.com/docs/introduction/authentication/) to see how to generate one.

Please note that if you’re doing this from within a Web Extension, you don’t need to generate a token because it will be injected automatically. For more on Web Extensions, check the Skedulo Developer Documentation [here](https://developer.skedulo.com/docs/customization/skedulo-sdk/web-extensions/).

## Unfiltered queries

So, token in hand, let’s make our first GraphQL call.

The endpoint we need to use is [https://api.skedulo.com/graphql/graphql](https://api.skedulo.com/graphql/graphql), and we want to do a POST request with the request type of ‘GraphQL’.

We also need to make sure we set the authentication to ‘Bearer Token’, the prefix to ‘Bearer’, and the token to our API token.

![](https://cdn-images-1.medium.com/max/3200/0*ebBA_ZIbImeu4VL3)

Insomnia will automatically add the correct headers, e.g Content-Type however if these get cleared, please make sure Content-Type is set to application/json

![](https://cdn-images-1.medium.com/max/3200/0*Ln5IYeUTy3J9rFsm)

Now we’re ready to make our first call! For this example, copy and paste the following into Insomnia:
```graphql
    query {
      regions {
        edges {
          node {
            UID
            Name
          }
        }
      }
    }
```
Hit send, and you should be returned the regions within your Skedulo tenant, for example:
```json
    {
      "data": {
        "regions": {
          "edges": [{
            "node": {
              "UID": "0003ef0d-2e08-4e37-8b91-c35ccc36ad84",
              "Name": "South West England"
            }
          }]
        }
      }
    }
```
So, as we can see in this response, it’s returned all of the regions in this tenant (one, in this case) in the ‘edges’ array. You can also see that it has only returned the fields specifically requested in the query.

## Pagination

If you are performing unfiltered queries, it’s likely they could return a large amount of data. The Skedulo Pulse Platform limits queries to return 200 results at once. This is to ensure stability of the platform.

So, in order to get more records, we need to paginate through the results. This is very simple in GraphQL.

We simply need to include a few more fields within our query in order to know if there are more pages, and how many there are.

We will cover more advanced use of pagination in our future post on filtering, but for now let’s talk about basic pagination

The below query is similar to our first, but now includes a “cursor” field on our queries object, as well as a “pageInfo” object.
```graphql
    query {
      jobs {
          edges {
            cursor
            node {
              UID
              Name
            }
          }
          pageInfo {
            hasNextPage
            hasPreviousPage
          }
        }
    }
```
The cursor is how we ask for additional records, and the pageInfo is how we know if there are more pages.

A response to this query may look like:
```YAML
    {
      "data": {
        "jobs": {
          "edges": [
            #more records
            {
              "cursor": "MQ==",
              "node": {
                "UID": "00142b03-37c0-435c-9ce0-a35bd80fc8d6",
                "Name": "JOB-0001"
              }
            }
          ],
          "pageInfo": {
            "hasNextPage": true,
            "hasPreviousPage": false
          }
        }
      }
    }
```
Take note of the cursor field. We will use that with the next query to get more records. This is achieved by specifying the after property, like in the below example:
```graphql
    query {
      jobs(after: "MQ==") {
        edges {
          cursor
          node {
            UID
            Name
          }
        }
        pageInfo {
          hasNextPage
        }
      }
    }
```
Running this query, we then get the next 200 records after the one corresponding to the given cursor. Next, simply repeat until hasNextPage becomes false to get all the records.

We will cover this in more detail when we talk about advance filtering, but if you can’t wait, you can check out the developer docs [here](https://developer.skedulo.com/developer-guides/integration-and-automation/api-overview/graphql/#get-started-with-graphqlgraphql-pagination/).

## Field Discovery

Now that we’ve done our first GraphQL query, you’re probably wondering if there’s an easy way to find out which fields you can query from a specific object. Of course, you can look at the object definition within the Skedulo setup menu, but there is an easier way!

GraphQL supports what are called ‘introspection’ queries. These allow you to ask the API about what it can return and what it supports. We will cover this in depth in a future post (and it’s also touched on in my [previous GraphQL post](https://developer.skedulo.com/blog/quick-and-easy-graphql-exploration-in-skedulo/)), but for now its worth understanding that Insomnia will automatically perform introspection queries for you, allowing auto-complete when you’re constructing your GraphQL queries.

![](https://cdn-images-1.medium.com/max/3200/0*E8Uj5hWTQerC0IdK)

You can also click the “schema” button on the right of the window to browse the schema yourself (much like you can in GraphiQL).

## Single record queries

So, this is great if we need to get all records, but what about when we need an individual record? Say, for example, we have a Job ID already and we need to get more information about just that job.

Well, we can perform a different query! Rather than a jobs query (or regions, like in our above example), we can do a jobsById query, which as you’d expect, returns the chosen fields for a single job when provided with its ID.

Here is an example of a jobsById query:
```graphql
    {
      jobsById(UID: "00141fb5-5a30-484e-bf83-4fa2c81094da") {
        UID,
        Name,
        Start,
        Duration
      }
    }
```
Of course, if you wish to run this in your own tenant, replace the UID with one that corresponds to a job in your tenant.

The result is slightly different to the first one, with the returned record being in the jobsById property of the returned JSON structure.
```YAML
    {
      "data": {
        "jobsById": {
          "UID": "00141fb5-5a30-484e-bf83-4fa2c81094da",
          "Name": "JOB-0067",
          "Start": null,
          "Duration": 50
        }
      }
    }
```
So, this naturally leads us on to some basic filtering because getting ALL records from an object likely isn’t useful most of the time, and getting a single record is only handy when you already have its UID.

## Simple query filtering

As mentioned above, GraphQL supports filtering and we’ll go into more detail in a future post, but for now let’s try some basic filtering.

Sticking with jobs, here is an example of how we’d get only jobs with the status of “Queued”
```graphql
    query {
      jobs(filter: "JobStatus == 'Queued'") {
        edges {
          node {
            UID,
            Name,
            Description,
            JobStatus
          }
        }
      }
    }
```
You can see that this query looks almost identical to our first one, except this time we are specifying a filter and some criteria.

As you’d expect, the resulting JSON structure is the same as the unfiltered query, but now with only the records that match the criteria:
```YAML
    {
      "data": {
        "jobs": {
          "edges": [
            {
              "node": {
                "UID": "001483a7-fe78-4cce-b77e-76d84464b8e1",
                "Name": "JOB-0035",
                "Description": "updated from GraphiQL3",
                "JobStatus": "Queued"
             }
            },
            #...more records
          ]
        }
      }
    }
```
There are, of course, more operations you can do within a filter aside from a simple ‘equals’. If you want a sneak peek of that check out the Skedulo Developer documentation [here](https://developer.skedulo.com/developer-guides/integration-and-automation/api-overview/graphql/#get-started-with-graphqlgraphql-queries/#eql-filters), otherwise stay tuned for the post on advanced filtering!

Now that we know about getting all records, getting records by UID and simple filtering, the last thing we will cover in this post is getting related records in a single call.

## Related Records

Taking our previous filtered example, let’s include information about the allocated resource in our query, but in this case, we will change our filter to “Pending Dispatch” because “Queued” records likely won’t yet have a resource allocated.
```graphql
    query {
      jobs(filter: "JobStatus == 'Pending Dispatch'") {
        edges {
          node {
            UID,
            Name,
            Description,
            JobStatus,
            JobAllocations {
              Status
              Resource {
                Name
              }
            }
          }
        }
      }
    }
```
Again, this query looks similar to the previous one, but note that we’re including the JobAllocations field. This is a relationship to the Job Allocations object, and we can then include fields from that object (e.g “Status”) and even include fields from objects related to the Job Allocations object (e.g “Name” on the Resource object).

Here is what the response from this call looks like:
```YAML
    {
      "data": {
        "jobs": {
          "edges": [
            {
              "node": {
                "UID": "00142b03-37c0-435c-9ce0-a35bd80fc8d6",
                "Name": "JOB-0001",
                "Description": "updated from GraphiQL1",
                "JobStatus": "Pending Dispatch",
                "JobAllocations": [
                  {
                    "Resource": {
                      "Name": "Michael Wheeler"
                    },
                    "Status": "Pending Dispatch"
                  }
                ]
              }
            }
          ]
        }
      }
    }
```
You can see it includes all of the requested fields in a similar format to how they are laid out in the query. This makes it very easy to get just the information you need without having to ask for unnecessary data, or make multiple requests and join them together.

## Conclusion

That is it for the basics of accessing data on the Skedulo Pulse Platform. As you can see, GraphQL is an incredibly powerful way to query data, offering several advantages over the traditional RESTful APIs.

In future posts we will be covering creating/updating records (mutation), advanced filtering, batch data processing, and introspection. This will give you all the tools you need to build rich experiences both on the Skedulo Pulse Platform as well as integrate with other systems!

As always, we’d love to hear about what you’re building on the Skedulo Pulse Platform so please reach out to us on Twitter [@SkeduloDevs](https://twitter.com/SkeduloDevs) or [LinkedIn](https://www.linkedin.com/showcase/skedulo-devs)!

## References

* [Quick and easy GraphQL exploration in Skedulo — Skedulo Developer Blog](https://developer.skedulo.com/blog/quick-and-easy-graphql-exploration-in-skedulo/)
* [Authentication — Skedulo Developer Documentation](https://developer.skedulo.com/docs/introduction/authentication/)
* [Web Extensions — Skedulo Developer Documentation](https://developer.skedulo.com/docs/customization/skedulo-sdk/web-extensions/)
* [GraphQL Pagination — Skedulo Developer Documentation](https://developer.skedulo.com/developer-guides/integration-and-automation/api-overview/graphql/#get-started-with-graphqlgraphql-pagination/)
* [EQL Filters — Skedulo Developer Documentation](https://developer.skedulo.com/developer-guides/integration-and-automation/api-overview/graphql/#get-started-with-graphqlgraphql-queries/#eql-filters)

---

---
url: "https://developer.skedulo.com/blog/graphql-101-part-2-elastic-query-language-eql-filters"
type: "blogPost"
title: "GraphQL 101, Part 2: Elastic Query Language (EQL) Filters"
author: "Sophie Wheeler"
date: "2023-01-04"
---

# GraphQL 101, Part 2: Elastic Query Language (EQL) Filters

Welcome to the second part in this series on using GraphQL with the Skedulo Pulse Platform! If you've not had a chance to read part one, you can check it out here and then come back. Don't worry, I'll wait.

Read it now? Great!

In this part, we will be covering filters. Filters are a powerful and necessary part of building well optimized queries and making your applications as performant as possible.
Skedulo uses Elastic Query Language, also known as EQL, for filtering our queries. These filters are similar to the 'WHERE' clause in a SQL query.
In part one, we covered simple filtering, but here is a quick refresher. To start with, we have to specify the 'filter:' parameter in our query. This will tell it to return only the records that match the filter criteria, rather than all of them for a given table:
```graphql
query {
  jobs(filter: "JobStatus == 'Queued'") {
    edges {
      node {
        UID,
        Name,
        Description,
        JobStatus
      }
    }
  }
}
```
As you would expect, running this query will produce a result similar to the below, returning all Jobs with a JobStatus of 'Queued':
```yaml
{
  "data": {
    "jobs": {
      "edges": [
        {
          "node": {
            "UID": "001483a7-fe78-4cce-b77e-76d84464b8e1",
            "Name": "JOB-0035",
            "Description": "updated from GraphiQL3",
            "JobStatus": "Queued"
         }
        },
        // ...more records
      ]
    }
  }
}
```
With that out of the way, let's continue.

## Operators and Types
You've already seen a commonly used Operator in the query above (equals), as well as a common Type (String). However, there are several more that Skedulo supports within query filters.

But first, a quick discussion of Types (or, Literals). As the name suggests, this is the type of data that is held in a field. For example, text ("String") or a number (an "Integer" or "Float").

When we use a filter to compare a field value to another value (or values, more on that later), we need to make comparisons of the same Type. In our above example, we are comparing a String (the value in the "JobStatus" field) to another String ("Queued").

In the same way, if we wanted to filter for all jobs of a certain "Start" (a Date/Time, called an "Instant"), we'd need to compare it to another "Instant".

For example:
```yaml
query {
  jobs(filter: "Start == 2022-01-14T00:00:00.000Z" ) { 
    //…query 
  }
}
```
Skedulo supports the following types: String, Boolean, Integer, Floating Point (Decimal), Date/Time (Instant), Local Time, Local Date, Duration, and Null. We won't be covering every single one of them in this post, so the main point to take away is that when doing a comparison within a filter, make sure you are comparing the same type.

For more examples of the Types available check out the developer documentation [here](https://developer.skedulo.com/blog/quick-and-easy-graphql-exploration-in-skedulo/).

If you don't know what type a field is, check out my [intro to GraphQL](https://developer.skedulo.com/blog/graphql-101-part-1-accessing-data-on-the-pulse-platform/) post, where we touch on introspection queries. I will be covering this in more detail in a future post, so keep a lookout for it!

So with Types out of the way, let's take a look at Operators!

An operator is the 'bit' between the field (e.g "JobStatus" or "Start") and the value ("Queued" or "2022-01-14T00:00:00.000Z") that you wish to compare. In our first example, this is the "equals" operator, which is represented by `==` .

Let's talk about operators in more detail.

The first is `!=` or, Not Equal, which is literally the opposite of `==`. These operators can be used when comparing any type

The next set are the comparison operators, these are `<` (less than), `>` (greater than), <=(less than or equal to), and >=(greater than or equal to). These operators are generally used for comparing numeric types, for example: Instant, Integer, Float, Local Time, and Local Date.

Next up is `LIKE` and `NOTLIKE` These operators compare whether a partial match exists, normally within a String type. We use the `%` as a wildcard.

So if we needed to find all of the Jobs with a description that begins with "Skedulo", we could use the `LIKE` operator to do so.

```yaml
query {
  jobs(filter: "Description LIKE 'Skedulo%'" ) { 
    //…query 
  }
}
```

Notice the `%` symbol after *Skedulo*. This means that any value can come after *Skedulo* and still be returned. For example, using the above query, a job with a description of *"Skedulo are scheduling the modern workforce"* would be returned.

Alternatively, if we wanted to find all jobs where the description didn't contain the word "Skedulo", we could use `NOTLIKE`. Note the % symbol before and after "Skedulo". This means that if "Skedulo" is anywhere in the description, the job will not be returned.

```yaml
query {
  jobs(filter: "Description NOTLIKE '%Skedulo%'" ) { 
    //…query 
  }
}
```
The next two operators are somewhat special, as they are designed for use within Picklist fields.

Picklist fields are essentially a list of String types, so we have `INCLUDES` and `EXCLUDES` to check if the provided String value is or isn't within the list. They behave in much the same way as `==` or `!=`

We also have `IN` and `NOTIN` that are conceptually similar, but designed for use when you are providing a list of values for the comparison. We will cover this in more detail in the next section.

The final operators are `AND` and `OR`. These are designed to allow you to combine multiple filter criteria.
For example:

```yaml
query {
  jobs(filter: "JobStatus LIKE 'Q%' AND Start < 2022-01-14T00:00:00.000Z") {
    //…query
  }
}
```
This query would return all jobs with a JobStatus beginning with "Q" **AND** that started after January 1st, 2022.

```yaml
query {
  jobs(filter: "JobStatus LIKE 'Q%' OR Start < 2022-01-14T00:00:00.000Z") {
    //…query
  }
}
```
Whereas this query would return all jobs with a JobStatus beginning with "Q" **OR** jobs that started after January 1st, 2022.

So you may have noticed that we are filtering here on **two** fields (JobStatus and Start) so now is probably a good time to talk about Lists.

## Lists
Armed with the knowledge of operators, types, and multiple fields you might now be thinking, "What if I want to get all jobs that have either 'Pending Dispatch' or 'Queued' status?"
Your first thought might be to do a query like this:

```yaml
query {
  jobs(filter: "JobStatus == 'Queued' OR JobStatus == 'Pending Dispatch'") {
    //…query
  }
}
```
This would actually work just fine, and return the records you are expecting. But what if you also want to get "Dispatched", or any number of other Status values? Your query would start to get quite long and hard to manage. Luckily, we have another option: Lists.

Remember earlier when we mentioned the `IN` and `NOTIN` operators? Well, now is their time to shine!

Using a list and the IN operator, our query becomes:
```yaml
query {
  jobs(filter: "JobStatus IN ['Queued', 'Pending Dispatch']") {
    //…query
  }
}
```
Just as easily, we could get all other Jobs by changing the query to use the `NOTIN` operator. For example:
```yaml
query {
  jobs(filter: "JobStatus NOTIN ['Queued', 'Pending Dispatch']") {
    //…query
  }
}
```
You can also use lists for other data types. For example, this query would return all jobs for the given dates:
```yaml
query {
  jobs(filter: "Start IN [2022-06-16T09:35:00.000Z, 2022-07-21T09:45:00.000Z] ") {
    //…query
  }
}
```
Of course, you can also use the `NOTIN` operator to get Jobs that are not on those dates.

Now, let's combine everything we've covered so far and talk about Multiple Fields.

## Multiple Fields
As we've learnt so far, if we want to filter on multiple different fields, we can use the `AND` operator. We have also covered using Lists to filter on multiple values within the same field.

Now, let's dig more into using these together, as well combining them with the `OR` operator.

We can, and often need to, use both the `AND` and `OR` operators when we are constructing our filters. When doing so we need to enclose each statement in brackets.

For example:
```yaml
query {
  jobs(filter: "(Name == 'Skedulo' OR Description LIKE '%sked%') AND (Locked == true)") {
    //…query
  }
}
```
This query will return all Jobs that are either named "Skedulo" **or** have "sked" in the description **and** are also locked. You can see that the two conditions - `(Name == 'Skedulo' OR Description LIKE '%sked%') AND(Locked == true)` - are enclosed in brackets and are separated by an `AND` operator.

This of course means that both of the conditions must be met in order for a record to be returned.

We can also use the `OR` operator to combine conditions like in this example:
```yaml
query {
  jobs(filter: "(JobStatus == 'Queued') OR (Locked == false)") {
    //…query
  }
} 
```

This would return all Jobs that are in the "Queued" status, OR those that are not "Locked".

As we covered in the Lists section, if we want to return Jobs in both the "Queued" and "Pending Dispatch" status that also aren't locked, we should use a list for the JobStatus, and the `AND` operator for the Locked field.
```yaml
query {
  jobs(filter: "(JobStatus IN ['Queued','Pending Dispatch']) AND (Locked == false)") {
    //…query
  }
}
```
We could even combine multiple conditions to get all Jobs that are either "Queued", "Pending Dispatch", or named "Skedulo", as well as being unlocked by a query. For example:
```yaml
query {
  jobs(filter: "(JobStatus IN ['Queued','Pending Dispatch'] OR Name == 'Skedulo' ) AND (Locked == false)") {
    //…query
  }
}
```
Now that we can handle multiple fields, let's kick it up a notch with Filtering Multiple Objects.

## Filtering Multiple Objects
The last thing we will cover in this post is filtering queries that traverse multiple objects. As we know, one of the powerful things about GraphQL is the ability to query for, and return, only the data we need in a single call.

Often, that will mean we need to get records from multiple objects. For example, what if we needed to get all of the Jobs and Job Allocations where the Job is Queued or Pending Dispatch, and the Job Allocation records that have a certain Resource assigned for a given month?

Before we get to handling all of that, let's talk quickly about Relationships.

For example, if we want to get all the Job Allocations assigned to the Resource "Michael Wheeler" but we don't have his Resource Id. Unfortunately there is no field on Job Allocation that contains the assigned Resource's name.

Of course, there is a field that looks up to a Resource, and the Resource has a name field, so in this instance, we need to look at the "Name" field on the Resource Object and we do that by using dot notation. For example:
```graphql
query {
  jobAllocations(filter: "Resource.Name == 'Michael Wheeler'") {
    edges {
      node {
        Name
        Start
        Resource {
          Name
        }
      }
    }
  }
}
```

So, we are introducing two new things here. The first one is `Resource.Name`, which is the dot notation mentioned above. We are referencing the `Name` field on the `Resource` Object. If you've written any SQL before, this likely is quite familiar to you.

The second one is returning details from the `Resource` object, but including it in the same way we would include another field.
This would return something like:

```graphql
{
  "data": {
    "jobAllocations": {
      "edges": [{
        "node": {
          "Name": "JA-0001",
          "Start": "2022-06-16T09:35:00.000Z",
          "Resource": {
            "Name": "Michael Wheeler"
          }
        }
      }]
    }
  }
}
```
The cool thing here is that we can add filters at any level, so, armed with this knowledge, we can achieve what we set out to do at the start of this section.

We will start with the query and then explain what is happening.
```graphql
query {
  jobs(filter: "(JobStatus IN ['Queued','Pending Dispatch']) AND (Start >= 2022-06-01T00:00:00.000Z AND Start <= 2022-06-30T11:59:59.999Z)") {
    edges {
      node {
        Name
        JobStatus
        Start
        JobAllocations(filter: "Resource.Name == 'Michael Wheeler'") {
          Name
          Resource {
            Name
          }
        }
      }
    }
  }
}
```
The first filter should look fairly familiar. We are looking for Jobs that are "Queued" or "Pending Dispatch" with a list. We also have an `AND` condition to check that the Start is after 01/06/2022 AND before 30/06/2022.

After we have selected some fields (`Name`, `JobStatus`, `Start`), we select the relationship to `JobAllocations`. We can simply filter this the same way as we do in the parent query (`Jobs`). Within that query we can also select the fields from `JobAllocations` and `Resource` we wish to return.
The resulting output would be something like:
```graphql
{
  "data": {
    "jobs": {
      "edges": [{
        "node": {
          "Name": "JOB-0001",
          "JobStatus": "Pending Dispatch",
          "Start": "2022-06-16T09:35:00.000Z",
          "JobAllocations": [{
            "Name": "JA-0001",
            "Resource": {
              "Name": "Michael Wheeler"
            }
          }]
        }
      },
      {
        "node": {
          "Name": "JOB-0035",
          "JobStatus": "Queued",
          "Start": "2022-06-02T09:35:00.000Z",
          "JobAllocations": []
        }
      }]
    }
  }
}
```
We can see that both Job records match the first filter, and the first record also has a `JobAllocation` record matching the second filter.

The second record, "JOB-0035" doesn't have any `JobAllocations` that match the filter so an empty list is returned.

As you can see, we used two filters and returned data from three different objects. Within our filters, we used the following Operators: "equals", "less than or equal to", "greater than or equal to", "AND", and "IN". We also used a list and both the String and Instant data types.

## Conclusion
Now you should have all the tools you need to master your GraphQL query filters,and get only the records you need! Stay tuned for part three in our GraphQL series, where we will experiment with record changes, aka data mutation.
As always, we'd love to hear about what you're building on the Skedulo Pulse Platform so please reach out to us on Twitter @SkeduloDevs or LinkedIn!

## References
* [Skedulo Developer Docs - GraphQL Queries](https://developer.skedulo.com/developer-guides/deskless-productivity-cloud/interacting-with-apis/graphql-queries/#literals)
* [Skedulo Developer Blog - Quick and easy GraphQL exploration in Skedulo](https://developer.skedulo.com/blog/quick-and-easy-graphql-exploration-in-skedulo/)

---

---
url: "https://developer.skedulo.com/blog/graphql-101-part-3-efficient-data-mutation-and-graphql-aliases"
type: "blogPost"
title: "GraphQL 101, Part 3: Efficient data mutation and Aliases"
author: "Sophie Wheeler"
date: "2023-01-18"
---

# GraphQL 101, Part 3: Efficient data mutation and Aliases

Welcome to the third part in this series on using GraphQL with the Skedulo Pulse Platform! We’ve covered [accessing data](https://developer.skedulo.com/blog/graphql-101-part-1-accessing-data-on-the-pulse-platform/) and [using filters](https://developer.skedulo.com/blog/graphql-101-part-2-elastic-query-language-eql-filters/), so now it’s time to cover mutation and aliases.

So, what on earth do we mean by mutation and aliases?

**Mutation** is simply changing (or mutating) data using GraphQL. That means we use mutation queries to create, update, and delete records in the Skedulo Pulse Platform.

What about aliases? Well, **aliases** allow us to perform multiple actions in one call. We give each mutation an alias (e.g job0, job1, etc) and the Pulse Platform will perform them and return the result for each one. Using aliases improves efficiency versus doing each action in a separate call. They also allow us to insert multiple related records in a single call.

For example, if we want to create both a Job and Job Allocation, we’d normally need to insert the Job first, get its UID, and then use that to insert the Job Allocation. With aliases we can do this in a single call.

We’ll talk more about aliases later. For now, let’s begin with some [mutations](https://developer.skedulo.com/developer-guides/deskless-productivity-cloud/interacting-with-apis/graphql-mutations/)!

## Creating Records

Creating records is one of the most common mutations you will perform on the Pulse Platform, and it is very straightforward.

Here is an example of how to create a Job record:
```graphql
    mutation createJob {
      schema {
        insertJobs(input: {
          RegionId: "0003ef0d-2e08-4e37-8b91-c35ccc36ad84"
          Start: "2023-01-01T08:00:00+00:00"
          End: "2023-01-01T09:30:00+00:00"
          Duration: 90
          Address: "1 Small Street, Bristol"
          Description: "New Job"
          Type: "Maintenance"
          Urgency: "Normal"
        })
      }
    }
```
As you can see, we use the insertJobs operation with an input containing the fields and values we want to set.

You’ll also note that we’ve called this mutation createJob. This name can be set to anything you’d like, so choose something that makes sense for what you’re doing.

Each object type has its own ‘insert’ operation, for example insertAccounts for Accounts, insertContacts for Contacts, and so on.

We can use introspection queries to get these operations, or, if you’re using an API client like insomnia, it can do this for you. We will be covering introspection in more detail in a future post, but I also touched on it in my earlier [post on GraphQL basics](https://developer.skedulo.com/blog/quick-and-easy-graphql-exploration-in-skedulo/).

In this mutation, you can see we have various fields with various data types (more on data types in [part two of this series](https://developer.skedulo.com/blog/graphql-101-part-2-elastic-query-language-eql-filters/)). You’ll notice a new one though: `UID`. This stands for ‘unique identifier’ and is simply the ID of a record.

`RegionId` is a Relationship (aka Lookup) field, so we need to provide a `UID` of a ’Region’ record in order to insert this Job. We could get this by performing a query first.

When we perform this mutation, we get the following result back:
```yaml
    {
      "data": {
        "schema": {
          "insertJobs": "00145503-d82e-458a-b6df-0dd93bb08c10"
        }
      }
    }
```
We are provided with the `UID` of the record we just created, so we could use this in subsequent calls within our application.

You might be thinking to yourself, well that is great but what if I want to create two related records at the same time, for example Job and Job Allocation? Well fear not, we will be covering just that in the section on aliases and Related Records.

You can also use aliases to create multiple records in the same call!

Now that we know how to create records, let’s move on to updating!

## Updating Records

Updating records is another very important and very common use case for mutations, and it is very similar to creating.

Following on from our job example above, let’s say we want to change the Job’s type and Urgency:
```graphql
    mutation updateJob {
      schema {
        updateJobs(input: {
          UID: "00145503-d82e-458a-b6df-0dd93bb08c10"
          Type: "Installation"
          Urgency: "Urgent"
        })
      }
    }
```
The main difference this time, is we are specifying the UID of the Job and using the updateJobs operation rather than insertJobs.

We even get a similar response back from the Pulse Platform, but note that it tells us it was an update operation rather than an insert.
```yaml
    {
      "data": {
        "schema": {
          "updateJobs": "00145503-d82e-458a-b6df-0dd93bb08c10"
        }
      }
    }
```
Now that we can create and update single records, let’s talk about how to get rid of them!

## Deleting Records

What if we don’t need the Job we’ve just created and updated? Well, as you can probably guess by now we use the deleteJobs operation.

Here is an example of deleting a Job.
```graphql
    mutation deleteJob {
      schema {
        deleteJobs(UID: "00145503-d82e-458a-b6df-0dd93bb08c10")
      }
    }
```
You will notice it differs from the previous operations, where instead of an input containing all of the fields we wish to update, we simply provide a `UID`.

Again we get back a similar response, including the `UID` of the record we just deleted. Of course this `UID` is now no longer valid, but it allows us to validate that the record we requested to be deleted was actually deleted.
```yaml
    {
      "data": {
        "schema": {
          "deleteJobs": "00145503-d82e-458a-b6df-0dd93bb08c10"
        }
      }
    }
```
We’ve now covered all of the basics: creating, updating, and deleting single records. So let’s move on to how to use aliases to perform mutations on multiple records in a single call.

## Using Aliases

In all of the previous examples, we were performing a mutation on a single record. This is useful if you are building a simple form or similar, where you may only need to handle one record at a time.

But what if you’re building something more complex? Of course, you could make multiple calls, but this isn’t very efficient.

Luckily, GraphQL has you covered with [aliases](https://developer.skedulo.com/developer-guides/deskless-productivity-cloud/interacting-with-apis/graphql-aliases/). We can use these to perform multiple mutations in a single call.

Let’s take a look at how this works.
```graphql
    mutation updateMultipleJobs {
      schema {
        job0: updateJobs(input: {
          UID: "00146e2f-c8db-4593-adc2-084abc866785"
          Duration: 60
        })
        job1: updateJobs(input: {
          UID: "0014586b-3fa3-4f74-a5b1-a47f22a4b3a2"
          Duration: 60
        })
        job2: updateJobs(input: {
          UID: "001419d8-ea58-40d8-8fc9-7e5e114af0e0"
          Duration: 60
        })
      }
    }
```
This mutation looks quite similar to the previous updateJobs example, but notice how under the schema key, we have now got multiple updateJobs operations, each one with its own key (e.g job0, job1).

These keys are aliases, and they allow us to perform multiple actions in a single mutation. We have to provide the keys to the GraphQL API, and they must be unique to that transaction. They will be returned by the Pulse Platform when making the API call.

For example, we’d get this response for the above mutation:

 ```yaml
    {
      "data": {
        "schema": {
          "job0": "00146e2f-c8db-4593-adc2-084abc866785",
          "job1": "0014586b-3fa3-4f74-a5b1-a47f22a4b3a2",
          "job2": "001419d8-ea58-40d8-8fc9-7e5e114af0e0"
        }
      }
    }
```
As you can see, we get a map of our provided alias to the record’s `UID`. Just like in the single calls we covered earlier, we can use these returned `UID’s` to perform further actions.

The cool thing about aliases is that we can perform different actions in a single call. Taking a look at the below example, we are inserting a job, updating two jobs, and deleting one.
```graphql
    mutation createUpdateDeleteJobs {
      schema {
        job0: updateJobs(input: {
          UID: "00146638-4614-41e5-8312-e241d1871bea"
          Description: "updated from a single call"
        })
        job1: updateJobs(input: {
          UID: "00149d62-2ce9-40ff-a705-0db466225f92"
          Description: "me too!"
        })
          job2: insertJobs(input: {
          RegionId: "0003ef0d-2e08-4e37-8b91-c35ccc36ad84"
          Start: "2023-01-01T08:00:00+00:00"
          End: "2023-01-01T09:30:00+00:00"
          Duration: 90
          Address: "1 Small Street, Bristol"
          Description: "i was also created!"
          Type: "Maintenance"
          Urgency: "Normal"
        })
         job3: deleteJobs(UID: "00146a22-c4c2-4d1b-b70a-31cdb7949ba3")
      }
    }
```
When we make this call, we get the following response back from the Pulse Platform:
```yaml
    {
      "data": {
        "schema": {
          "job0": "00146638-4614-41e5-8312-e241d1871bea",
          "job1": "00149d62-2ce9-40ff-a705-0db466225f92",
          "job2": "001451bc-454d-41ab-ae24-2b3a75c628ff",
          "job3": "00146a22-c4c2-4d1b-b70a-31cdb7949ba3"
        }
      }
    }
```
This tells us that we successfully performed three different operations on four records. Neat, huh?

This leads us to the obvious question: “What if I want to create multiple **related** records in a single call? Well, GraphQL has got your back! We can use aliases and idAlias to do just that.

## Aliases and Related Records

Now that we’ve got all the pieces to insert, create, or delete records, and perform multiple operations in one call, let’s link it all together (pun intended) to create multiple related records.

The final piece of the puzzle is idAlias. This is a value we pass to the operation (e.g insertJobs) giving GraphQL a way to reference the record we intend to create before it is created.

We then use that within the same mutation to tell the related records which of the newly created records they should be related to.

Looking at the example below:
```graphql
    mutation createJobsWithAllocations {
      schema {
        job0: insertJobs(input: {
          RegionId: "0003ef0d-2e08-4e37-8b91-c35ccc36ad84"
          Start: "2023-01-01T08:00:00+00:00"
          End: "2023-01-01T09:30:00+00:00"
          Duration: 90
          Address: "1 Small St, Bristol"
          Description: "fun with idAlias"
        } idAlias: "NEW_JOB_ID0")
       ja0: insertJobAllocations(input: {
          ResourceId: "0005f801-7a9c-40fe-8933-7886e0441e84"
          JobId: "NEW_JOB_ID0"
          Status: "Pending Dispatch"
        })
      }
    }
```
This looks a lot like what we did in the previous section, but with one very important difference.

We provide both an input and idAl`ias to the operation. As you can see, we’ve specified `idAlias` as “NEW_JOB_ID0” in our `insertJobs` operation. Then, in our insert `JobAllocations` operation, rather than providing a UID in the “JobID” field (like we’re doing for “ResourceId”), we’re providing that exact same idAlias.

This tells GraphQL how to link up the records we’re creating, allowing us to insert both of them in a single call. It really is that simple!

We get the following back from the Pulse Platform, telling us that both our Job and Job Allocation records have been successfully created:
```yaml
    {
      "data": {
        "schema": {
          "job0": "001433c3-0729-437f-998c-9384a5c6ecd3",
          "ja0": "0018972f-ac70-4598-ad40-2fca8b88ba09"
        }
      }
    }
```
Just like with aliases, we need to generate our own idAlias values, and they must be unique within a transaction.

## Conclusion

We’ve now covered how to perform data mutations, and make them as efficient as possible by using aliases and even being able to insert multiple related records in a single call. In part four, we will cover working at scale using batch processing!

As always, we’d love to hear about what you’re building on the Skedulo Pulse Platform so please reach out to us on Twitter [@SkeduloDevs](https://twitter.com/SkeduloDevs) or [LinkedIn](https://www.linkedin.com/showcase/skedulodevs/)!

## References

* [Skedulo Developer Docs — GraphQL Queries](https://developer.skedulo.com/developer-guides/deskless-productivity-cloud/interacting-with-apis/graphql-queries/#literals)
* [Skedulo Developer Docs — Mutations](https://developer.skedulo.com/developer-guides/deskless-productivity-cloud/interacting-with-apis/graphql-mutations/)
* [Skedulo Developer Docs — Aliases](https://developer.skedulo.com/developer-guides/deskless-productivity-cloud/interacting-with-apis/graphql-aliases/)
* [Skedulo Developer Blog — Quick and easy GraphQL exploration in Skedulo](https://developer.skedulo.com/blog/quick-and-easy-graphql-exploration-in-skedulo/)
* [Skedulo Developer Blog — Accessing Data on the Pulse Platform](https://developer.skedulo.com/blog/graphql-101-part-1-accessing-data-on-the-pulse-platform/)
* [Skedulo Developer Blog — GraphQL Part 2 — Elastic Query Language (EQL) Filters](https://developer.skedulo.com/blog/graphql-101-part-2-elastic-query-language-eql-filters/)

---

---
url: "https://developer.skedulo.com/blog/graphql-101-part-4-a-look-inwards-graphql-introspection"
type: "blogPost"
title: "GraphQL 101, Part 4: A look inwards, GraphQL Introspection"
author: "Sophie Wheeler"
date: "2023-02-02"
---

# GraphQL 101, Part 4: A look inwards, GraphQL Introspection

It’s time for Part 4 of our GraphQL 101 Series! If you’ve missed them you can check them out here:

* [Part 1](https://developer.skedulo.com/blog/graphql-101-part-1-accessing-data-on-the-pulse-platform/) we covered accessing data.

* [Part 2](https://developer.skedulo.com/blog/graphql-101-part-2-elastic-query-language-eql-filters/) was using filters.

* [Part 3](https://developer.skedulo.com/blog/graphql-101-part-3-efficient-data-mutation-and-graphql-aliases/) was all about mutation and aliases.

Now, it’s time to get introspective!

As I touched on way back in the [Part 1](https://developer.skedulo.com/blog/graphql-101-part-1-accessing-data-on-the-pulse-platform/) of this series, GraphQL has the concept of introspection. This means that we can ask the GraphQL API to tell us about itself.

While having up-to-date API documentation is very important and even a necessity to allow developers to be productive, having an API that can tell you about itself is even better.

There are two main ways to get information about what the Pulse Platform’s GraphQL API can do; introspection queries and the schema endpoint. Once we’ve learnt about these ways of running introspection queries we’ll also briefly cover tooling that can automate this for you.

## Introspection Queries

[Introspection](https://graphql.org/learn/introspection/) queries are a lot like “normal” data queries, however, rather than returning records they return information about the GraphQL API itself and what it can do. This is particularly useful when trying to understand what you can query for.

Let’s pretend we know nothing about Skedulo but want to find some data. Before we do anything else, we need to know what objects exist for us to query. To find this out, we can run a query like the example below to get the available schema types (aka. objects):
```graphql
    {
      __schema {
        types {
          name
          kind
        }
      }
    }
```
You can see that this is very similar to a data query, but instead of asking for records, we’re asking for the different schema types with the name and kind fields requested.

This would return a response like;
```yaml
    {
      "data": {
        "__schema": {
          "types": [
            {
              "name": "Jobs",
              "kind": "OBJECT"
            },
            {
              "name": "Accounts",
              "kind": "OBJECT"
            }
            //…more types
          ]
        }
      }
    }
```
Now that we’ve got this information, we can further dig into the objects. How about we take a look at the Jobs object in more detail?

We can perform another query to get a list of all of the fields on the Jobs object. You can see that we’re filtering by providing a type name, and that we’re also querying the fields, returning their name.
```graphql
    {
      __type(name: "Jobs") {
        name
        fields {
          name
        }
      }
    }
```
You’ll notice this query is a little bit different, as we’re now querying the __type object, rather than the __schema object.

Making this query, we’d get a result back like this;
```yaml
    {
      "data": {
        "__type": {
          "name": "Jobs",
          "fields": [
            {
              "name": "AbortReason"
            },
            {
              "name": "Account"
            },
            {
              "name": "AccountId"
            }
            //…more fields
          ]
        }
      }
    }
```
Finally, let’s dig a little deeper into the field information we get back. What if we want to know what the type is for each field?

As we learnt in Part 1, we can dig deeper by asking for related information in the same query. For example:
```graphql
    {
      __type(name: "Jobs") {
        name
        fields {
          name
          type {
            name
          }
        }
      }
    }
```
This would return a result like:
```yaml
    {
      "data": {
        "__type": {
          "name": "Jobs",
          "fields": [
            {
              "name": "AbortReason",
              "type": {
                "name": "String"
              }
            },
            {
              "name": "Account",
              "type": {
                "name": "Accounts"
              }
            },
            {
              "name": "AccountId",
              "type": {
                "name": "ID"
              }
            },
            //…more fields
          ]
        }
      }
    }
```
You can see here we have some familiar types, such as String and ID, but we also have a type of Accounts. This simply tells us that the Account field is a relationship to the Accounts object, and thus the object name is its type.

Now, let’s take a look at the Schema Endpoint.

## Schema Endpoint

Introspection queries are great, but what if we want to get all of the information at once? Well, that is where the Schema endpoint comes in.

If we make a GET request to /graphql/schema endpoint, we will simply get back the entire GraphQL schema for our Skedulo tenant.

You’ll get back a response in [GraphQL Schema Definition Language](https://graphql.org/learn/schema/), which will look something like this:

```yaml    
type Jobs {
      AbortReason: String
      Account: Accounts
      AccountId: ID
      ActualEnd: Instant
      ActualStart: Instant
      Address: String
      AutoSchedule: Boolean!
      CanBeDeclined: Boolean!
      CompletionNotes: String
      Contact: Contacts
      //…more fields
    }
    
    type Accounts {
      BillingCity: String
      BillingPostalCode: String
      BillingState: String
      BillingStreet: String
      //…more fields
    }
    //…more types
```

As you can see, these responses tell us about the objects and what fields they contain and their types in a very similar way to running the queries in the previous section.

So this is great, but what can we do with it?

If you want a broader picture of your tenant’s entire data model, using the schema endpoint can be a great way to get this.

In fact, the neat autocomplete functionality provided by your API tooling often uses this endpoint as its data source, along with other tools that use SDL to [visualize](https://ivangoncharov.github.io/graphql-voyager/), or otherwise inspect, GraphQL Schemas.

## Tooling

As you can see, introspection is super useful for finding out about what GraphQL can do. However, it becomes an even more powerful tool for exploring your schema and data when it’s combined with API tools such as Insomnia or Postman.

For example, let’s take a look at using Insomnia:

We need to create a new GraphQL request and provide the GraphQL endpoint for the Skedulo Pulse Platform, which is https://<instance>/graphql/graphql

You will also need to provide an authentication token. This is the same kind that you use for making any other call to Skedulo.

![](https://cdn-images-1.medium.com/max/2664/0*XaJrzd-VWxJvSlHn)

To do this, we select Auth and then Bearer. In the Prefix box we enter ‘Bearer’ and we put our token in the ‘Token’ box.

When we do this, Insomnia will automatically try and fetch the schema by performing introspection queries.

You should now see a ‘schema’ button in the body box., Click ‘Show Documentation’ to open a window to the side that allows you to browse the GraphQL schema.

![](https://cdn-images-1.medium.com/max/3200/0*XC3Me8wdM5n_7ReJ)

The other useful functionality you get is autocomplete. Insomnia will begin suggesting objects and fields as you type, which can make it easier for you to construct queries and mutations when experimenting or browsing the schema.

![](https://cdn-images-1.medium.com/max/2000/0*BBkRKTW68J7lHqEN)

If you prefer to use Postman, it also supports this and they provide further information [here](https://learning.postman.com/docs/sending-requests/graphql/graphql-http/). Configuring requests in Postman is largely the same as in Insomnia.

If you just want to experiment without needing to set anything up, I covered how you can use the inbuilt GraphiQL tool from within the Pulse Platform in my post [here](https://developer.skedulo.com/blog/quick-and-easy-graphql-exploration-in-skedulo/).

## Conclusion

Now you know how you can use GraphQL to tell you about GraphQL through introspection! I hope you’ll find this useful in your exploration of the APIs and it makes building applications on the Pulse Platform even easier!

Stay tuned for the final part in the series, where I take you through some extra tips and tricks to know when using GraphQL with the Skedulo Pulse Platform.

As always, we’d love to hear about what you’re building so please reach out to us on Twitter [@SkeduloDevs](https://twitter.com/SkeduloDevs) or [LinkedIn](https://www.linkedin.com/showcase/skedulo-devs/)!

## References

* [Skedulo Developer Blog — Accessing Data on the Pulse Platform](https://developer.skedulo.com/blog/graphql-101-part-1-accessing-data-on-the-pulse-platform/)
* [Skedulo Developer Documentation — Use GraphQL Schema](https://developer.skedulo.com/developer-guides/integration-and-automation/api-overview/graphql/#graphql-schema)
* [GraphQL.org — Introspection](https://graphql.org/learn/introspection/)
* [GraphQL.org — Schemas](https://graphql.org/learn/schema/)
* [GraphQL Voyager](https://ivangoncharov.github.io/graphql-voyager/)

---

---
url: "https://developer.skedulo.com/blog/graphql-101-part-5-tips-and-tricks"
type: "blogPost"
title: "GraphQL 101, Part 5: Tips and Tricks"
author: "Sophie Wheeler"
date: "2023-03-06"
---

# GraphQL 101, Part 5: Tips and Tricks

Welcome to the final part in our GraphQL 101 Series! If you’ve missed any of the earlier parts in this series, you can check them all out by clicking [here](https://developer.skedulo.com/blog/category/graphql-101/).

Today, we’re going to cover three topics to help you level up your GraphQL knowledge: upserting, batch requests, and visualisation.

Ready? Let’s go!

## Upserting

As we covered in part four, you can use idAlias in order to insert multiple related records at the same time, but what if you need to do a similar operation after records already exist?

Well, we can do an upsert! Which, as the name implies, is an operation that does either an insert, or an update depending on whether the record exists or not. The good thing about an upsert is that you can match records either on UID, or a custom “External Id”.

In order to make use of this great feature, there are a couple of things we need to do first:

* Create a custom field to use as an External ID on the objects we want to upsert.
* Enable tracking on that custom field.

Those steps are covered in detail [here](https://developer.skedulo.com/developer-guides/deskless-productivity-cloud/interacting-with-apis/graphql-upserts/), so once you’ve completed them let’s get into how to perform the upsert request.

These are made in the exact same way as any other GraphQL request we’ve covered so far but we call upsert<Object> rather than insert<Object> or update<Object>.

Here is an example of an upsert request:
```graphQL
    mutation upsertNewClientUpsert {
      schema {
        upsertCustomExternalObject(input: {
          Name: "Client Case Test"
          ExternalId: "ClientCaseNumber_ID01"
        }, keyField: "ExternalId")
      }
    }
```
If you’ve read the rest of the series, no doubt this is going to look very familiar. However, you can see we’ve set the ExternalId field to “ClientCaseNumber_ID01” and we’ve specified it as the keyField.

This request would result in a response similar to the following:
```yaml
    {
      "data": {
        "schema": {
          "upsertCustomExternalObject": "042ad3bb-2c50-4fdf-b6e1-e2d25cdfd403"
        } 
      }
    }
```
The upsert request tells the Pulse Platform to look for a record with the ExternalID set to “ClientCaseNumber_ID01” and if it finds one, perform an update with the data in the request. If no record is found, it will perform an insert instead.

So now, we can make the following request:
```graphql
    mutation upsertNewClientUpsert {
     schema {
      upsertCustomExternalObject(input: {
       Name: "Change name"
       ExternalId: "ClientCaseNumber_ID01"
      }, keyField: "ExternalId")
     }
    }
```
And we will get the same response as earlier.

However, if we then get the record’s details by its ID as in the below example:
```graphql
    {
      customExternalObjectById(UID: "042ad3bb-2c50-4fdf-b6e1-e2d25cdfd403") {
        UID,
        Name,
        ExternalId
      }
    }
```
We will get the following as a response:
```yaml
    {
      "data": {
        "customExternalObjectById": {
          "UID": "042ad3bb-2c50-4fdf-b6e1-e2d25cdfd403",
          "Name": "Change name",
          "ExternalId": "ClientCaseNumber_ID01"
        }
      }
    }
```
As you can see, this means we didn’t need to know the UID of the record in order to make changes to it, which can be super helpful in data migration cases. For example, when you’ve got related records from another system that have IDs already and you wish to import them into Skedulo.

## Batch Requests

Now, let’s talk about batch requests. As we learnt before, we can do multiple requests in a single call with aliasing and idAlias, and these are great for doing multiple inserts or updates of related data.

But what about if we want to do a large number of requests, or different kinds of requests (e.g. get some data, and store some data)?

Well, it’s time for a batch request. These are slightly different to the requests we’ve seen before. The first difference is that they need to be sent to the batch endpoint: http://api.skedulo.com/graphql/graphql/batch

The next difference is that they are sent in JSON format (which is also how other GraphQL requests are sent, it’s just normally our library or client formats them for us).

So, let’s take a look at an example request, where we sent two queries, one for regions and one for jobs):
```graphQL
    [
      {
        "query": "query { regions { edges { node { UID Name }}}}"
      },
      {
        "query": "query { jobs { edges { node { UID Name }}}}"
      }
    ]
```
As you can see, these look similar but are within the query key of our JSON object, which is within an array.

What we get back is also in the form of an array, but the content will look very similar to what you’re used to with other queries.
```yaml
    [
      {
        "data": {
          "regions": {
            "edges": [
              {
                "node": {
                  "UID": "0003ef0d-2e08-4e37-8b91-c35ccc36ad84",
                  "Name": "South West England"
                }
              }
            ]
          }
        }
      },
      {
        "data": {
          "jobs": {
            "edges": [
              {
                "node": {
                  "UID": "00142b03-37c0-435c-9ce0-a35bd80fc8d6",
                  "Name": "JOB-0001"
                }
              },
              {
                "node": {
                  "UID": "00149f20-7f8f-4f1f-b3fa-0696687f4504",
                  "Name": "JOB-0034"
                }
              }
              //… more jobs
            ]
          }
        }
      }
    ]
```
As you can see, each query result is contained in a data object as normal, and these are returned inside an array.

If, for example, you need to do multiple queries, getting lots of data from different objects on page load batching can be a much more efficient way to do this.

If you want to learn more about how batching works at a technical level, check out this post on the [apollo blog](https://www.apollographql.com/blog/apollo-client/performance/query-batching/).

## Visualisation

The last tip in this series is visualisation. As you know, we can use introspection in order to find out more about what is available within Skedulo, but sometimes that can be difficult for us to parse.

So, what if we want to generate a visualisation of our data model? Well, lucky for us there are GraphQL visualisation tools that will do this for us!

I’m going to talk about two here, one free and one paid.

The first one is the great open source tool, [GraphQL Voyager](https://github.com/IvanGoncharov/graphql-voyager). This can be run in two ways, either locally or from within Skedulo by deploying it as a web extension!

If you’d like to simply run it locally, check out the [example here.](https://github.com/sophienyaa/GraphQLVoyagerHTML) Note: you will need to replace <token here> on line 50 of the HTML with your API token in order for it to work!

Once you have it running you can use it to visualise part, or all of your GraphQL schema. You can click each object, or use the sidebar to search and focus on that specific object and its fields and relationships!

![](https://cdn-images-1.medium.com/max/3200/0*povF8eBKXZ35VKnB)

It is a very handy and powerful tool for getting a better understanding of your data model!

The second one is GraphQL Editor, this is a web based tool that you can use to visualise any GraphQL schema, including that of the Skedulo Pulse Platform. It has a 14 day trial, and they cover how to use it to visualise GraphQL schema in their [blog post here.](https://blog.graphqleditor.com/visualize-your-schema) This tool also has many other features and doesn’t require installation.

## Conclusion

That’s it for our GraphQL 101 series. I hope that you’ve found it useful and can take the tips and tricks from this post, as well as the previous posts in the series to build amazing experiences on the Skedulo Pulse Platform!

If you want to learn even more about GraphQL, the [“How to GraphQL”](https://www.howtographql.com/) series is an excellent place to start!

As always, we’d love to hear about what you’re building so please reach out to us on Twitter [@SkeduloDevs](https://twitter.com/SkeduloDevs) or [LinkedIn](https://www.linkedin.com/showcase/skedulodevs/)!

## References

* [Skedulo Developer Blog — GraphQL](https://developer.skedulo.com/blog/category/graphql-101/)
* [Skedulo Developer Docs — Upsert](https://developer.skedulo.com/developer-guides/deskless-productivity-cloud/interacting-with-apis/graphql-upserts/)
* [Skedulo API Docs — GraphQL Batch](https://developer.skedulo.com/skedulo-api/#tag/GraphQL/operation/graphqlBatch)
* [Apollo Blog — Query Batching](https://www.apollographql.com/blog/apollo-client/performance/query-batching/)
* [Github — GraphQL Voyager HTML](https://github.com/sophienyaa/GraphQLVoyagerHTML)
* [How to GraphQL — GraphQL Foundation](https://www.howtographql.com/)

---

---
url: "https://developer.skedulo.com/blog/how-to-enable-change-history-on-any-record-page"
type: "blogPost"
title: "How to enable change history on any record page"
author: "Scott Gassmann"
date: "2023-01-27"
---

# How to enable change history on any record page

In the recent [post](https://developer.skedulo.com/blog/change-history-is-now-generally-available/) , we announced the GA release of [Change History](https://docs.skedulo.com/user-guides/admin-and-config/admin-and-config-webapp/view-change-history/) for the [Skedulo Pulse Platform](https://www.skedulo.com/product/platform/). Highlighted in the post was how Change History is enabled for Job, Asset, and Resource records ‘out of the box’. But what if you want to roll out Change History for additional standard or custom objects? Well, with Record Pages, we can do just that, and in this post, I’m going to show you how! 🥳

There are a number of reasons why it might be worth considering enabling Change History on a record page beyond Job, Resources, and Asset records. For example:

* **Relying on system audit fields isn’t always enough.** System fields such as Created By or Last Modified By will absolutely give you the record creator and who last modified the record, but that’s where they stop. They don’t tell you explicitly what fields were changed and, more over, what the data changed from and to. System Administrators do have access to Change History via the Settings menu, however, additional users often need to see this information too, and having it available directly on the record makes it incredibly convenient.

* **Regulated industries**, such as those within health markets (but certainly not limited to), are often required to add additional layers of security and tracking to ensure access to sensitive data (e.g. PII / SPII) is both appropriate to the user and that the changes to data are auditable. This can often present as requirements from the business to display Change History data to users across your organisation.

* **Automations & Integrations** are common amongst enterprise SaaS applications, and Skedulo is no different. There are often upstream, and downstream applications and/or workflows involved in scheduling deskless workforces and having visibility of data changes is often important to users in order to validate connected systems are functioning and processing updates correctly.

* **Cross-functional teams.** It’s common that data is accessible and editable by a number of teams within organisations. This often results in many users making changes to data. Having the additional context of who made the change and when can accelerate users when servicing customers and working through potential errors or data quality initiatives.

Don’t be too concerned if your reason is not on the list above, there are a myriad of reasons why you might elect to enable Change History across multiple objects within your Skedulo Environment. The most important thing is to just take a moment to consider *if* you should, *when* you should, and *where* you should.

![](https://cdn-images-1.medium.com/max/2548/0*NZmB9MIO6qM6yOBM)

## Enabling Change History on any record page

*If you already have a custom record page created and just want to add the history tab, feel free to jump to the next section.*

If your object is currently using the system-generated record page (this will be the case unless you’ve already created a custom record page for the object), go ahead and create a custom record page. Strictly speaking, for custom objects, you can simply override the existing ‘record-view’ page; however, as a best practice, I prefer to create a fresh record page that keeps the original version of the record-view page intact. You can learn more about overriding the default ‘record-view’ page [here](https://developer.skedulo.com/developer-guides/customize-and-extend/create-and-customize-pages/overriding-pages-example/configure-view-page/).

In this example, I’m going to create a custom ‘account-view’ record page. To do this, I first have to head to the settings menu, which is accessible by **clicking your avatar** in the top right corner and choosing ‘**Settings**’ from the dropdown menu.

In the settings menu (the bar on the left-hand), select ‘**Platform Settings**’ under the ‘Developer tools’ heading. You will then be able to see the list of all Pages within your environment. From here, click on “Create New” in the top right-hand corner to create a new page.

![](https://cdn-images-1.medium.com/max/2800/0*skdrBZgTLfLvZuwV)

The below example will replicate the system-generated record-view page, with one key difference. Due to it being a custom record page, we are now able to create additional tabs. As this is a standard object, you can copy and paste the below example into a new page within your Skedulo environment without having to build an ‘Accounts’ object to replicate this functionality.

```yaml

    {% extends "base-recordview" %}
    {% set resource_name="Accounts" %}
    
    {% block header %}
      <sp-split-row>
        <div slot="left">
          <sp-header style="margin-bottom: 0">
            <sp-column>
              <sp-heading size="2xl" level="1">
                {% block title %}
                  <platform-component package-name="recordpage" name="RecordDefiner"></platform-component>
                {% endblock title %}
              </sp-heading>
                <sp-row style="--sp-row-spacing: var(--sp-spacing-3); color: var(--sp-color-neutral-600);">
                  <sp-icon icon="details"></sp-icon>
                  <span>Account record</span>
                </sp-row>
              </sp-column>
            </sp-header>
        </div>
        <div slot="right" style="text-align: right;">
          <sp-header style="margin-bottom: 0">
            <sp-heading>
           
              <platform-component package-name="recordpage" name="RecordTemplate" template="{{ '<sp-link href="{{_.host.buildPlatformUrl("accounts-edit?uid=" + _.queryParams.uid )}}"><sp-button leading-icon="edit" button-type="primary" compact="">Edit</sp-button></sp-link>' }}"></platform-component>
            </sp-heading>
          </sp-header>
        </div>
      </sp-split-row>
    {% endblock header %}
    
    {% block body %}
         <sp-tabs selected="{{_.queryParams.selectedtab}}">
      <platform-component package-name="nav" name="ReflectiveTabs" search-param="selectedtab"
      tabs="{{  [
                  {"name":"details","label":"Details"},
                  {"name":"system-info","label":"System Info"}
                ]   |dump}}">
       </platform-component>
     
            <sp-tab-panel name="details">
                <sp-responsive-columns>
                    <div>
                        <platform-component package-name="recordpage" name="RecordFields" include-fields="{{ include_fields }}" exclude-fields="{{ exclude_fields }}" exclude-system-fields></platform-component>
                    </div>
                </sp-responsive-columns>
            </sp-tab-panel>
            <sp-tab-panel name="system-info">
                <sp-responsive-columns>
                    <div>
                        <platform-component package-name="recordpage" name="RecordFields" only-system-fields></platform-component>
                    </div>
                </sp-responsive-columns>
            </sp-tab-panel>
    
        </sp-tabs>
    {% endblock body %}
```    
## Add the history tab

Now for the magic! We need to make two fairly minor adjustments to the custom record page to expose the list of changes that have been performed to the record over time, and because that’s quite a long tab name, I’m going to keep it simple and call it `History`.

## Add a custom tab

Within the existing `<sp-tabs>`component, we are going to add the below line, this will establish the tab (albeit with no content).


```yaml
{"name":"history","label":"History"}
```


The `<sp-tabs>` component should now look like this:

``` yaml
{% block body %}
  <sp-tabs selected="{{_.queryParams.selectedtab}}">
    <platform-component 
      package-name="nav" 
      name="ReflectiveTabs" 
      search-param="selectedtab"
      tabs="{{  [
                {"name":"details","label":"Details"},
                {"name":"history","label":"History"},
                {"name":"system-info","label":"System Info"}                                           
                ]|dump}}">
</platform-component> 
```

The tab should also now be visible on your record page when you refresh. In the next step, we will add the list view component that will display the changes that have been made to the record.

## Add the history list component

Add the `<sp-tab-panel>` component at the end of your record page (this should be just above the `{% endblock body %}` element). The ordering of the `<sp-tab-panels>` doesn’t change the ordering of the tabs presented on the record page (although keeping them in the same order can generally be helpful to quickly find sections of your page in the future)
```yaml
       <sp-tab-panel name="history">
            <div style="padding-top: var(--sp-spacing-4)">
              <platform-component
                package-name="recordpage"
                name="RecordTemplate"
                template="{{ '{% if UID %}<platform-eventbus-scope closed><platform-component package-name="listview" name="ListView" query="entityId:{{ UID }}" resource-name="History"></platform-component></platform-eventbus-scope>{% endif %}' }}"
               ></platform-component>
              </div>
        </sp-tab-panel>
```
## Completed code

Your custom record-view page should now look like the below example. The great thing about this example is that you can simply change the object name in the resource_name variable to replicate this for any other object. For example, `{% set resource_name=”Accounts” %}` could be changed to `{% set resource_name=”Contacts” %}`
``` yaml
   {% extends "base-recordview" %}
    {% set resource_name="Accounts" %}
    {% block header %}
      <sp-split-row>
        <div slot="left">
          <sp-header style="margin-bottom: 0">
            <sp-column>
              <sp-heading size="2xl" level="1">
                {% block title %}
                  <platform-component package-name="recordpage" name="RecordDefiner"></platform-component>
                {% endblock title %}
              </sp-heading>
                <sp-row style="--sp-row-spacing: var(--sp-spacing-3); color: var(--sp-color-neutral-600);">
                  <sp-icon icon="details"></sp-icon>
                  <span>Account record</span>
                </sp-row>
              </sp-column>
            </sp-header>
        </div>
        <div slot="right" style="text-align: right;">
          <sp-header style="margin-bottom: 0">
            <sp-heading>
               <platform-component package-name="recordpage" name="RecordTemplate" template="{{ '<sp-link href="{{_.host.buildPlatformUrl("accounts-edit?uid=" + _.queryParams.uid )}}"><sp-button leading-icon="edit" button-type="primary" compact="">Edit</sp-button></sp-link>' }}"></platform-component>
            </sp-heading>
          </sp-header>
        </div>
      </sp-split-row>
    {% endblock header %}
    {% block body %}
         <sp-tabs selected="{{_.queryParams.selectedtab}}">
      <platform-component package-name="nav" name="ReflectiveTabs" search-param="selectedtab"
      tabs="{{  [
                  {"name":"details","label":"Details"},
                  {"name":"history","label":"History"},
                  {"name":"system-info","label":"System Info"}                                           
                ]   |dump}}">
       </platform-component>

            <sp-tab-panel name="details">
                <sp-responsive-columns>
                    <div>
                        <platform-component package-name="recordpage" name="RecordFields" include-fields="{{ include_fields }}" exclude-fields="{{ exclude_fields }}" exclude-system-fields></platform-component>
                    </div>
                </sp-responsive-columns>
            </sp-tab-panel>
            <sp-tab-panel name="system-info">
                <sp-responsive-columns>
                    <div>
                        <platform-component package-name="recordpage" name="RecordFields" only-system-fields></platform-component>
                    </div>
                </sp-responsive-columns>
            </sp-tab-panel>
           <!-- History tab -->
          <sp-tab-panel name="history">
            <div style="padding-top: var(--sp-spacing-4)">
              <platform-component
                package-name="recordpage"
                name="RecordTemplate"
                template="{{ '{% if UID %}<platform-eventbus-scope closed><platform-component package-name="listview" name="ListView" query="entityId:{{ UID }}" resource-name="History"></platform-component></platform-eventbus-scope>{% endif %}' }}"
               ></platform-component>
              </div>
            </sp-tab-panel>
        </sp-tabs>
    {% endblock body %}
```
![](https://cdn-images-1.medium.com/max/2548/0*NZmB9MIO6qM6yOBM)

> **Tip:** Remember to update your list view configuration to point to your new record page. If you need a refresher, have a look at the [Building beautiful list views in Pulse](https://developer.skedulo.com/blog/building-beautiful-list-views-in-pulse/) post by Alison Johnston.


As always, if you have any questions, please feel free to comment below or reach out to us [@SkeduloDevs](https://twitter.com/SkeduloDevs) (We would especially love it if you were to tweet us with your completed example! 🚀)

Until next time, stay awesome 😎

## References

* [Skedulo Support Docs — Admin Settings: Change History](https://docs.skedulo.com/user-guides/admin-and-config/admin-and-config-webapp/view-change-history/)
* [Skedulo Support Docs — Overriding the default View Record template](https://developer.skedulo.com/developer-guides/customize-and-extend/create-and-customize-pages/overriding-pages-example/configure-view-page/)
* [Change History is now Generally Available (GA)](https://developer.skedulo.com/blog/change-history-is-now-generally-available/)
* [Building beautiful list views in Pulse (when you don’t code)](https://developer.skedulo.com/blog/building-beautiful-list-views-in-pulse/)

---

---
url: "https://developer.skedulo.com/blog/introducing-the-new-developer-portal"
type: "blogPost"
title: "Introducing the new Skedulo developer site!"
author: "Sophie Wheeler"
date: "2026-09-09"
---

# Introducing the new Skedulo developer site!

We've rebuilt developer.skedulo.com from the ground up to make it a 
one-stop-shop for anyone developing on the Skedulo Pulse Platform. 

Everything used to be spread across multiple locations, making it difficult
to know where to start. Here's a rundown of what's available on the new site.

## Developer quickstarts

The [quickstarts](https://developer.skedulo.com/docs/) are organized around what you're building, and
each one ends with a working result in your skedulo tenant:

- [Make your first API call](https://developer.skedulo.com/docs/graphql/) — authenticate and run a
  GraphQL query in about five minutes.
- [Install the Skedulo CLI](https://developer.skedulo.com/docs/cli/) — set up the cli and learn the
  command groups that manage everything you build.
- [Build a custom page](https://developer.skedulo.com/docs/horizon/) — create a page with Horizon and
  Breeze components. 
- [Build your first mobile form](https://developer.skedulo.com/docs/mobile/) — extend the Skedulo Plus
  app, starting from a working example.
- [Create a webhook](https://developer.skedulo.com/docs/webhooks/) — get an HTTP callback whenever a
  record changes.

If you're starting from zero, [Start building](https://developer.skedulo.com/start-building/) walks
you through getting a tenant, authenticating and picking a path from there.

## Try the APIs without leaving the browser

The [API explorer](https://developer.skedulo.com/api-explorer/) is a browsable reference for the
platform's REST APIs, with request examples in your language of choice
and a try-it panel for live calls. Its GraphQL sibling, the
[GraphQL explorer](https://developer.skedulo.com/graphql-explorer/), introspects the schema and runs
queries against your own tenant. Both use the same API token you'd use
from code, so what works in the explorer works in your integrations.

## The blog and changelog are now here

All of the existing blog posts, including the GraphQL 101, Automation 101, Mastering
Low Code series are all here. The old developerblog.skedulo.com site now 
redirects to here, we do intend to retire it so be sure to update any
bookmarks. 

Alongside it, the [changelog](https://developer.skedulo.com/changelog/) gives you an overview of
platform and API changes that affect developers, drawn from the Skedulo 
release notes. Both the blog and the changelog have RSS feeds:
[blog](https://developer.skedulo.com/blog/feed.xml) and
[changelog](https://heart.my.skedulo.com/function/release-notes-feed/rss/developers).

## Your AI assistant can read all of this too

Every page on the site has a Markdown twin, simply append `.md` to any path.
The entire site is available to agents as well, using [llms-full.txt](https://developer.skedulo.com/llms-full.txt). 

There's also a growing catalog of
[installable agent skills](https://developer.skedulo.com/skills/) that teach coding assistants how
to work with the Skedulo Pulse platform including things like CLI guardrails, 
API patterns, and artifact schemas. If you build with an AI assistant,
[start here](https://developer.skedulo.com/docs/agent-ready/).

## Where the docs live

The developer guides remain at
[docs.skedulo.com](https://docs.skedulo.com/developer-guides/), and
links from the old developer site redirect to the right place. This
portal is for getting started, trying things, and staying current, with
the docs site containing in-depth reference documentation.

## Conclusion

We hope the new developer site helps you to build great things on the Skedulo Pulse Platform!
If you have any feedback, or encounter any issues please reach out to us, either on [LinkedIn](https://uk.linkedin.com/showcase/skedulodevs/) or
via [support](https://support.skedulo.com). 

After all, the site is built for you, so your feedback will help us to make it as good as it can be!

---

---
url: "https://developer.skedulo.com/blog/introducing-the-skedulo-developer-blog"
type: "blogPost"
title: "Introducing the Skedulo developer blog"
author: "Scott Gassmann"
date: "2022-08-31"
---

# Introducing the Skedulo developer blog

In June this year (it’s 2022, by the way, in case you’re like me and don’t remember where the last 3 years went), we launched the Skedulo Pulse Platform™, which is a platform purpose-built to power Skedulo’s broad suite of applications. A platform for both declarative and programmatic developers to build on, empowering you to codify and automate business processes and deliver customised visual experiences across multiple form factors

In the post, [Introducing Skedulo Pulse: The next chapter in our drive to support the deskless workforce](https://www.skedulo.com/blog/introducing-skedulo-pulse-the-next-chapter-in-our-drive-to-support-the-deskless-workforce/), Head of Platform, Evan Hollonds, outlines the 5 key pillars of the pulse platform; Extensibility, Automation, Intelligence, Security, and my favourite… Developer Experience! (DX) And with that, our commitment to those who build on the platform (that’s you 😎 ) has never been more important or resolute.

## Why a developer blog?

DX goes well beyond the products and tools (SDKs, CLIs, APIs, UI Frameworks, Docs etc) developers leverage to create value. Don’t get me wrong, the products are hugely important, but they are only one component of our broader DX strategy and vision. This is why we’ve established a platform Evangelism and Advocacy team to supplement Skedulo’s DX initiatives through engaging with the technical communities to not only articulate and demonstrate the capabilities of the platform but also provide a conduit for feedback to ensure you have the support to get the most out of the Pulse Platform. The first order of business … establish the Developer blog.

![](https://developer.skedulo.com/blog-images/post/220831-introducing-the-skedulo-developer-blog/220831-2.png)

A wise soul once said to me:
>“good products and documentation are not enough” (referring to the components of DX).

 This phrase has really stuck with me, and it couldn’t be more important in our decision to launch the Skedulo Developer blog.

Supporting materials (such as developer blogs) provide guidance and context, and more complete examples balance the what/how/why paradigm (where documentation is the what, and the how is often lacking, let alone the question of why).

* *What is this capability?* — What does it do? What are the constraints? Etc.

* *How do you consume this capability?* This often requires more context than the ‘*what*’.

* *Why is this important?* What value does this unlock? Why should you care to learn about it?

It’s our mission for the developer blog to educate, guide, and inspire you to solve big problems with the Pulse Platform. (Full warning, we are also likely to write some pretty corny jokes along the way too.) We also have a few more surprises up our sleeves over the coming months to further enhance the Skedulo Developer Experience. Be sure to subscribe to our publication (shameless plug) to learn about all the resources that will support you in building on the platform.

## What topics will we be covering?

There are a number of ways you can build (or develop) on the Pulse Platform, some programmatic and some declarative. So naturally, we will be covering the spectrum of these development techniques as well as surrounding technical themes like architecture and broader technical best practices. The bottom line is, if you’re building on the platform, from creating a custom field to implementing webhooks and functions, this is the blog for you!

## Your editors

Myself (Scott Gassmann) and Michael Wheeler will be your blog curators, often writing posts ourselves with practical examples as well as information on the latest releases to keep you up to date on all things Pulse Platform! We will also frequently be welcoming new and guest authors to the blog, so if you would like to contribute or have topics that you’d love to see covered, please do reach out to us on twitter [@SkeduloDevs](https://twitter.com/SkeduloDevs).

**Sophie Wheeler** is a Lead Developer Advocate at Skedulo with extensive experience as both a Salesforce technical architect and software engineer. Sophie focuses on the Skedulo Pulse Platform, writing technical content and frequently speaking at conferences. She is a full-stack developer and enjoys working on IoT, and Integration projects. Follow her on Twitter [@sophienyaa](https://twitter.com/sophienyaa) or check his GitHub projects [@sophienyaa](https://github.com/sophienyaa).

**Scott Gassmann** is a Lead Platform Evangelist at Skedulo with over a decade of experience as a cloud technologist, Salesforce application architect and technical product manager. Scott is responsible for evangelism and developer advocacy programmes at Skedulo and has a passion for no-code and low-code application development. Follow him on Twitter [@scottgassmann](https://twitter.com/scottgassmann).

Until next time, stay awesome 😎

## References

* [Developer docs](http://developer.skedulo.com)
* [API reference](https://developer.skedulo.com/skedulo-api/)
* [Blog: Introducing the Skedulo Pulse Platform](https://www.skedulo.com/blog/introducing-skedulo-pulse-the-next-chapter-in-our-drive-to-support-the-deskless-workforce/?utm_source=google&utm_medium=cpc&utm_campaign=Brand-US-Search%28SP%29&utm_adgroup=&utm_content=Skedulo&utm_term=skedulo&gclid=CjwKCAiA1aiMBhAUEiwACw25MbE7jfTkvy5IxDjABSjvyg66PVWCIaod7dt9p2ePTjXvgqB2jXr70hoC0yQQAvD_BwE)

---

---
url: "https://developer.skedulo.com/blog/joining-your-data-in-happy-relationships"
type: "blogPost"
title: "Episode #5 -  Joining your data in happy relationships"
author: "Alison Johnston"
date: "2023-01-09"
---

# Episode #5 -  Joining your data in happy relationships

Welcome back, Low Coders! Way back in [Episode 1](https://developer.skedulo.com/blog/mastering-low-code-app-development-with-the-skedulo-pulse-platform-episode-1-object-creation/), we created several objects — the `Aircraft`, `Aircraft Parts`, and the `Fleet` objects. Today we’re going to look at how to tie all the objects together to turn our data into one big happy family. Creating relationships between your objects allows your users to easily understand how their data fits together. Having the aircraft as a single record that *relates to* `Jobs` and `Accounts` will mean that any update to the `Aircraft` object will then reflect at both the account and job records without needing to update all the records.

By having an X Wing fighter as the aircraft and then *joining it* to multiple accounts, you can update the aircraft record once and move on to your next Jedi trick, knowing both your `Job` and `Account` will have the most up-to-date information. This also helps your users to easily see the data they want without needing to hunt and gather it from the system. We do this by adding a Lookup Relationship between our objects, tying them together, thereby making life more simple! Huzzah!

The actual creation of the relationships is pretty simple, but there are a few considerations that we will cover and then next episode we will work through how to display the related data on the pages we’ve been updating.

Currently, our data objects are sitting in our Skedulo tenant, all out on their own. The below section of the Entity Relationship Diagram (ERD) shows that only Jobs relate to an Account at the moment:

![](https://cdn-images-1.medium.com/max/3200/0*u3HRkYHaJn9nAjYx)

The line from the `Account` to `Job` has the three tines on the `Job` side, indicating that a single `Account` can have many Jobs associated with it. This makes sense, as you would hopefully keep servicing your customer’s aircraft over time, not as a one-off.

When adding a relationship between objects, one thing to remember is that you want to add the lookup field *from* the child object *to* the parent object. So in the scenario where we want to associate parts to an aircraft, you would go to the `Aircraft Parts` object and add the lookup field there.

To add custom fields to your objects, we navigate to the `Objects & fields` menu in the `Settings` section of Skedulo, locate your Aircraft Parts object and then click on [Add custom field](https://support.skedulo.com/hc/en-us/articles/360001271116-Admin-Settings-Custom-Fields)

![](https://cdn-images-1.medium.com/max/3200/0*UrK01zH85reUZfBl)

From the list of field types, simply select `Lookup relationship` and click `Next`

![](https://cdn-images-1.medium.com/max/2636/0*6J6Bn-PEJvnOxv02)

Enter the field name, label and select the parent object you want to relate these records to and hit Save. Simple!

![](https://cdn-images-1.medium.com/max/2628/0*y_G01WbGJixnXYJV)

So now our ERD has aircraft with one or many parts associated with it:

![](https://cdn-images-1.medium.com/max/3200/0*7grShPldYiLJUB-h)

This is great! However, what happens when you have a situation where you want many parents to relate to many children records? For example, you and your staff service lots of different types of aircraft, and your customers have lots of different aircraft as part of their fleet — you want an easy way of showing that information both on the `Account`, and the `Aircraft` records. This is where we have our ever fabulous Junction Objects! You can’t create a many-to-many relationship field directly within the platform, but you can put the lookups on your junction object!

## Junction Objects

A junction object is there to tie together many objects. We want to be able to relate an aircraft to one or more `Accounts`, and to one or more `Jobs`. Similarly, an Account has more than one aircraft in their fleet, so you need to be able to add many aircraft to the fleet of the account. We do this by putting all the lookups on the junction object (in our case, the object called `Fleet`). So following the above steps to create the lookup relationships, you would go to the `Fleet `object and add a `Lookup` to the `Account` and a `Lookup` to the `Aircraft`!

Each `Fleet` record now allows you to select an aircraft, an account, set whether the aircraft is still active within the fleet, and assign the serial number of that specific aircraft!

![](https://cdn-images-1.medium.com/max/3200/0*8RVm2ShU5Nlh7nzd)

And your ERD is now looking almost like a big happy family:

![](https://cdn-images-1.medium.com/max/3200/0*L4RyS03VsZgYO_ir)

The last thing you will want to relate is the `Fleet` records to `Jobs`. This will allow your Schedulers to identify which exact vehicle your wonderful servicing team needs to look at when out on the Job. No faffing around trying to figure out which aircraft is broken, or which parts you need to look at when you’re out on the job. Efficiency is our name and time saving is our game!

![](https://cdn-images-1.medium.com/max/3200/0*52UmoCf_BXtgIkZD)

Join us here at Low Code Corner next time when we add some of this data onto our pages in a new tab! And as always, if you have questions, reach out to us via the comments below or on Twitter @SkeduloDevs

## References

* [Admin Settings: Custom Fields](https://support.skedulo.com/hc/en-us/articles/360001271116-Admin-Settings-Custom-Fields)

---

---
url: "https://developer.skedulo.com/blog/making-your-pages-pop-with-pretty-pictures"
type: "blogPost"
title: "Episode #4 -  Making your pages POP with pretty pictures"
author: "Alison Johnston"
date: "2022-12-14"
---

# Episode #4 -  Making your pages POP with pretty pictures

Welcome back, Low Coders! We’ve covered a lot of ground over the last few posts: creating objects, updating pages, and removing clicks from the process of adding and editing records. You are well and truly on the right side of the rebellion so far. Today, we are going to focus on adding some more oomph to your pages by adding images! Data is great and we all love it, but pictures just make life a bit better — imagine your workers trying to find the right part for their aircraft service and think how easy it would be to *show* them the part they’re after! Or if you’re in the business of helping people, an image of your patient or customer might just add a little je ne sais quoi. We will cover adding images to both your record pages and your list views in order to take your pages from data columns to Data Nirvana (pew pew).

Adding an image to a page is actually pretty simple. As long as you know where the picture is and how to tell Skedulo to put it on the page, the sky’s the limit. So, let’s dive in and make some magic.

## List view images

If you followed along with the [last episode](https://developer.skedulo.com/blog/episode-3-adding-some-extra-zhoosh-to-your-list-views/), your list view should look something like this:

![](https://cdn-images-1.medium.com/max/3200/0*XSZFq6yrMv2m0DlF)

It’s fabulous, but it doesn’t really pop. Let’s add some images to make it amazing, shall we?

Let’s start with the Branding picklist. I’ve already found the images I want to use on the internet so now, I just need to update the Branding column template to show them off. First, I select my Aircraft object from the Objects & Fields menu, and then click on Edit default columns

![](https://cdn-images-1.medium.com/max/3200/0*k18Nb8yRS98nEjGv)

From here, I go to edit the Branding column, and pop in the image references (as below):

![](https://cdn-images-1.medium.com/max/3200/0*baAAydC8m_mDtQQl)

We are using an [IF](https://docs.skedulo.com/developer-guides/customize-and-extend/list-view-pages/advanced-column-config/) statement to tell Skedulo that if the Branding picklist value is Rebellion, then the rebel symbol image should be displayed, otherwise the imperial seal image should be displayed. Make sure you add in the alternative text, and set the height and width of the images.

```md
    {% if Branding == ‘Rebellion’ %}
    <img src=”https://starwarsblog.starwars.com/wp-content/uploads/2015/11/rebel-symbol-536x536.jpg" alt=”Rebellion” width="60" height="60">
    {% else %}
    <img src=”https://starwarsblog.starwars.com/wp-content/uploads/2016/02/imperialseal-536x536.jpg" alt=”Empire” width=”60" height=”60">
    {% endif %}
```

Click on Done and you will see a preview of your list!

![](https://cdn-images-1.medium.com/max/3200/0*WBuVmCJqxTyjMixY)

Brilliant!! If you’re happy with these changes, then click Save and jump ahead to the next step, but if, like me, you want to add a little more colour to your list view, then join me in editing the Hyperspace column.

I want to add some colour and change the true and false to something more eye-catching. Open the Hyperspace column editor and add the following code (which I found in this [fabulous article](https://docs.skedulo.com/developer-guides/customize-and-extend/list-view-pages/advanced-column-config/)):

```md
    {% if Hyperspace %}
    <sp-lozenge leading-icon=”tick” theme=”solid” color=”green”>Yup</sp-lozenge>
    {% else %} <sp-lozenge leading-icon=”warning” theme =”border” color=”red”>Nope</sp-lozenge>
    {% endif %}
```

This then gives me a MUCH better preview of:

![](https://cdn-images-1.medium.com/max/3200/0*Zm6j-K_ajTj0M7aJ)

Brilliant! Remember to save your work and then off we go to bedazzle the view page!

## Images for your pages

Remember when we added an Image custom field? If you just put your image URL in there then, when you are viewing your page, it only shows the URL, which isn’t what we’re really after. So, let’s change up the page to show the actual image, shall we?

To do this, we need to go and modify the View page of our Aircraft object, so off to Platform Pages (beta) in the Skedulo Settings menu we go. Find your aircraft-view page and let’s dive in!

Scroll down to where your Image field is within the Template Content section (if this is the first change to your page that you’re making, may I humbly suggest a review of [this post](https://developer.skedulo.com/blog/mastering-low-code-app-development-episode-2-putting-your-skedulo-record-pages-into-hyperspace/)?)

Following along with our favourite [documentation](https://developer.skedulo.com/docs/customization/platform/pages/overriding-pages-example/configure-view-page/#adding-an-image), we know that we need to update the image field with the following code (making sure to update the field name to your actual field name):

```md
    <sp-record-row>
    <span slot=”label”>Image</span>
    <platform-component package-name=”recordpage” name=”RecordTemplate” template=”{{ ‘<img src=”{{Image}}” alt=”{{name}}” width=”200" height=”200">’ }}”></platform-component>
    </sp-record-row>
```

When I go to look at my page now, I see:

![](https://cdn-images-1.medium.com/max/3200/0*kVA3Pb4uoBoRd3A0)

PRETTY!! Personally, I want to keep the Edit page as is, as this gives people the chance to change the URL if it’s wrong. If you want to change your Edit page to show the image as well, feel free, but remember that users will need a way to input or update the URL somehow. Perhaps a second field to input the image would help in this scenario.

I also want to add the Branding images we used in our list views, so let’s update that field as well, shall we?

Using the same code we added the image to the Branding column in the list view, we can update the Branding field on the View page, as per below:

```md
<sp-record-row>
    <span slot=”label”>Branding</span>
        <platform-component 
            package-name=”recordpage” 
            name=”RecordTemplate”
            template=”{{‘{% if Branding ==“Rebellion”%}<img src=”https://starwarsblog.starwars.com/wp-content/uploads/2015/11/rebel-symbol-536x536.jpg" alt=”Rebellion” width=”100" height=”100">{% else %}<img src=”https://starwarsblog.starwars.com/wp-content/uploads/2016/02/imperialseal-536x536.jpg" alt=”Empire” width=”100" height=”100">{% endif %}’}}”>
        </platform-component>
</sp-record-row>
```
The only difference was that I needed to enclose the value of the picklist in double quotes, rather than the single quotes used in the list view update.

Once I’ve saved the changes, my page looks like this:

![](https://cdn-images-1.medium.com/max/3200/0*nok8qFydmTzEPhV3)

Personally, I would prefer the images to be in a single column, as this looks a bit wonky. So, let’s move them! With this final change, the full code for my View page ends up as:

```yaml
{% extends "base-recordview" %}
{% set resource_name="aircraft" %}
{% block header %}
<sp-split-row>
    <div slot="left">
  <sp-header style="margin-bottom: 0">
    <sp-column>
      <sp-heading size="2xl" level="1">
          {% block title %}
              <platform-component package-name="recordpage" name="RecordDefiner"></platform-component>
          {% endblock title %}
      </sp-heading>
        <sp-row style="--sp-row-spacing: var(--sp-spacing-3);">
          <sp-icon icon="details"></sp-icon>
          <span>Aircraft </span>
      </sp-row>
    </sp-column>
     </sp-header>
    </div>
    <div slot="right" style="text-align: right;">
        <sp-header style="margin-bottom: 0">
        <sp-heading>
    <platform-component package-name="recordpage" name="RecordTemplate" template="{{'<a href="/platform/page aircraft-edit?uid={{UID}}"> <sp-button>Edit</sp-button>'}}"></platform-component>
    </sp-heading>
      </sp-header>
    </div>
  </sp-split-row>
{% endblock header %}
{% block body %}
<sp-responsive-columns>
  <div>
     <sp-record-row>
    <span slot="label">Hyperspace</span>
    <platform-component package-name="recordpage" name="RecordFieldView" field-name="Hyperspace"></platform-component> 
  </sp-record-row>   
  <sp-record-row>
    <span slot="label"># of Seats</span>
    <platform-component package-name="recordpage" name="RecordFieldView" field-name="Seats"></platform-component> 
  </sp-record-row>
     <sp-record-row>
    <span slot="label">Release Date</span>
    <platform-component package-name="recordpage" name="RecordFieldView" field-name="ReleaseDate"></platform-component> 
  </sp-record-row>  
  <sp-record-row>
    <span slot="label">Last Service Date</span>
    <platform-component package-name="recordpage" name="RecordFieldView" field-name="LastService"></platform-component> 
  </sp-record-row>    
    </div>
  <div>
     <sp-record-row>
     <span slot="label">Branding</span>
        <platform-component package-name="recordpage" name="RecordTemplate" template="{{'{% if Branding == "Rebellion" %} <img src="https://starwarsblog.starwars.com/wp-content/uploads/2015/11/rebel-symbol-536x536.jpg" alt="Rebellion" width="100" height="100">{% else %}
<img src="https://starwarsblog.starwars.com/wp-content/uploads/2016/02/imperialseal-536x536.jpg" alt="Empire" width="100" height="100">{% endif %}'}}"></platform-component>
    </sp-record-row>     
    <sp-record-row>
      <span slot="label">Image</span>
      <platform-component package-name="recordpage" name="RecordTemplate" template="{{ '<img src="{{Image}}" alt="{{name}}" width="200" height="200">' }}"></platform-component>
    </sp-record-row>
  </div>
  </sp-responsive-columns>
{% endblock body %}
```

And the page looks like this:

![](https://cdn-images-1.medium.com/max/3200/0*N2x5Gi-Ab3Iijz6C)

Much, MUCH better! Being the stickler for continuity that I am, I also update my Edit page so the fields are in the same order as my View page, to avoid confusing my users.

Join us here at Low Code Corner next time when we dive into adding relationships to other objects! And as always, if you have questions, reach out to us via the comments below or on Twitter [@SkeduloDevs](https://twitter.com/skedulodevs)

## References
* [Advanced column configuration for list views](https://docs.skedulo.com/developer-guides/customize-and-extend/list-view-pages/advanced-column-config/)
* [Skedulo Icon Library](https://skedulo.github.io/platform-web-storybooks/storybook/platform-ui/?path=/docs/components-icon--available-icons)
* [Overriding the default View Record template](https://developer.skedulo.com/docs/customization/platform/pages/overriding-pages-example/configure-view-page/)

---

---
url: "https://developer.skedulo.com/blog/mastering-low-code-app-development-episode-2-putting-your-skedulo-record-pages-into-hyperspace"
type: "blogPost"
title: "Episode #2 - Putting your Skedulo record pages into Hyperspace"
author: "Alison Johnston"
date: "2022-11-07"
---

# Episode #2 - Putting your Skedulo record pages into Hyperspace

Welcome back, Low Coders! Did you know that whenever you create a custom object on the Pulse Platform, by default you get a View, Create, Edit, and List View page automatically created for you? Well you do! And did you know that you can further customise these to supercharge them for you and your users? Come, step into my office while we make lives better for you, your users and the general galaxy.

Your users are busy. They are important people servicing the whole galaxy and they rely on Skedulo to give them the information they need to do their jobs. This information needs to be more than just data on a page. It needs to be intuitive, easy to access and quick to comprehend. Updating your record pages gives you the opportunity to flex your hyperdrive and give your users the data they need in a format they love.

## View pages

Let’s take a look at the Aircraft object that I built. It stores high-level information about the aircraft that our somewhat fictitious galactic company services. It has a handful of fields, and when I go to look at the page it looks like this:

![](https://cdn-images-1.medium.com/max/3200/0*C7KyxBHHG9UTJWXf)

Looks OK, but the fields are shown alphabetically. This is not really the way people are going to want to see this information. So we are going to give this page a makeover to provide our users with data in a way that really helps them. Let’s go!

Once you create a custom object, you get pages automatically created for you. These can be found in your setup area under Platform Settings (beta):

![](https://cdn-images-1.medium.com/max/3200/0*-NotL2zCQCrdPn20)

Once you get to your platform pages list, you will need to find the ones you want to update.

![](https://cdn-images-1.medium.com/max/3200/0*5bErnKtXfUpCWNJn)

You can manually scroll through the list, or better yet, add a filter!

Go to the right of the page and click on Filters. This will then give you the option to Add filter.

![](https://cdn-images-1.medium.com/max/3200/0*Vy_XEqKYHnX4VL27)

By default the filter assumes you want to filter based on Page Name, which is exactly what we want (although go ahead and check out the other options so you know what you can access later). If you happen to know the name of the page you’re after, you can use the Page Name > equals filter, but if you’re not completely sure you can use the contains function. I generally use contains, but it’s a personal preference.

I called my object aircraft, so that’s what I put in and then click Apply.

![](https://cdn-images-1.medium.com/max/3200/0*hf4eG3BPYivtki0o)

Bingo! We have a list of all the pages where the name of the page contains the word aircraft.

![](https://cdn-images-1.medium.com/max/3200/0*mZ4Svwn9gkFr_JbN)

To start with I want to update the View page for my aircraft, so I click on the aircraft-view page.

What we see is the name of the page, and the page type, as well as the Template Content. The template content is where we want to be. This is the part where we can tell Skedulo what to display and in what order. Each page is made up of three parts; the Header, Body and Footer. We’re going to dive into the Header and Body sections, as the Footer looks good as it is. If you wanted to change the Footer, you’d simply apply your changes in the same Template Content section.

## The header section

By default, if you have a name field, it will populate this at the top (thanks, Skedulo!). However, I want to change the aircraft wording to proper case (because I like proper case a LOT). I also want to pop an Edit button on the right hand side to make life easy for my users to keep their data up to date.

Now, it is important to note that if you want to change ANY part of the header (or body or footer) you need to include *all* the components in your template (otherwise they will simply not render at all). Given I don’t want to change the Name of the header, but I do want to change the other parts, I need to make sure the header still contains the name.

![](https://cdn-images-1.medium.com/max/3200/0*EQFvh8PDoG3hswrr)

Now, we all know that I’m not a developer, so I head on over to the [documentation](https://developer.skedulo.com/developer-guides/customize-and-extend/create-and-customize-pages/overriding-pages-example/configure-view-page/) to see how we go about making changes. This article will walk you through step by step how to change your page, and it’s absolute gold. To be honest the article explains each step better than I can, so I’ll walk you through the changes I made to get my page to where I wanted.

Here’s the code I ended up with by following the article:

```md
{% extends "base-recordview" %}
{% set resource_name="aircraft" %}
{% block header %}
<sp-split-row>
    <div slot="left">
  <sp-header style="margin-bottom: 0">
    <sp-column>
      <sp-heading size="2xl" level="1">
          {% block title %}
              <platform-component package-name="recordpage" name="RecordDefiner"></platform-component>
          {% endblock title %}
      </sp-heading>
        <sp-row style="--sp-row-spacing: var(--sp-spacing-3);">
          <sp-icon icon="details"></sp-icon>
          <span>Aircraft</span>
      </sp-row>
    </sp-column>
     </sp-header>
    </div>
    <div slot="right" style="text-align: right;">
        <sp-header style="margin-bottom: 0">
        <sp-heading>
    <platform-component package-name="recordpage" name="RecordTemplate" template="{{'<a href="/platform/page/aircraft-edit?uid={{UID}}"><sp-button>Edit</sp-button>'}}"></platform-component>
    </sp-heading>
      </sp-header>
    </div>
  </sp-split-row>
{% endblock header %}
```

I updated the sub-heading using the below code snippet:

   ```md
    <sp-row style=”—sp-row-spacing:var(—sp-spacing-3);”>
    <sp-icon icon=”details”></sp-icon>
    <span>Aircraft</span>
    </sp-row>
```
I added the Edit button simply following along with the article. Save your page. Go back to your record view page and BOOM!! New Header!

![](https://cdn-images-1.medium.com/max/3200/0*cH_Q-Zg97RVL7jdH)

We’ll be writing about adding fancy highlight sections to your header in a separate post, so keep an eye out for that one!

## The body section

Moving onto the body of the page, which appears under the header and houses all the important information, this is where we will reorder the fields on the page to make it more logical for the users viewing the data.

Again, I followed along with the article and arrived with the below code:
```md
{% block body %}
<sp-responsive-columns>
  <div>
   <sp-record-row>
     <span slot="label">Branding</span>
       <platform-component package-name="recordpage" name="RecordFieldView" field-name="Branding"></platform-component> 
    </sp-record-row>
  <sp-record-row>
    <span slot="label"># of Seats</span>
    <platform-component package-name="recordpage" name="RecordFieldView" field-name="Seats"></platform-component> 
  </sp-record-row>
     <sp-record-row>
    <span slot="label">Release Date</span>
    <platform-component package-name="recordpage" name="RecordFieldView" field-name="ReleaseDate"></platform-component> 
  </sp-record-row>  
  <sp-record-row>
    <span slot="label">Last Service Date</span>
    <platform-component package-name="recordpage" name="RecordFieldView" field-name="LastService"></platform-component> 
  </sp-record-row>    
    </div>
  <div>
   <sp-record-row>
    <span slot="label">Hyperspace</span>
    <platform-component package-name="recordpage" name="RecordFieldView" field-name="Hyperspace"></platform-component> 
  </sp-record-row>   
          <sp-record-row>
    <span slot="label">Image</span>
    <platform-component package-name="recordpage" name="RecordFieldView" field-name="Image"></platform-component> 
  </sp-record-row>
  </div>
  </sp-responsive-columns>
{% endblock body %}
```

Now I have the fields in an order that makes sense for the users, across two columns (no scrolling!):

![](https://cdn-images-1.medium.com/max/3200/0*FyqR7_fLWYvUCyAk)

If you want to make changes to the footer for this page, you simply follow the steps from the amazing article we’ve been using so far!

We’ll go through how to add images to your page to make them pop in Episode 4 — I haven’t forgotten them I promise!

## Edit pages

Your Edit pages also come out of the box (thanks again, Skedulo!) but sometimes you might want to have different fields when in edit mode than when you’re viewing the record. The most obvious choice for this is the Name field. When I’m editing or creating, I want to be able to include the name, but when I’m viewing it, I only need this field in the header of the page (redundant data is, well, redundant).

So for me, when I changed up my Edit page I made sure I kept the order of the fields *exactly* the same as my view page, but I included the Name as the first field.

Why keep your fields in exactly the same order? Well because users are probably viewing the data and then changing it using the Edit button. If the fields are suddenly in a different order than they were looking at it can be a bit jarring. So, let’s help everyone out where we can!

Before I change the code for my Edit page, the page renders like this:

![](https://cdn-images-1.medium.com/max/3200/0*y1zo8lR5InqFaaj7)

The fields are not in the order I want them, and that pesky ‘aircraft’ sub-header is back. Following the fabulous [documentation](https://developer.skedulo.com/developer-guides/customize-and-extend/create-and-customize-pages/overriding-pages-example/configure-view-page/) for Edit pages, I end up with this [code](https://gist.github.com/ajohnston-skedulo/6b3add9600123732dcdb374cddf6f007):

 <iframe src="https://medium.com/media/d9ecfee371ba2d4f333f3a1b6d30bbee" frameborder=0></iframe>

And here’s my page! Everything’s back in the order I want it across both columns, and my sub-header now instructs people they’re editing the aircraft.

![](https://cdn-images-1.medium.com/max/3200/0*PMn42xlqrJHmud1g)

## List views

We’ve given people a way to view and edit their records, but the last piece is the list view (so they can pick which record to view or edit). For this, you go to your Objects & fields (in the Data Management section of Settings), navigate to your object (in this case the Aircraft object) and click on Edit default columns.

![](https://cdn-images-1.medium.com/max/3200/0*Q8fhwrKB_JZKYJWt)

Select the columns you want to display and then save your changes.

All we need now is a way to give this fancy new view to the users. Off to the [Navigation Bar](https://docs.skedulo.com/user-guides/admin-and-config/admin-and-config-webapp/config-users-and-preferences/configure-navigation-menu/) we go!

![](https://cdn-images-1.medium.com/max/3200/0*7F22o21Qqqn2D4vh)

Remembering that Skedulo very kindly provides you with a default List page for each object you create, we simply need to add this to the navigation menu so it’s easy for users to access. I want this to appear in my Manage menu (but you may want it somewhere else, or as a brand new menu item of its own — dealers choice).

First, you click on Add Menu Item. Give your menu item a name, and then you want to make sure you’re pointing to the platform page for aircraft-list. After selecting Platform Page as the Type, you should find the correct page from the drop down.

![](https://cdn-images-1.medium.com/max/2172/0*nkWs7wRLTI5vVXXH)

Reorder the menu and you are all done!

For a more detailed explanation of just how beautiful you can make these list views, see the post [here](https://developer.skedulo.com/blog/building-beautiful-list-views-in-pulse/).

Join us here at Low Code Corner next time when we explore editing records directly from your list view. And as always, if you have questions, reach out to us via the comments below or on Twitter @SkeduloDevs

## References

* [Overriding the default View Record template](https://developer.skedulo.com/developer-guides/customize-and-extend/create-and-customize-pages/overriding-pages-example/configure-view-page/)
* [Overriding the default Edit Record template](https://developer.skedulo.com/developer-guides/customize-and-extend/create-and-customize-pages/overriding-pages-example/configure-edit-page/)
* [Advanced column configuration for list views](https://docs.skedulo.com/developer-guides/customize-and-extend/list-view-pages/advanced-column-config/)
* [Skedulo Icon Library](https://skedulo.github.io/breeze-ui/?path=/docs/breeze-tokens-icons--available-icons)
* [Admin settings: Global Navigation Bar](https://docs.skedulo.com/user-guides/admin-and-config/admin-and-config-webapp/config-users-and-preferences/configure-navigation-menu/)

---

---
url: "https://developer.skedulo.com/blog/mastering-low-code-app-development-going-rogue-creating-date-time-fields-via-the-skedulo-lens-api"
type: "blogPost"
title: "Mastering low code app development, Going Rogue: Creating Date Time Fields via the Skedulo Lens API"
author: "Alison Johnston"
date: "2022-10-18"
---

# Mastering low code app development, Going Rogue: Creating Date Time Fields via the Skedulo Lens API

Hello again, fearless low coders! Today, we are heading into the world of using APIs. Obviously, I am not a developer. A true developer would find this incredibly basic (and to be fair it is) but as a declarative maven of old I initially found this quite daunting. But, dear reader, I persevered and did it — I created a Date Time field using the API!

There are a few steps we need to follow to make this work, so click along with me and let’s go rogue…

## Step 1 — Skedulo Tenant Ready to launch

First of all, you want to make sure you’ve set your [API user](https://developer.skedulo.com/user-guides/admin-and-config/admin-and-config-webapp/extend-with-extensions/define-api-user/#api-user) in your Skedulo tenant. Go to your Settings section, and click on the API user menu option.

![settings](https://developer.skedulo.com/blog-images/post/221018-1-mastering-low-code-app-development-going-rogue-creating-date-time-fields-via-the-skedulo-lens-api/221018-1-2.png)

*Settings*

From here, select the user you want to nominate as the API user and activate.

![settings-set-the-api-user](https://developer.skedulo.com/blog-images/post/221018-1-mastering-low-code-app-development-going-rogue-creating-date-time-fields-via-the-skedulo-lens-api/221018-1-3.png)

*Settings > Set the API User*

After that, you want to create your [API token](https://developer.skedulo.com/user-guides/admin-and-config/admin-and-config-webapp/extend-with-extensions/create-api-tokens/) (sounds scarier than it is, trust me). Make sure you copy this token and keep it somewhere safe (like 1Password, LastPass, NOT a post it note on the side of your monitor, please). Scroll down to the Developer Tools menu option.

![settings-developer-tools](https://developer.skedulo.com/blog-images/post/221018-1-mastering-low-code-app-development-going-rogue-creating-date-time-fields-via-the-skedulo-lens-api/221018-1-4.png)

*Settings > Developer Tools*

Click on the API Tokens tab and then Create.

![settings-developer-tools-create-api-token](https://developer.skedulo.com/blog-images/post/221018-1-mastering-low-code-app-development-going-rogue-creating-date-time-fields-via-the-skedulo-lens-api/221018-1-5.png)

*Settings > Developer Tools > Create API Token*

## Step 2 — Ready your weapon of choice

Next, we have to write the API call. For this, you’ll need a third party tool such as Postman, Insomnia or Apigee. I asked around and found that [Insomnia](https://insomnia.rest/) was a good choice for a beginner like me. Insomnia is pretty self explanatory and while it took me a few tries to understand, I got there — and so will you! Feel free to use any tool that works for you — some of your coworkers may have strong feelings about which tool to use. It’s a personal choice.

In our Skedulo Developer Documentation, there’s a whole section on [authentication](https://developer.skedulo.com/skedulo-api/#tag/Authentication). From here, I figured out that I needed to know which region my Skedulo tenant was in because this allows us to then call the right version of the API.

So, how do we find this helpful information? The documentation tells us! Huzzah!

`https://api.skedulo.com/auth/config/team/web?name=my-team`, where my-team is the team name in any region.

For my Skedulo tenant (where my team name is aj-platformplayground), I used a GET command and entered the following:

`https://api.skedulo.com/auth/config/team/web?name=aj-platformplayground`

What I got back tells me that I need to be using the AU APIs (see towards the bottom where the server tells me my API is api.au.skedulo.com).

![get-your-region-specific-api](https://developer.skedulo.com/blog-images/post/221018-1-mastering-low-code-app-development-going-rogue-creating-date-time-fields-via-the-skedulo-lens-api/221018-1-6.png)

*Get your region specific API*

So, after this I need to tell Skedulo via the API that I’m allowed to do stuff over the API. This is where our authentication and API token come back to us.

Skedulo allows authentication using a Bearer Token (thanks [documentation](https://developer.skedulo.com/skedulo-api/#tag/Authentication)!). This is actually the API token we created back in Step 1. Being a big fan of copy & paste, I looked at the [Lens API Overview](https://developer.skedulo.com/skedulo-api/#section/Overview) and saw I needed all my API calls to have the following info in the HTTPS header:

  * `content-type`: `application/json`
  * `authorization`: `Bearer “$API_TOKEN”`

So, back to Insomnia and there is a whole section for the Headers. All the values were blank. So let’s dive in and fix it!

First off, I added the content-type and set the value as application/json. Then, I added the authorization header and set the value to Bearer “API token value”.

**Handy hint for beginners**

I initially pasted my API token inside the inverted commas. This didn’t work so I went hunting for the reason. When I clicked on the Headers tab there was more info:

![get-your-region-specific-api](https://developer.skedulo.com/blog-images/post/221018-1-mastering-low-code-app-development-going-rogue-creating-date-time-fields-via-the-skedulo-lens-api/221018-1-7.png)

*Hint for beginners - remove inverted commas*

Looking at the error I knew instantly what was wrong. The inverted commas! Consider this a friendly reminder that inverted commas should be removed before posting your API call.

Once I removed the inverted commas from my Authorization value of my header, I clicked Send and hey presto!! I can’t remember the last time I was so happy to see a little green box telling me everything was ok!

![get-your-region-specific-api](https://developer.skedulo.com/blog-images/post/221018-1-mastering-low-code-app-development-going-rogue-creating-date-time-fields-via-the-skedulo-lens-api/221018-8.png)

*Successful whoami response*

## Step 3: Fire in the hole!

OK, my Insomnia was now ready to write a new custom field to my aircraft object! All I needed was the right API and the right format of the JSON message to get this done. Enter our trusty developer documentation guide for [custom fields](https://developer.skedulo.com/docs/customization/custom-objects-and-fields/custom-api/)!

First off was the API that we want to send our data to (making sure to grab the right region of the API):

`https://api.au.skedulo.com/custom/standalone/fields`

This API allows you to set new fields on an existing object when you use the `POST method. Sounds like what we want! Next, we move onto the JSON message. Good old copy & paste to the rescue, and we get:

```json
{ 
"name": "LastHyperdriveUse",
"schemaName": "aircraft",
"label": "Last Hyperdrive Use",
"description": "Date and time of the last time hyperdrive was used",
"fieldType": "datetime",
"column": {
  "type": "datetime",
  "required": "false"
	}
}
```
Let’s break it all down, shall we? JSON messages have a line for each Name/Value pairing being sent to the API. This means that each line in the above code snippet has the name (i.e. “label”) and a value (i.e. “Last Hyperdrive Use”) which we want the API to create as a custom field. So, you use the JSON to tell the API that you want the name of the field to be LastHyperdriveUse, and the schemaName (i.e. the object) is aircraft. Pretty neat, huh?

| Name       | Description                                               | Sample Value          |
|------------|-----------------------------------------------------------|-----------------------|
| API name   | This will be the API name of the field - no spaces or special characters please. | LastHyperdriveUse     |
| schemaName | This is the name of the data object you want the new field to appear on. Make sure you use the Object’s Name, not the Label. | aircraft              |
| label      | This is what will display on screen - usually it is the same as the name, but rendered with spaces. | Last Hyperdrive Use   |
| description| This is a further description as to what this field is used for. | Date and time of the last time hyperdrive was used |
| fieldType  | This is the type of field you’re creating. For date & time fields, this needs to be entered as datetime (i.e. no capitals, underscores, spaces etc etc). | datetime              |
| column     | This is further information around the field you are creating. This can include if the field is to be required, if a default value is to be populated, or if this field must be set as unique across all records. | "column": { "type": "datetime", "required": "false" } |

Check your spelling, and click on that trusty Send button. Wait for your new favourite green box to let you know your rogue mission is OK and then use your Hyperdrive to get back to declarative nirvana! You did it! You sent an API call! You. Are. A. Legend.

As always, if you have questions, reach out to us via the comments below or on Twitter [@SkeduloDevs](https://www.twitter.com/skedulodevs)

## References

* [Skedulo Admin Settings](https://developer.skedulo.com/user-guides/admin-and-config/admin-and-config-webapp/extend-with-extensions/define-api-user/)
* [Skedulo Lens API Documentation](https://developer.skedulo.com/skedulo-api/)
* [Skedulo Developer Guides](https://developer.skedulo.com/docs/customization/custom-objects-and-fields/custom-api/)

---

---
url: "https://developer.skedulo.com/blog/mastering-low-code-app-development-with-the-skedulo-pulse-platform-episode-1-object-creation"
type: "blogPost"
title: "Episode #1 - Mastering low code app development with the Skedulo Pulse Platform: Object Creation"
author: "Alison Johnston"
date: "2022-10-18"
---

# Episode #1 - Mastering low code app development with the Skedulo Pulse Platform: Object Creation

You’ve been using Skedulo for a while, and it is fab-u-lous! However, your team wants to see some more information when they’re doing their work. Let’s imagine your team services all of the aircraft of the galaxy, both near and far, far away. Your scheduling team knows which companies have which aircraft, and how many of them they have. Your workers need to know which aircraft they’re off to service, and what parts of the aircraft they need to swap out to get their customers back in the air.

Why is it so important to be able to offer additional information? Imagine you are a deskless worker, running around all over the galaxy fixing aircraft. Each time you reach for your trusty Skedulo app on your device, you click into a Job to see where you’re going, who you’re meeting, and what needs to be done. 

If you had to load up the schematics of *all* the aircraft, you’d be scrolling like the opening credits of a space-saga. Surely, it would be better to be able to click through and see the exact aircraft that needs fixing on each particular Job, as well as a list of the exact parts that could need replacing.

On our intrepid journey to mastering low code app development on the Skedulo Pulse Platform, we’ll tackle the following topics:

* Episode 1: Creating new objects (this is us, right now)
* [Going Rogue: Adding fields via the API](https://developer.skedulo.com/blog/mastering-low-code-app-development-going-rogue-creating-date-time-fields-via-the-skedulo-lens-api/)
* Episode 2: Updating the standard View and Edit pages for the object, and adjusting the list views
* Episode 3: Editing records from your list views
* Episode 4: Adding fancy images to make your pages pop
* Episode 5: Adding relationships to other objects (allowing you to make associations with other records)
* Episode 6: Display related data on your pages using Tabs
* Episode 7: Using filters on your new Tabs
* Episode 8: Pre-populating data when users are creating records (Let’s make lives easier where we can, shall we?)
* Episode 9: Configuring page redirects after creating or editing records.

## Creating your object

The first step to being able to store additional data is to [create a new custom object](https://docs.skedulo.com/user-guides/admin-and-config/admin-and-config-webapp/create-and-customize-work/create-manage-data-objects/). In this case, you’re going to create an Aircraft object in order to allow you to record the details of your aircrafts. To do this, simply go to the Settings section of your Skedulo tenant.

![](https://developer.skedulo.com/blog-images/post/221018-2-mastering-low-code-app-development-with-the-skedulo-pulse-platform-episode-1-object-creation/2.png)

From here you want to go to your Data objects, and then click Create custom object.

![](https://developer.skedulo.com/blog-images/post/221018-2-mastering-low-code-app-development-with-the-skedulo-pulse-platform-episode-1-object-creation/3.png)

You can give your object any name you want, and then create as many fields as you want or need (within reason — no one wants to have to fill in 800 fields…).

For the purposes of this example, enter the following:

* Object label: `Aircraft`
* Object name: `aircraft`
* Object description: `Used to store details of the aircraft serviced`

**The object name needs to have no spaces, underscores, or special characters as this is used by the API to do other fancy stuff.*

![](https://developer.skedulo.com/blog-images/post/221018-2-mastering-low-code-app-development-with-the-skedulo-pulse-platform-episode-1-object-creation/4.png)

When you want to add fields to your object, click on the Add custom field button on your newly created object.

![](https://developer.skedulo.com/blog-images/post/221018-2-mastering-low-code-app-development-with-the-skedulo-pulse-platform-episode-1-object-creation/5.png)

Think about the kind of data you want to capture in this field. You have options galore, as you can see. Our trusty Support site details what each field type does and is [here](https://docs.skedulo.com/user-guides/admin-and-config/admin-and-config-webapp/create-and-customize-work/create-manage-data-objects/).

![](https://developer.skedulo.com/blog-images/post/221018-2-mastering-low-code-app-development-with-the-skedulo-pulse-platform-episode-1-object-creation/6.png)

For your object you might want the name, number of seats, the brand, and whether Hyperdrive can be enabled. Because I like pictures, I also want to display the image of the aircraft, using a URL (we’ll talk about how this works more in Episode 4). Below is the list of fields I created, including their types for the aircraft object

| Field Name  | Field Label     | Field Type  |
|------------ |-----------------|-------------|
| Name        | Name            | Text        |
| Branding    | Branding        | Picklist    |
| Hyperspace  | Hyperspace      | Checkbox    |
| Seats       | # Seats         | Number      |
| ReleaseDate | Release Date    | Date        |
| Image       | ImageName       | URL         |

One field type you might want that is not on the list is a combined date and time. This field type *is* available in Skedulo however currently these fields need to be created through the API. We cover this off in a separate post [here](https://developer.skedulo.com/blog/mastering-low-code-app-development-going-rogue-creating-date-time-fields-via-the-skedulo-lens-api/), or you could ask one of your friendly developers if you’re lucky enough to have one in house.

![](https://developer.skedulo.com/blog-images/post/221018-2-mastering-low-code-app-development-with-the-skedulo-pulse-platform-episode-1-object-creation/7.png)

Now you’ve got your shiny new object! Yay! Galaxy domination is one step closer!

## Things to ponder

When you’re creating your objects, think about ways that you can reduce the number of times you need to enter data. For me there is a secret joy in streamlining processes and data capture for my users. In my example, I’m not relating the Aircraft specifically to an account, or even a Job. 

The reason for this is that the Aircraft record will store only the information about the vehicle itself. We will create other junction objects to link these aircraft to accounts and jobs. This will mean that any update to the Aircraft object will then reflect at both the account and job records without needing to update all the records. 

For example, if I created a X Wing fighter for the Organa account, and a X Wing fighter for the Skywalker account in the Aircraft object, every change to an X Wing fighter would have to be done twice. By simply creating the X Wing fighter as the aircraft and then joining it to multiple accounts, you can update once and move on to your next Jedi trick.

Once you’ve created your shiny new object and recorded some data, you may want to update the columns that appear when you look at a list view. This can be done by clicking on the Edit default columns button. For a more detailed explanation of just how beautiful you can make this, see the post [here](https://developer.skedulo.com/blog/building-beautiful-list-views-in-pulse/).

![](https://developer.skedulo.com/blog-images/post/221018-2-mastering-low-code-app-development-with-the-skedulo-pulse-platform-episode-1-object-creation/8.png)

There are probably a number of other objects you want to tackle, so it’s rinse and repeat to get the objects you and your business need. If you’re following along with this example, you need to create a Parts object (to store the parts of each aircraft)

![](https://developer.skedulo.com/blog-images/post/221018-2-mastering-low-code-app-development-with-the-skedulo-pulse-platform-episode-1-object-creation/9.png)

as well as a Fleet object (to store the exact aircraft each customer has).

![](https://developer.skedulo.com/blog-images/post/221018-2-mastering-low-code-app-development-with-the-skedulo-pulse-platform-episode-1-object-creation/10.png)

Join us here at Low Code Corner next time when we dive into how to update the pages for our aircraft. And as always, if you have questions, reach out to us via the comments below or on Twitter @SkeduloDevs

## References

* Skedulo [Data Objects](https://docs.skedulo.com/user-guides/admin-and-config/admin-and-config-webapp/create-and-customize-work/create-manage-data-objects/)
* Skedulo [Custom Fields](https://docs.skedulo.com/user-guides/admin-and-config/admin-and-config-webapp/create-and-customize-work/create-manage-data-objects/)

---

---
url: "https://developer.skedulo.com/blog/quick-and-easy-graphql-exploration-in-skedulo"
type: "blogPost"
title: "Quick and easy GraphQL exploration in Skedulo"
author: "Sophie Wheeler"
date: "2022-09-13"
---

# Quick and easy GraphQL exploration in Skedulo

## Introduction

As you may know, the Skedulo Pulse Platform uses [GraphQL](https://graphql.org/) for data querying and manipulation, but did you also know there is a **built in** tool that helps you to explore the GraphQL APIs and your own Skedulo data? Well, there is!

However, before we get in to that, let’s have a quick primer on GraphQL!

## What IS GraphQL?

Well, a nice little definition from the folks at [Red Hat](https://www.redhat.com/en/topics/api/what-is-graphql) says:
>  *“GraphQL is a query language and server-side runtime for application programming interfaces (APIs) that prioritizes giving clients exactly the data they request and no more.”*

What this means in practical terms, for Skedulo developers, is that you can make complex query requests, spanning multiple objects in a single call and only return the data you actually need.

On the other side of things, you can make similarly complex data manipulation requests (called mutations) to update or insert multiple related or unrelated records in a single call.

The nature of this approach to queries and mutations helps to make your applications faster and more efficient than the traditional RESTful API model, that may require multiple requests with extra data that isn’t required to fulfil the same need, or may need specialised APIs that require more maintenance.

The other fun thing about GraphQL is the concept of introspection queries, these allow you to ask the API about itself so you can better understand what is available to you!

So GraphQL sounds pretty cool right? But I hear you asking, how can I actually *make* *use* of it?

Well, you’ve many options! Tools like [insomnia](https://insomnia.rest/) and [postman](https://www.postman.com/) both support GraphQL and of course you would use it when developing [web extensions](https://developer.skedulo.com/docs/customization/skedulo-sdk/web-extensions/) on Skedulo.

## Setting Up

Now that we know what GraphQL is, let’s look at an easy way to get started with it, using a tool that is available right inside our Skedulo tenant!

Introducing… GraphiQL! The handy web extension and subject of this blog post that you can activate to explore your own tenants data!

Here’s how you use it;

**1. Log in to your tenant and go to the settings menu** (by clicking on your name in the top right and selecting ‘Settings’)

![navigate-to-settings-image](https://developer.skedulo.com/blog-images/post/220913-quick-and-easy-graphql-exploration-in-skedulo/220913-2.png)

*Navigate to settings*

**2. Navigate to Extensions > Standalone Web Extensions** and find the ‘GraphiQL’ extension, click the three dots on the right hand side and then ‘Publish’

![navigate-to-web-extensions-image](https://developer.skedulo.com/blog-images/post/220913-quick-and-easy-graphql-exploration-in-skedulo/220913-3.png)

*Navigate to extensions*

**3. Then navigate to Global Navigation Bar** > Add menu item

Give your menu item a name, select type of ‘Web extension’, choose the ‘GraphiQL’ web extension and grant access to it. We would suggest only allowing access by the ‘Administrator’ role so your end users are not able to see it.

Hit ‘Apply’ and then ‘Save’ in the bottom right hand corner to save the menu item

![navigate-to-global0-navigation-bar-image](https://developer.skedulo.com/blog-images/post/220913-quick-and-easy-graphql-exploration-in-skedulo/220913-4.png)

*Navigate to Global Navigation Bar*

**4. Finally, you’re ready to go!** You can now go to your ‘GraphiQL’ menu item and…

## Start Exploring!

GraphiQL comes with a handful of example queries and mutations defined for you, so you can run these by going to the play button in the top left hand corner

![graphiql-web-extension](https://developer.skedulo.com/blog-images/post/220913-quick-and-easy-graphql-exploration-in-skedulo/220913-5.png)

*GraphiQL Web Extension*

But you can now also write your own queries and mutations, as well as use the ‘docs’ section on the right hand side to perform introspection queries to learn more about the API!

Let’s take a look at an [example](https://developer.skedulo.com/developer-guides/integration-and-automation/api-overview/graphql/#get-started-with-graphqlgraphql-queries/) from the Skedulo Developer Docs and see what happens when we run it!

Using the ‘Retrieve a list of all jobs’ example might look something like this:

![graphiql-job-query](https://developer.skedulo.com/blog-images/post/220913-quick-and-easy-graphql-exploration-in-skedulo/220913-6.png)

*GraphiQL Job Query*

You can see the data returned on the right hand side of the screen

We can also perform record updates (mutations in GQL speak) using this too, for [example](https://developer.skedulo.com/developer-guides/integration-and-automation/api-overview/graphql/#get-started-with-graphqlgraphql-mutations/):

![graphiql-job-mutation](https://developer.skedulo.com/blog-images/post/220913-quick-and-easy-graphql-exploration-in-skedulo/220913-7.png)

*GraphiQL Job Mutation*

We’ve now updated the description of three jobs at once using GraphiQL!

There are many, many more examples provided in the [GraphQL section](https://developer.skedulo.com/developer-guides/integration-and-automation/api-overview/graphql/#get-started-with-graphql) of the [Skedulo Developer Docs](https://developer.skedulo.com/), and now with GraphiQL up and running you can explore these without needing any special tools!

If you’d like to learn more about GraphQL in general there is an excellent series called [How To GraphQL](https://www.howtographql.com/) that is free and provided by the GraphQL community.

As always, if you have any questions, learnings or anything else you’d like to share with us, you can reach out on twitter [@SkeduloDevs](http://twitter.com/SkeduloDevs)

## References

* [GraphQL.org](https://graphql.org/)
* [Red Hat — What is GraphQL](https://www.redhat.com/en/topics/api/what-is-graphql)
* [Insomnia REST Client](https://insomnia.rest/)
* [Postman REST Client](https://www.postman.com/)
* [Skedulo Developer Docs — Web Extensions](https://developer.skedulo.com/docs/customization/skedulo-sdk/web-extensions/)
* [Skedulo Developer Docs — GraphQL](https://developer.skedulo.com/developer-guides/integration-and-automation/api-overview/graphql/#get-started-with-graphql)
* [Skedulo Developer Docs — GraphQL Queries
](https://developer.skedulo.com/developer-guides/integration-and-automation/api-overview/graphql/#get-started-with-graphqlgraphql-queries/)
* [Skedulo Developer Docs — GraphQL Mutations](https://developer.skedulo.com/developer-guides/integration-and-automation/api-overview/graphql/#get-started-with-graphqlgraphql-mutations/)
* [How To GraphQL](https://www.howtographql.com/)

---

---
url: "https://developer.skedulo.com/blog/the-new-skedulo-documentation-site-is-now-live"
type: "blogPost"
title: "Announcement: The new Skedulo documentation site is now live!"
author: "Corinne Boyle"
date: "2023-02-10"
---

# Announcement: The new Skedulo documentation site is now live!

We are very excited to introduce to you our new Skedulo documentation site. Whether you want to learn how to create a job, understand how to optimise your scheduling, customise your user experience, or develop on the Pulse Platform, you now only need to visit one place: [docs.skedulo.com](https://docs.skedulo.com/).

![](https://cdn-images-1.medium.com/max/2528/1*RoB5aFl80q8js30ywwn9Qg.png)

So, I hear you ask, what’s new?

Perhaps most obviously, there has been a massive design level-up. The slick new design not only looks beautiful, but makes navigating our documentation easy.

We have made our first big push to create a single source of truth for our documentation. Everything you might need to aid you as you navigate through or develop on the Skedulo Pulse Platform is accessible from [docs.skedulo.com](https://docs.skedulo.com/); from user and developer guides, to reference material, to links to our support site and developer blog, it’s all there!

We also now have a great new developer landing page over at [developer.skedulo.com](https://developer.skedulo.com/). If you’re building on the Skedulo Pulse Platform, this should be your first port of call. The developer landing page gives you quick access to all of the content available on the docs site as well as our developer blog.

![](https://cdn-images-1.medium.com/max/2434/1*SDp6RzQSrWawhwl3lCuPdQ.png)

You can now search both the User Guide and the Developer Guide simultaneously, meaning you can get access to relevant documentation faster. The search results are prioritised based on where you search from, so if you’re in the User Guide, results from that location appear first in the list.

Of course, we didn’t want to waste the opportunity to improve the information architecture of our documentation. The process of migrating content to a single source presented us with the perfect opportunity to restructure our User Guide documentation and move to a more task-based approach.

Having the User Guide and Developer Guide in the same place not only makes your life easier. It also helps to foster a culture of collaboration between our teams. A single source of documentation is far easier to maintain and update.

Ah, but what about bookmarks? Not to worry! We have added redirects to all articles from the Knowledge Base so it will be simple to locate the new home of your most often visited content.

We hope you are as excited about exploring our new documentation as we are about bringing it to you. However, this is just the beginning, we will be continuing to improve the site and we’d love to hear your feedback!

As always, you can reach out to us on Twitter [@SkeduloDevs](https://twitter.com/SkeduloDevs) or [LinkedIn](https://www.linkedin.com/showcase/skedulo-devs/) with questions, feedback, or just to tell us about something cool you’ve built.

**References**

* [Skedulo documentation site](https://docs.skedulo.com/)
* [Skedulo developers site](https://developer.skedulo.com/)

---

---
url: "https://developer.skedulo.com/blog/unleash-the-power-of-record-access-policies"
type: "blogPost"
title: "Unleash the power of record access policies"
author: "Scott Gassmann"
date: "2023-06-29"
---

# Unleash the power of record access policies

[Record access policies](https://developer.skedulo.com/user-guides/admin-and-config/admin-and-config-webapp/permissions-and-data-access-control/use-record-access-policies-to-control-data-access/record-access-policies/) provide a powerful mechanism to control data access at a granular level. Whether you're a developer or an administrator, understanding the value and capabilities of record access policies opens up a world of possibilities for designing sophisticated solutions. In this blog post, we will explore record access policies, why they are valuable, and the problems they help solve, and provide practical examples to showcase their application

## What are record access policies?

Record access policies enable both administrators and developers to define rules for controlling the visibility of data (records) to users so you are able to isolate data to different groups of users, all based on the conditions you define. 

Record access policies are composed of two elements.  

### Policies
A **[Policy](https://developer.skedulo.com/user-guides/admin-and-config/admin-and-config-webapp/permissions-and-data-access-control/use-record-access-policies-to-control-data-access/manage-record-access-policies/)** is a group of related rules that can be enabled or disabled at the same time.

### Rules

**[Rules](https://developer.skedulo.com/developer-guides/manage-and-control-access/create-and-use-record-access-policies/understand-record-access-policy-rules/)** are where the magic happens! The rule contains the logic that will allow or deny access to records. Specifically, a rule comprises of the following: 
 
* **Object type:** The name of the object you’d like the rule to apply to, for example, `Jobs`.  it also accepts more dynamic configuration, for example, `hasLookup:region`, which means this rule will apply to any record of an object that has a lookup field named `region`. So if your policy is related to objects that are linked to a region, this will ensure that as you build out your data model over time, the rule will continue to apply and you won’t need to add specific rules for all applicable object types.

* **Filter:** This is where you use the power of [GraphQL](https://developer.skedulo.com/blog/category/graphql-101/) and [Elastic Query Language](https://developer.skedulo.com/blog/graphql-101-part-2-elastic-query-language-eql-filters/) to define the records within the object that you’d like the rule to apply to. Let’s say your organization has a policy (see what I did there) whereby Account records should not be visible to scheduling teams when a customer becomes inactive. We can create a filter that will look for our custom field “Account status” and check if it’s set to “Active” or “Inactive”.
In this case, we set the Filter to `AccountStatus != ‘Inactive’`.

![](https://developer.skedulo.com/blog-images/post/230629-unleash-the-power-of-record-access-policies/02.png)

* **Access Type:** Define the rule to allow access to data or restrict it. As this is at the `rule` level,  multiple rules within a single policy can have different `access types` for the same object type i.e. “Rule 1” might have an access type of `Deny` to lock down the data and “Rule 2” might have an access type of `Allow` to loosen the restrictions in certain cases.


* **Roles excluded:** If you need to ensure that your rule(s) only apply to specific groups of users, you can simply exclude users with specific roles. A practical example of this might be where you don’t want the rules to apply to senior managers or those in the C-suite

* **Permission excluded:** Similar to “roles excluded”, users can be excluded when their role(s) include specific permissions. That is, you want some policies to apply to everyone, but other policies don't apply to people with certain functional permissions, for example:

  * **Policy 1** - Everyone can only see data in their region.
  * **Policy 2** - You can only see jobs in your region unless you have permission to dispatch jobs.

## Unlock new possibilities

By now, you’re probably getting a few ideas on how you could leverage record access policies. Let’s explore some of the everyday use cases.

* **Regional data isolation** 
Allow users to see only the data associated with their region(s). 

* **Business unit data isolation** 
Limit data access to users based on the team they work within (sometimes this can be region based; however, sometimes this can also be service based. Either way, you have the flexibility to achieve both). 

* **Grant access to data**
 Provide access to data when it meets certain criteria. For example, you might want to provide access to `job` records only if the user has been allocated to the `job` and the `job status` is not set to completed or canceled. This would result in the user being able to see their ‘active jobs’ only.

* **Improve user experience**
  Removing ‘noise’ for your users reduces both the cognitive load users require to carry out their task and reduces unnecessary clicks (and you’d be surprised how fast that can impact productivity). 

For example, if “Sally the scheduler” only manages the work schedule for the team in South San Francisco, we can filter out all data related to any other region. As a result, Sally doesn’t have to apply filters to list views or scroll through Accounts or Jobs that don’t relate to her day-to-day activity.

## Get up and running fast with policy templates

[Policy templates](https://developer.skedulo.com/user-guides/admin-and-config/admin-and-config-webapp/permissions-and-data-access-control/use-record-access-policies-to-control-data-access/record-access-policy-templates/) are a set of pre-configured policies and rules that solve for typical business use cases. For the launch of record access policies, there is a template for restricting data access by region. Over time, more templates will become available to accelerate the administration process. If there's a particular template you’d like to see, let us know @SkeduloDevs on [LinkedIn](https://www.linkedin.com/showcase/skedulodevs/?viewAsMember=true) or [Twitter](https://twitter.com/SkeduloDevs)! 

![](https://developer.skedulo.com/blog-images/post/230629-unleash-the-power-of-record-access-policies/03.png)


## With great power comes great responsibility

There’s no question that record access policies offer unprecedented control and flexibility. We've built it this way to solve some of the most sophisticated data access requirements. However, it’s essential to be mindful of the impacts of incorrectly configured and unoptimized rules. Without proper testing and validation, tenant performance and stability have the potential to be noticeably impacted. 

Here are some tips on how you can ensure you are successful with record access policies from day 1: 

* Build and test your policies in a non-production environment. 
* Ensure your test plan includes integrations, extensions and customizations.
* Ensure all subqueries in filters are essential; over-reliance on subqueries can directly impact performance. 

## APIs for developers

Explore all the APIs to create and manage record access policies in the [Skedulo developer docs](https://developer.skedulo.com/developer-guides/manage-and-control-access/create-and-use-record-access-policies/manage-record-access-policies-via-the-api/#record-access-policy-endpoints). They provide [detailed documentation and examples](https://developer.skedulo.com/developer-guides/manage-and-control-access/create-and-use-record-access-policies/how-rap-controls-data-access/) to help you on your implementation journey! 

## Conclusion

Record access policies offer developers unprecedented control and flexibility over data access. By incorporating these policies into your solutions, you can design sophisticated data visibility and privacy rules. Get started today and let us know the solutions you build with this incredibly powerful feature. 

## References

* [Overview: record access policies](https://developer.skedulo.com/user-guides/admin-and-config/admin-and-config-webapp/permissions-and-data-access-control/use-record-access-policies-to-control-data-access/record-access-policies/)
* [Manage record access policies](https://developer.skedulo.com/user-guides/admin-and-config/admin-and-config-webapp/permissions-and-data-access-control/use-record-access-policies-to-control-data-access/manage-record-access-policies/)
* [Understand record access policy rules](https://developer.skedulo.com/developer-guides/manage-and-control-access/create-and-use-record-access-policies/understand-record-access-policy-rules/)
* [GraphQL 101: Developer blog series](https://developer.skedulo.com/blog/category/graphql-101/)
* [Overview: Record access policy templates](https://developer.skedulo.com/user-guides/admin-and-config/admin-and-config-webapp/permissions-and-data-access-control/use-record-access-policies-to-control-data-access/record-access-policy-templates/)
* [Manage record access policies via the API](https://developer.skedulo.com/user-guides/admin-and-config/admin-and-config-webapp/permissions-and-data-access-control/use-record-access-policies-to-control-data-access/record-access-policy-templates/)
* [API reference for record access policies](https://docs.skedulo.com/skedulo-api/#get-/authorization/policies/-id-)

---

---
url: "https://developer.skedulo.com/deprecation-policy"
type: "page"
title: "Deprecation policy"
---

# Deprecation policy

Skedulo occasionally retires developer-facing features, APIs, and tools.
This page describes what you can rely on when that happens.

## Our commitments

1. **Advance notice.** Deprecations are announced in the
   [changelog](https://developer.skedulo.com/changelog/) before any behavior changes, with the
   retirement date stated up front.
2. **A migration path.** Every deprecation ships with a documented
   alternative and a migration guide.
3. **A support window.** Deprecated functionality keeps working for the
   published window. We do not remove things the day we announce them.

## Currently deprecated

| Feature | Replacement | Notes |
| --- | --- | --- |
| Skedulo SDK | Skedulo CLI | The CLI covers development, packaging, and deployment |
| SDK-based packages and libraries | CLI packages | See the [deployments guide](https://docs.skedulo.com/developer-guides/create-and-manage-deployments/) |

Questions about a specific deprecation? Raise a request with
[developer support](https://support.skedulo.com).

---

---
url: "https://developer.skedulo.com/docs"
type: "page"
title: "Developer quickstarts"
---

# Developer quickstarts

Pick the quickstart that matches what you're building. Each one ends
with something working in your tenant.

## Quickstarts

- **[Make your first API call](https://developer.skedulo.com/docs/graphql/)**: authenticate and query
  jobs, resources, and custom objects with GraphQL.
- **[Build a custom page](https://developer.skedulo.com/docs/horizon/)**: create a page in the web app
  with Horizon and Breeze components.
- **[Build your first mobile form](https://developer.skedulo.com/docs/mobile/)**: put a custom form in
  the Skedulo Plus app for workers in the field.
- **[Create a webhook](https://developer.skedulo.com/docs/webhooks/)**: call your own systems when a
  record changes.

## Tooling

- **[API explorer](https://developer.skedulo.com/api-explorer/)**: browse every REST API and try
  requests from the browser.
- **[GraphQL explorer](https://developer.skedulo.com/graphql-explorer/)**: introspect your tenant's
  schema and run queries with your API token.
- **[Install the Skedulo CLI](https://developer.skedulo.com/docs/cli/)**: scaffold, develop, and
  deploy artifacts from the command line.
- **[Build with your AI assistant](https://developer.skedulo.com/docs/agent-ready/)**: installable
  agent skills, markdown mirrors of every page, and an `llms-full.txt`
  index.

## Example repositories

Working code to clone and adapt, all deployable with the CLI:

- [CLI artifact examples](https://github.com/skeduloDevelopers/SkeduloCLIExamples):
  example definitions for every artifact type (objects, fields,
  functions, pages, webhooks, and roles).
- [Horizon component examples](https://github.com/skeduloDevelopers/HorizonComponentExamples):
  custom web-app components, including a Google Map and an address-entry
  field.
- [Mobile extension examples](https://github.com/skeduloDevelopers/MobileExtensionExamples):
  Skedulo Plus forms. HelloWorld is the intended starting point;
  UIComponentsShowcase demonstrates every form component.
- [Optimization extension examples](https://github.com/skeduloDevelopers/OptimizationExtensionExamples):
  custom scheduling logic built on connected functions.
- [Agent skills](https://developer.skedulo.com/skills/): teach your AI coding assistant to build on
  Skedulo.

## Full documentation

The quickstarts cover the first hour. For the data model,
authentication, scheduling, optimization, and access control, read the
developer guides at
[docs.skedulo.com](https://docs.skedulo.com/developer-guides/).

---

---
url: "https://developer.skedulo.com/docs/agent-ready"
type: "page"
title: "Use Skedulo with your AI assistant"
---

# Use Skedulo with your AI assistant

AI coding assistants do good Skedulo work when they have the right
context. This page covers the three sources we maintain for that:
installable agent skills, markdown mirrors of this site, and a
single-file index of the whole site.

## Agent skills

[Skedulo agent skills](https://github.com/skeduloDevelopers/agent-skills)
are instruction sets that teach an assistant how the platform actually
works: the CLI's guardrails, API patterns, artifact schemas, and
deployment workflows. Install one with the
[Skills CLI](https://skills.sh/):

```bash
npx skills add skeduloDevelopers/agent-skills@<skill-name>
```

Skills cover the full extension surface, including:

- **skedulo-cli**: safe `sked` usage (alias enforcement, inspection
  habits, and guardrails around destructive operations).
- **skedulo-api-developer**: GraphQL, EQL, batch operations, and
  performance patterns for the Pulse APIs.
- **connected-function-developer**: build and deploy serverless
  functions for custom business logic.
- **horizon-page-developer**: author and deploy platform pages across
  all three authoring flows.
- **mex-developer**: build and validate Skedulo Plus mobile extensions.
- **webhooks-developer** / **triggered-actions-developer**: event-driven
  automation, including deferred timers and inbound SMS.

The [full catalog](https://developer.skedulo.com/skills/) also covers object models, user roles,
automations, optimization extensions, and list-view configuration. It is
generated from the
[agent-skills repository](https://github.com/skeduloDevelopers/agent-skills),
so the repo is always current.

## Markdown mirrors

Append `.md` to any page URL on this site to get that page as plain
markdown:

```
https://developer.skedulo.com/docs/webhooks.md
https://developer.skedulo.com/blog/graphql-101-part-1-accessing-data-on-the-pulse-platform.md
```

The mirror is generated from the same source as the rendered page, so
the two can't drift.

## The whole site in one file

`llms-full.txt` concatenates every page into a single plain-text file.
Load it into an assistant's context, or index it locally:

```
https://developer.skedulo.com/llms-full.txt
```

## Putting it to use

Starting a Skedulo project? Install the skills that match what you're
building. Your assistant gets the schemas, workflows, and guardrails
without you pasting documentation into the chat.

Asking a one-off question? Paste the page's `.md` URL. The assistant
reads clean markdown instead of scraping HTML.

For the full platform reference (API docs, data model, extension
guides), the developer guides at
[docs.skedulo.com](https://docs.skedulo.com/developer-guides/) remain
the source of truth.

---

---
url: "https://developer.skedulo.com/docs/cli"
type: "page"
title: "Quickstart: install the Skedulo CLI"
---

# Quickstart: install the Skedulo CLI

The Skedulo CLI (`sked`) is the command-line tool for building on the
platform. It scaffolds, develops, and deploys every artifact type
(functions, pages, web and mobile extensions, webhooks, custom objects),
which puts your tenant's configuration in source control and CI.

## 1. Install

Download the installer for your platform and follow the on-screen
instructions:

- **macOS (Apple Silicon):**
  [sked-arm64.pkg](https://cli.skedulo.com/channels/stable/sked-arm64.pkg)
- **macOS (Intel):**
  [sked-x64.pkg](https://cli.skedulo.com/channels/stable/sked-x64.pkg)
- **Windows (64-bit):**
  [sked-x64.exe](https://cli.skedulo.com/channels/stable/sked-x64.exe)
- **Windows (32-bit):**
  [sked-x86.exe](https://cli.skedulo.com/channels/stable/sked-x86.exe)

After installing, open a fresh terminal so the `sked` command is on your
PATH. On Windows, use Command Prompt or PowerShell; running the CLI
under WSL isn't supported.

Verify the install:

```bash
sked about
```

## 2. Authenticate

Log in to a tenant through your browser, giving it an alias you'll use
in every later command:

```bash
sked tenant login web -a my-tenant
```

Check what you're connected to:

```bash
sked tenant list
```

Working across dev, UAT, and production tenants? Log in to each with its
own alias, and set the one you use most as the default with
`sked tenant set-default -a <alias>`.

## 3. Learn the command groups

| Command group | What it manages |
| --- | --- |
| `sked artifacts` | Create, fetch, and deploy artifacts: custom objects and fields, functions, pages, web and mobile extensions, webhooks, user roles |
| `sked tenant` | Logins, aliases, and the default tenant |
| `sked function` | Local function development (`sked function dev`) and scaffolding |
| `sked web-extension` | Local web-extension development |
| `sked package` | Deploy, list, and register packages: bundles of artifacts that ship together |

Artifact commands follow one shape:

```bash
sked artifacts <type> <operation> [flags] -a <tenant-alias>
```

For example, fetching every webhook defined on a tenant:

```bash
sked artifacts webhook get -o ./webhooks -a my-tenant
```

## Next steps

- [CLI quick reference](https://docs.skedulo.com/developer-guides/cli/cli-quick-reference/)
  puts the common commands on one page.
- [Full command reference](https://docs.skedulo.com/developer-guides/cli/command-reference/)
  documents every command, flag by flag.
- [CLI examples repository](https://github.com/skeduloDevelopers/SkeduloCLIExamples)
  has example definitions for every artifact type, ready to
  `sked artifacts <type> upsert`.
- Using an AI assistant? Install the
  [skedulo-cli agent skill](https://github.com/skeduloDevelopers/agent-skills)
  so it drives `sked` safely and correctly.
- Put it to work: [build a mobile form](https://developer.skedulo.com/docs/mobile/) or
  [create a webhook](https://developer.skedulo.com/docs/webhooks/).

---

---
url: "https://developer.skedulo.com/docs/graphql"
type: "page"
title: "Quickstart: make your first API call"
---

# Quickstart: make your first API call

Skedulo exposes the platform's data through a GraphQL API: jobs,
resources, availability, and your custom objects. This quickstart takes
you from nothing to a working query in about five minutes.

## Before you start

You need:

- A Skedulo tenant (team) you can sign in to.
- Administrator access, so you can create an API token.
- `curl` or an API client such as Postman.

## 1. Get an API token

In the Skedulo web app, go to **Settings > Developer tools > API tokens**
and create a token. Tokens are Base64-encoded JWTs and can be long-lived
or time-limited. Treat them like passwords and store them securely.

Every API request carries the token in an `Authorization` header:

```
Authorization: Bearer $API_TOKEN
```

Verify the token works:

```bash
curl -X GET https://api.skedulo.com/auth/whoami \
  -H "Authorization: Bearer $API_TOKEN"
```

A JSON response describing your user and tenant means you're
authenticated.

## 2. Fetch your tenant's schema

Every tenant's GraphQL schema is introspectable. It includes the
standard Skedulo objects plus any custom objects and fields defined on
your team:

```bash
curl -X GET https://api.skedulo.com/graphql/schema \
  -H "Authorization: Bearer $API_TOKEN"
```

## 3. Run your first query

Queries and mutations are POSTed as JSON to the GraphQL endpoint. This
query fetches jobs:

```graphql
query {
  jobs {
    edges {
      node {
        UID
        Name
        Description
        JobStatus
      }
    }
  }
}
```

```bash
curl -X POST https://api.skedulo.com/graphql/graphql \
  -H "Authorization: Bearer $API_TOKEN" \
  -H "Content-Type: application/json" \
  -d '{"query": "query { jobs { edges { node { UID Name Description JobStatus } } } }"}'
```

The response mirrors the query's shape:

```json
{
  "data": {
    "jobs": {
      "edges": [
        {
          "node": {
            "UID": "0014a76c-dfa1-4e78-87b3-635b7d7f4897",
            "Name": "JOB-0007",
            "Description": "",
            "JobStatus": "Cancelled"
          }
        }
      ]
    }
  }
}
```

## 4. Filter results

Most query fields accept a `filter` parameter using Skedulo's query
language: equality, comparison, `LIKE`, `IN`, and boolean logic. For
example:

```graphql
query {
  jobs(filter: "JobStatus == 'Queued'") {
    edges {
      node {
        UID
        Name
        JobStatus
      }
    }
  }
}
```

## Next steps

- Explore the schema interactively in the
  [GraphQL explorer](https://developer.skedulo.com/graphql-explorer/) (paste your token and go), or
  install the
  [GraphiQL web extension](https://docs.skedulo.com/developer-guides/deskless-productivity-cloud/use-graphql/graphiql/)
  in your tenant.
- Browse the REST surface in the [API explorer](https://developer.skedulo.com/api-explorer/).
- Write data with
  [GraphQL mutations](https://docs.skedulo.com/developer-guides/deskless-productivity-cloud/use-graphql/graphql-mutations/).
- Page through large result sets with
  [pagination](https://docs.skedulo.com/developer-guides/deskless-productivity-cloud/use-graphql/graphql-pagination/),
  and review the
  [query limits](https://docs.skedulo.com/developer-guides/deskless-productivity-cloud/use-graphql/graphql-query-limits/).
- Prefer REST? See the
  [REST API guide](https://docs.skedulo.com/developer-guides/deskless-productivity-cloud/use-skedulo-rest-apis/).

---

---
url: "https://developer.skedulo.com/docs/horizon"
type: "page"
title: "Quickstart: build a custom page"
---

# Quickstart: build a custom page

Pages let you build custom views inside the Skedulo web app: record
creation forms, tailored list views, or entirely custom screens. A page
is HTML plus [Horizon
components](https://skedulo.github.io/platform-web-storybooks/) and
[Breeze design-system components](https://skedulo.github.io/breeze-ui/),
created directly in platform settings. Pages publish on save. There is
nothing to deploy.

## Before you start

You need:

- A Skedulo tenant with access to **Platform settings (beta)**.
- Administrator permissions in the web app.

## 1. Create the page

1. In the Skedulo web app, go to **Settings > Developer tools >
   Platform settings (beta)**.
2. Click **Create new** in the top right.
3. Fill in the form:
   - **Name**: how the page appears in the page list.
   - **Slug**: the URL path for the page. Auto-populated from the name;
     lowercase letters, numbers, and hyphens only.
   - **Page type**: pick **Custom** for a freeform page. (**Create**,
     **Edit**, **View**, and **List** types bind a page to record
     operations on an object.)
   - **Page description**: optional.
4. Click **Save**. Publishing happens automatically.

## 2. Add components

The **Template content** field holds your page's markup. Mix plain HTML
with Horizon and Breeze components, and use
[Nunjucks templating](https://mozilla.github.io/nunjucks/) for dynamic
rendering: loops, conditionals, and variables resolved at render time.

Browse what's available:

- [Horizon component Storybook](https://skedulo.github.io/platform-web-storybooks/)
- [Breeze design-system Storybook](https://skedulo.github.io/breeze-ui/)

## 3. View your page

From the page list in platform settings, click the page's **Slug** to
open it. Edit the template content and save; changes are live
immediately.

## Working with records

The page types beyond **Custom** wire pages to your data model:

- **Create**: a form that creates records of an object.
- **Edit** / **View**: operate on a single record (they take a record
  UID, so keep them out of the navigation menu).
- **List**: display many records, with configurable columns.

Standard-object pages are read-only; to customize one, duplicate it and
edit the copy. For a full worked example (custom object, navigation
menu, and overriding the system-generated Create/View/Edit/List pages),
see the
[page override guide](https://docs.skedulo.com/developer-guides/customize-and-extend/create-and-customize-pages/overriding-pages-example/).

## Next steps

- [Introduction to pages](https://docs.skedulo.com/developer-guides/customize-and-extend/create-and-customize-pages/introduction-to-pages/):
  page concepts in depth.
- [Custom objects and fields](https://docs.skedulo.com/developer-guides/customize-and-extend/create-and-customize-forms-objects-fields/introduction-to-custom-objects/):
  define the data your pages work with.
- [Horizon component examples](https://github.com/skeduloDevelopers/HorizonComponentExamples):
  deployable examples to adapt, including a Google Map and an
  address-entry field.
- Building something bigger? [Web
  extensions](https://docs.skedulo.com/developer-guides/customize-and-extend/)
  embed full custom web apps, developed and deployed with the
  [Skedulo CLI](https://developer.skedulo.com/docs/cli/).

---

---
url: "https://developer.skedulo.com/docs/mobile"
type: "page"
title: "Quickstart: build your first mobile form"
---

# Quickstart: build your first mobile form

Skedulo Plus extensions (mobile extensions) add custom forms to the
Skedulo Plus app: inspection checklists, job completion forms, signature
capture. A form is defined as JSON and deployed with the CLI. The fastest
way to a working form is to start from one of the official examples and
adapt it.

## Before you start

You need:

- The [Skedulo CLI installed and authenticated](https://developer.skedulo.com/docs/cli/).
- Git installed locally.
- A Skedulo tenant you can deploy to.
- Basic familiarity with GraphQL and JSON.

## 1. Clone the examples repository

```bash
git clone https://github.com/skeduloDevelopers/MobileExtensionExamples.git
```

Each example is a complete, deployable form. **HelloWorld** is the
bare-bones starter and the intended base for new extensions;
**AccountDetails** is a practical working form; **UIComponentsShowcase**
demonstrates every component. Pick the one closest to what you're
building.

## 2. Understand the structure

Each extension is a bundled artifact: a JSON artifact file next to a
source directory of the same name.

```
HelloWorld.MobileExtension.json         # artifact file (this is what you deploy)
HelloWorld/
  upload_config.json                    # name + definition ID for upload
  mex_definition/
    metadata.json                       # context: where the form appears
    ui_def.json                         # the form's pages and components
    instanceFetch.json                  # per-job/resource data queries
    staticFetch.json                    # team-level shared data queries
    static_resources/locales/en.json    # UI strings
```

The two files you'll touch first:

**`upload_config.json`** names the extension:

```json
{
  "name": "My Extension",
  "defId": "my_extension_id"
}
```

**`metadata.json`** sets the context object, which controls where the
form appears in the app: `"Jobs"` shows it on job details; `"Resources"`
puts it in the **More** menu:

```json
{
  "contextObject": "Jobs"
}
```

## 3. Define the UI

`ui_def.json` declares the form's pages and components: text editors,
selectors, date/time pickers, toggles, attachments, and signature
capture, among others. The
[component library reference](https://docs.skedulo.com/developer-guides/customize-and-extend-mobile/skedulo-plus-extensions/mex-ui-components/ui-component-intro/)
documents each component's syntax and options.

Labels and placeholder text live in
`static_resources/locales/en.json`; the UI definition references them by
key.

## 4. Deploy to your tenant

Upload the extension with the CLI, passing the **artifact file** (not
the source directory):

```bash
sked artifacts mobile-extension upsert -f HelloWorld.MobileExtension.json -a <tenant-alias>
```

Open the Skedulo Plus app, navigate to a job (or the **More** menu,
depending on your context object), and your form is there.

## Next steps

- [Getting started with Skedulo Plus extensions](https://docs.skedulo.com/developer-guides/customize-and-extend-mobile/skedulo-plus-extensions/getting-started/getting-started-mex/)
  is the full walkthrough.
- [Fetch job and resource data into your form](https://docs.skedulo.com/developer-guides/customize-and-extend-mobile/skedulo-plus-extensions/files/file-structure/)
  covers `instanceFetch` and `staticFetch` in depth.
- [Expressions and validation](https://docs.skedulo.com/developer-guides/customize-and-extend-mobile/skedulo-plus-extensions/getting-started/getting-started-mex/)
  covers dynamic behavior, conditional visibility, and input rules.
- Building with an AI assistant? Install the
  [mex-developer agent skill](https://github.com/skeduloDevelopers/agent-skills)
  so it knows the MEX schema and workflows.

---

---
url: "https://developer.skedulo.com/docs/webhooks"
type: "page"
title: "Quickstart: create a webhook"
---

# Quickstart: create a webhook

Webhooks call an endpoint you control whenever records change in
Skedulo: a job is created, a status moves, a booking is cancelled. Each
webhook is a GraphQL subscription that declares which object, which
operations, and which fields you care about.

## Before you start

You need:

- An [API token](https://developer.skedulo.com/docs/graphql/) with administrator access.
- An HTTPS endpoint that can receive POST requests. For a first test, a
  request-inspection service (or a tunnel to a local server) works fine.

## 1. Define the webhook

A webhook is a name, a destination URL, and a GraphQL subscription. Save
this as `webhook.json`:

```json
{
  "name": "job-changes",
  "url": "https://your-secure-endpoint.com",
  "type": "graphql",
  "query": "subscription { schemaJobs { operation timestamp data { UID Duration } previous { Duration } } }"
}
```

Reading the subscription:

- `schemaJobs`: subscribe to changes on the Jobs object. Every standard
  and custom object has a corresponding `schema<Object>` subscription
  field.
- `operation`: which change fired (`INSERT`, `UPDATE`, or `DELETE`).
- `data`: the record's current values. A webhook fires only when one of
  the fields in the `data` block changes.
- `previous`: the same fields' values before the change.

## 2. Create it

```bash
curl -s -X POST -H "Authorization: Bearer $API_TOKEN" \
  -H "Content-Type: application/json" -d @webhook.json \
  'https://api.skedulo.com/webhooks' | jq
```

## 3. Trigger and inspect

Change a job in your tenant (edit its duration, for example). Skedulo
POSTs to your endpoint with a body matching your subscription's shape,
plus `skedulo-webhook-id` and `skedulo-request-id` headers for
correlation.

## Filtering and configuration

- Narrow which changes fire the webhook with `filter` (and
  `extendedFilter`) arguments on the subscription field, using the same
  syntax as
  [query filters](https://developer.skedulo.com/docs/graphql/).
- Keep secrets out of definitions with config variables:
  `{{ CONFIG_VAR_NAME }}` templates in the `url` and `headers` fields
  resolve at delivery time. An unresolved variable fails the webhook, so
  define variables before referencing them.
- Custom objects need change-tracking enabled to fire webhooks (enabled
  automatically for objects created after May 2024).

## Prefer the CLI?

Webhooks are artifacts, so you can manage them in source control and
deploy with the [Skedulo CLI](https://developer.skedulo.com/docs/cli/):

```bash
sked artifacts webhook upsert -f my-webhook.webhook.json -a <tenant-alias>
```

Example webhook definitions (alongside every other artifact type) are in
the
[CLI examples repository](https://github.com/skeduloDevelopers/SkeduloCLIExamples).

## Next steps

- [Webhooks and triggered actions overview](https://docs.skedulo.com/developer-guides/integration-and-automation/webhooks-and-triggered-actions/)
  explains where webhooks end and triggered actions begin (triggered
  actions run Skedulo-native actions instead of calling your systems).
- [Schedule and defer webhooks](https://docs.skedulo.com/developer-guides/integration-and-automation/webhooks-and-triggered-actions/webhooks/)
  covers delaying delivery instead of firing immediately.
- [Debug webhooks](https://docs.skedulo.com/developer-guides/integration-and-automation/webhooks-and-triggered-actions/debug-webhooks-and-actions/)
  covers delivery logs and common failure modes.

---

---
url: "https://developer.skedulo.com/start-building"
type: "page"
title: "Start building on the Skedulo Pulse Platform"
---

# Start building on the Skedulo Pulse Platform

Skedulo is a scheduling platform for deskless work: jobs, resources,
availability, and the logic that matches them. You can extend it with
full code (APIs, functions, custom components), low code (page builder,
mobile forms), or no code (webhooks and triggered actions). This guide
gets you from nothing to your first working call, then points you at
the right quickstart for what you want to build.

## 1. Get a tenant

Everything you build runs inside a Skedulo tenant (your team). You
need:

- A tenant you can sign in to. If your organization already uses
  Skedulo, ask for a login on a dev or UAT tenant rather than
  production.
- Administrator access, so you can create API tokens and deploy
  artifacts.

Don't have a tenant?
[Talk to Skedulo](https://www.skedulo.com/request-a-demo/) about
getting set up.

## 2. Get an API token

In the Skedulo web app, go to **Settings > Developer tools > API
tokens** and create a token. Treat it like a password and store it
securely. Every API request carries it in an `Authorization` header.

Verify it works:

```bash
curl -X GET https://api.skedulo.com/auth/whoami \
  -H "Authorization: Bearer $API_TOKEN"
```

A JSON response describing your user and tenant means you're
authenticated.

## 3. Make your first API call

The platform's data (jobs, resources, availability, and your custom
objects) is exposed through a GraphQL API. Queries are POSTed as JSON
to the GraphQL endpoint:

```bash
curl -X POST https://api.skedulo.com/graphql/graphql \
  -H "Authorization: Bearer $API_TOKEN" \
  -H "Content-Type: application/json" \
  -d '{"query": "query { jobs { edges { node { UID Name JobStatus } } } }"}'
```

Prefer clicking around first? Paste your token into the
[GraphQL explorer](https://developer.skedulo.com/graphql-explorer/) to introspect your tenant's
schema and run queries in the browser, or browse the REST surface in
the [API explorer](https://developer.skedulo.com/api-explorer/).

## 4. Install the CLI

The Skedulo CLI (`sked`) scaffolds, develops, and deploys every
artifact type: functions, pages, web and mobile extensions, webhooks,
and custom objects. Install it from the
[CLI quickstart](https://developer.skedulo.com/docs/cli/), then authenticate:

```bash
sked tenant login web -a my-tenant
```

You'll want it for every path below except pure API integration.

## 5. Choose your path

Each quickstart ends with something working in your tenant:

- **[Integrate via API](https://developer.skedulo.com/docs/graphql/)**: query and change jobs,
  resources, and availability with GraphQL.
- **[Customize the platform](https://developer.skedulo.com/docs/horizon/)**: build custom pages for
  the web app with Horizon components.
- **[Build for mobile](https://developer.skedulo.com/docs/mobile/)**: put custom forms in the
  Skedulo Plus app for workers in the field.
- **[Automate workflows](https://developer.skedulo.com/docs/webhooks/)**: call your own systems the
  moment a record changes.

## Building with an AI assistant?

The docs are agent-ready: installable
[agent skills](https://developer.skedulo.com/skills/), markdown mirrors of every page, and an
`llms-full.txt` index. See
[build with your AI assistant](https://developer.skedulo.com/docs/agent-ready/) to set it up.

## Keep going

- [Developer quickstarts](https://developer.skedulo.com/docs/): the full quickstart index, tooling,
  and example repositories.
- [Developer guides](https://docs.skedulo.com/developer-guides/): the
  complete documentation, covering the data model, authentication, scheduling,
  optimization, and access control.
- [Blog](https://developer.skedulo.com/blog/) and [changelog](https://developer.skedulo.com/changelog/): tutorials, deep dives,
  and what's new for developers.
