Customize forms
Overview
Custom fields are useful for simple data entry, but custom forms allow for much more complex interactions and can be utilized for product inventory, site surveys, and patient medical records.
Access custom forms
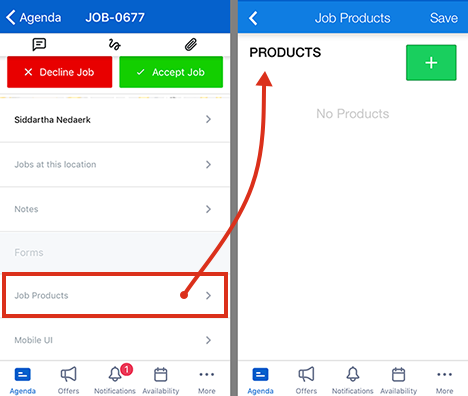
If custom forms have been added and mapped to the mobile app they will display either beneath “Notes” in a job’s details, or they will appear in the main menu.
Custom forms (and Visualforce forms) can be connected to specific job types as a way of submitting custom data about those jobs, or they can be resource-specific for purposes such as leave requests, and timesheets.
Note
If you require more information regarding custom forms, don’t hesitate to contact our Customer Success team.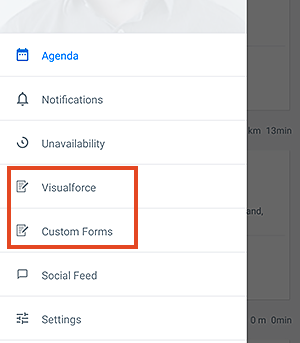
Some custom form options in the main menu of Skedulo.
Some custom form options with embedded UI elements.
Add a custom form
To access the custom form settings page, navigate to Settings > Developer tools > Custom forms.
The Upload Form button supports uploading and deploying zipped custom forms (*.tar.gz). Compiled and zipped forms can be deployed from this modal by uploading them as gzipped tar files. These archives will need to contain all files necessary to deploy forms and are restricted to a 15mb size limit. This tool is particularly useful when custom forms are ready for production and need to be deployed after testing has been completed in development environments.
To upload a new custom form, do the following:
- Click Upload Form. The Upload Custom Form modal displays.
- Click Browse and select the custom form from your file system.
- Click Upload and start deployment.
Required custom forms
The Skedulo v2 mobile app’s job details view can indicate if a custom form is required to be completed. When developed, a clear circular checkbox is added to the custom form button. A green checkmark indicates when it has been completed.
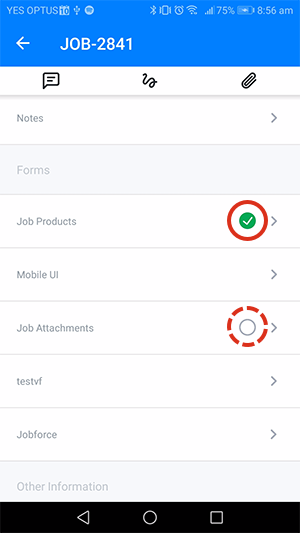
A job with two custom forms that are marked as required. One is completed.
Note
The developer of the custom form will need to include this option as part of their developed solution for these to become available.Publish a custom form
The Publish button allows admins to hide views or pages that they do not use or do not want to expose to their schedulers.
To publish a draft custom form, do the following:
- Click the menu icon at the end of the form row.
- Click Publish.
Hide a custom form
To return a custom form to Draft status so that it is not visible to users, do the following:
- Click the menu icon at the end of the form row.
- Click Unpublish.
Delete a custom form
To delete a custom form that is no longer needed, do the following:
- Click the checkbox at the start of the row to select the custom form.
- Click Delete.
Feedback
Was this page helpful?