Manage schedule rule conflicts on the Skedulo Pulse Platform
Note
This feature is only available on the Skedulo Pulse Platform.Overview
The Rule conflicts console helps to create a workflow for resolving conflicts that arise from schedules breaking the schedule rules configured for your team.
Resolve rule conflicts
Resolution of the conflict depends on the type. For example, if a time constraint rule has a conflict, then either the scheduled time or the time constraint needs to be changed to resolve it.
To resolve a conflict, do the following:
- Click on the job number or resource name (depending on the type of conflict) in the conflict row. The job details page or resource swimlane displays, as is applicable.
- Make changes so that there is no longer a conflict with the schedule rules. For example, if the conflict record indicates that the job is over allocated, deallocate the extra resources.
Note
When a schedule is updated so that the jobs are no longer conflicting with any of the rules, the record will no longer appear in the Rule conflicts console.Edit a rule conflict
Web app users with permissions for managing rule conflicts (violations) can change the status of a conflict and assign a user who can then be responsible for resolving it.
Change the status of a conflict record
Rule conflict records can have a status of Open, In progress, Closed, or Acknowledged.
To change the status of a record, do the following:
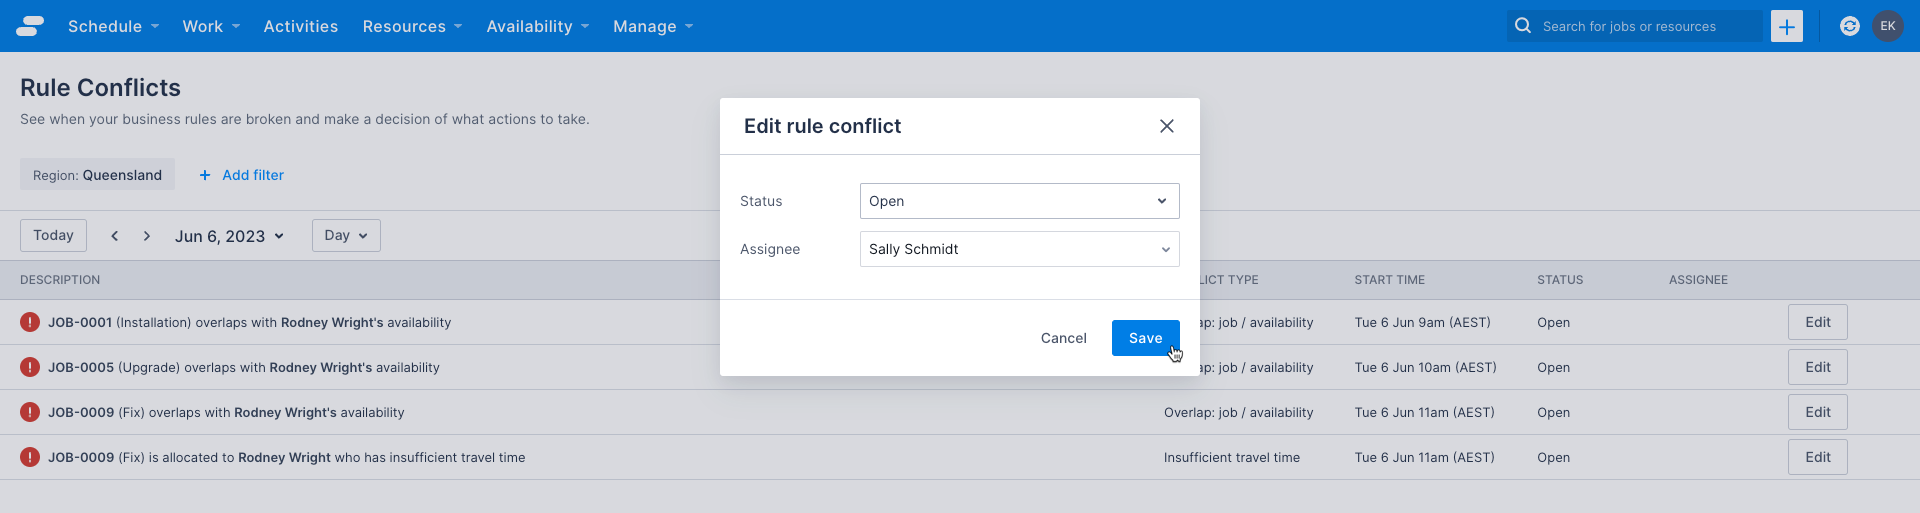
- On the conflict to update, click Edit.
- Click the Status dropdown and select the new status to assign.
- Click Save. The new status displays in the Status column.
Assign a user to a conflict record
To assign a user to a conflict record, do the following:
- On the conflict to assign, click Edit.
- Click the Assignee dropdown and select the user to assign to the conflict.
- Click Save. The user’s name displays in the Assignee column.
Note
Assigning a user does not automatically alert or notify them that an action is required of them.Related links
Feedback
Was this page helpful?