Export data
Overview
Administrators can easily export data from any object or field using the data export tool. The data is exported as a CSV file.
There are a number of reasons why you might need to export data from Skedulo. For example:
- To create a copy of data for backup purposes;
- To import data from Skedulo into another system of record;
- Because data quality initiatives may require the mass manipulation of data;
- Because changes in business operations may require the mass manipulation of data.
Create an export task
To export your data from Skedulo, you must first create an export task.
To create an export task:
- On the Data import/export page, click Create Task.
- From the task menu, select Export.
Define the export data
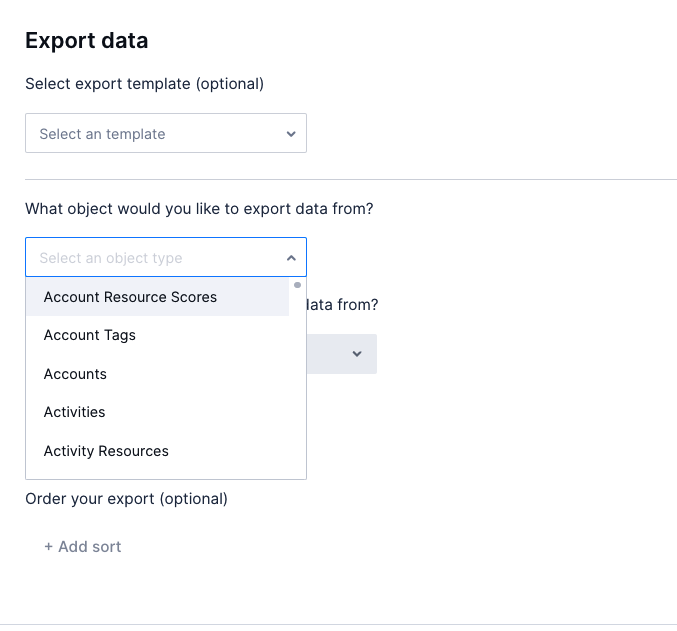
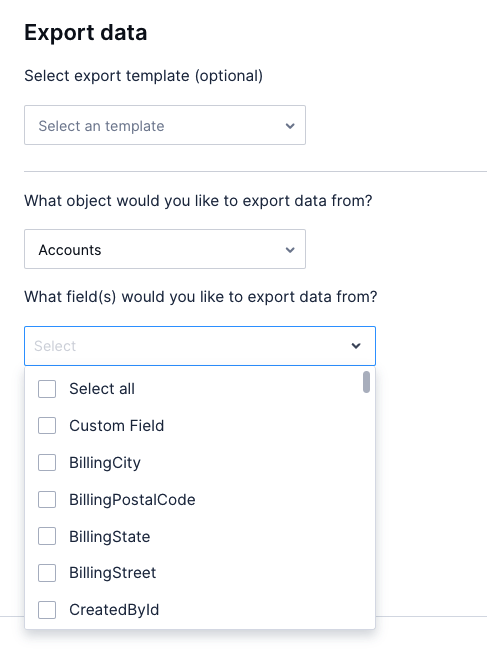
Once you have created an export task, you can select an object to export data from, and then further specify fields and filter the data before exporting.
-
From the Object dropdown menu, select the object you would like to export data from.
-
From the Fields dropdown menu, select the fields to include in the CSV file. You can either choose to select all fields, or select the ones you want to include from the list.
-
You can further refine your export data by adding filters.
- Click +Add filter to display the dropdown menu.

- Select a field to display a comparator dropdown menu.

- Select a comparator and then enter a value. You can add as many filters as you need.
- Click +Add filter to display the dropdown menu.
-
To order the order the export data in ascending or descending order:
- Click +Add sort to display the dropdown menu.

- From the dropdown menu, select a field.
- Select ASC to sort the selected field data in ascending order. Select DESC to sort the data in descending order.
- Click +Add sort to display the dropdown menu.
-
Click Create Task to save and run the export task.
-
Click Download file on the Data import/export table where the export task is listed to download the exported data as a CSV file.

Task statuses
| In Progress | The task is running (importing or exporting data). |
| Completed | The task has finished running and all the records are processed (with or without errors). |
| Canceled | The task has stopped because of one of the following reasons: An administrator canceled the process; there has been a connectivity failure; or an unexpected issue has caused the task to stop. |
Feedback
Was this page helpful?