Manage custom fields
Overview
The custom field section of admin settings allows admins to choose what fields to show and when.
To utilize previously created custom fields (in the CRM), you will need to add them to the custom fields settings within Skedulo. Detailed instructions on how to configure objects and fields on Skedulo for Salesforce and on the Skedulo Pulse Platform can be found here:
-
Skedulo for Salesforce:
- Create custom objects and fields in Salesforce and then map them in the Skedulo web app using the Custom fields settings page (see Create custom objects in Salesforce and Create custom fields).
-
Skedulo Pulse Platform:
- Create and manage custom objects and fields in the Skedulo web app using the Objects and fields settings page (see Create custom objects and fields in the Skedulo Pulse Platform). The custom field section of admin settings allows admins to choose what fields to show and when.
This page contains instructions for working with custom fields in Skedulo for Salesforce.
Manage custom fields
Note
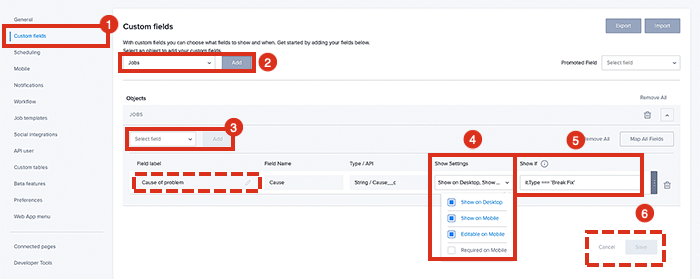
Access to the admin settings is provided via the user profile button (at the top-right of the console).To make changes to a custom field in the web app:
-
First, go to the admin settings for custom fields (accessible via the user profile button bottom-left of the console).
-
Select an object from the Select object picklist and click Add.
-
Next, select a field from the Select a field picklist and click Add.
-
Option: Add a reference field if required.
-
Option: Edit the field label to rename it to something more meaningful.
-
-
Choose where the field will be shown from the options available (multiple selections are permitted):
-
Show on Desktop.
-
Show on Mobile.
-
Editable on Mobile.
-
Required on Mobile.
-
-
Option: enter any Show if rules.
-
Click Save.
Tip
It is possible to highlight a custom text or label field and have it shown at the top of the job details view in the Skedulo the mobile app. For more info, refer to the documentation about promoted custom fields.Add an object
Before adding any fields, you first need to add an object. Select an object using the drop-down list provided, then click the Add button to add it to the editing area. The options available are pulled from the CRM—with the standard Skedulo objects at the top of the list, e.g., jobs, resources, etc.
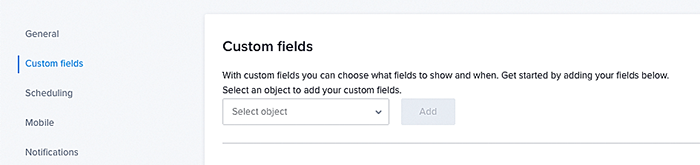
The admin settings for custom fields.
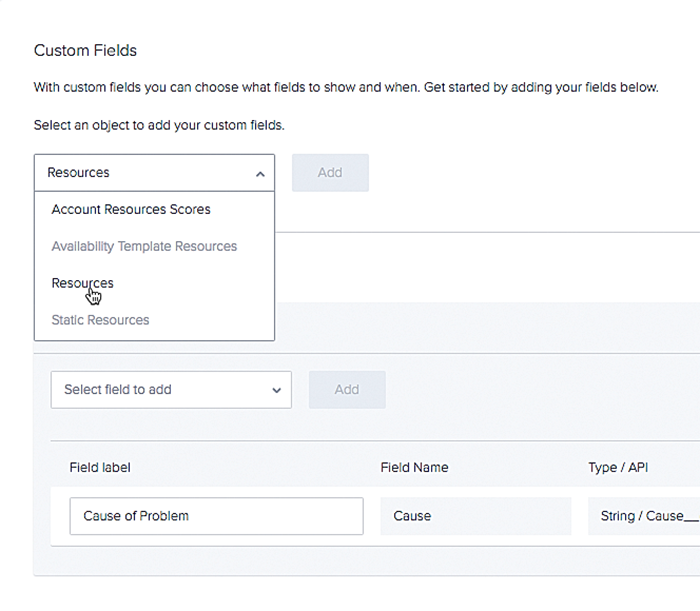
An object (resources) being added to the editing area of custom fields.
Tip
You can click in the text field of the drop-down list to enter a search phrase.Add a field
To add a field to an object, select the field from the available drop-down and click the Add button.
Alternatively, use the Map All Fields button near the top of the object display–this will add a record for every missing field for the current object.
Once multiple fields have been added to an object, re-order them using the drag handles on the right-hand side of each field.
Finally, click Save to keep the configuration.
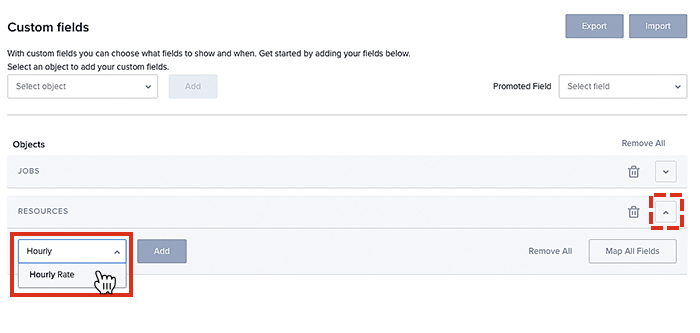
A field (named hourly rate) being added to the resources object.
Each custom field is made up of the following properties:
Custom field properties and their descriptions.
| Property | Description |
|---|---|
| Field Name. | An automatically generated name for the field used to identify the field within the object. This value cannot be changed. |
| Field type. | This identifies the data type of the field. It will determine how the user can interact with the field within the rest of the app. This value cannot be changed. |
| Field label. | The display used whenever the field is shown in the app. Every field will be given a default field label, but that value can be changed at any time. |
| API Name. | This is the name given to the field by the service provider. This value cannot be changed. |
| Show Settings. | These settings dictate whether the field will be visible on the mobile and desktop versions of the app. It also determines if the field is required as well as allowing the resource to edit the field when using the mobile app. |
| Show if. | Determines how to present content when certain criteria are matched, e.g., while creating a job or a scheduler changes the job type–if this is part of the Show if rule, then additional fields can be exposed. |
Add a reference field
Add a reference field using the same method as any other field. If the reference is to a standard Skedulo object (e.g., jobs, resources, etc.), then no additional steps are required. However, if the referenced object is a custom object, then a new object record will need to be added. This new object record will need at a minimum, a UID field, and a name field.
The following example shows a custom setup where a field on the Jobs object called Follow Up Procedure is referencing the Follow Up Procedures schema–with that schema providing a UID field and a name field.
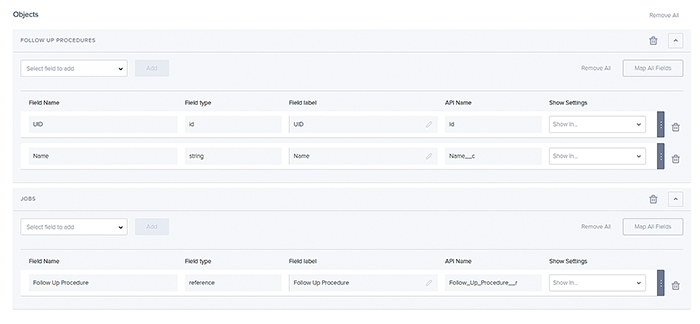
A set of custom fields from the configuration settings in the web app.
Mark a field as required
Using the Show Settings an admin can mark a custom field as required. Doing so will automatically make that field editable on the mobile app, and the job cannot be completed until the field has been populated and saved.
Custom fields that are defined as required are displayed regardless of the show if rules; enabling a resource to save jobs requiring this type of configuration.
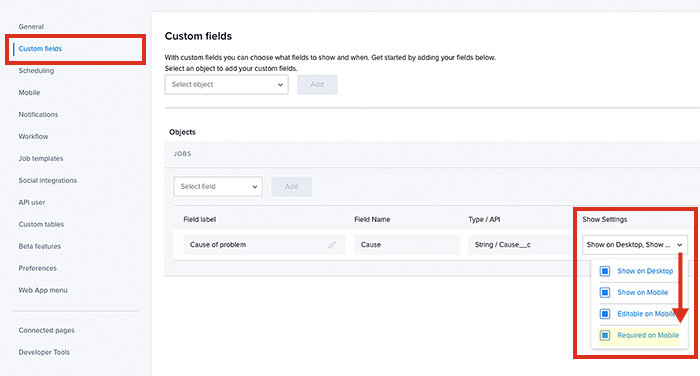
Making a custom field a required field for a job on the mobile app.
Remove a field or object
Any field or object can be removed by clicking the remove icon. This will also remove the custom field from the mobile app, i.e., the field will no longer be visible in the Skedulo mobile app.
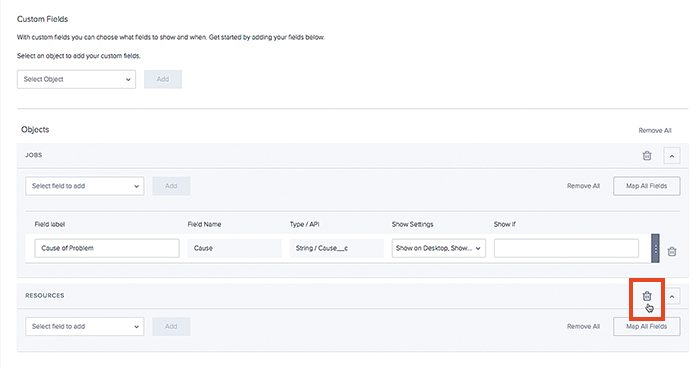
How to remove a field or an object from the Skedulo custom field settings.
“Show if” rules for custom fields
This allows users to write rules that evaluate to a boolean result using a relatively simple syntax to compare strings, booleans, numbers, etc. These rules are then run against custom fields on the job details page. The fields are only shown when the conditions described by the rule is met on both the job details page and the Skedulo mobile app.
Sample rules
Note
The conditional is case sensitive.| Rule | Context |
|---|---|
| it.Type === 'Installation' | Only show this field when the job type is 'Installation'. |
| it.Type !== 'Installation' | Only show this field when the job type is not 'Installation'. |
| it.Description === '%Event%' | Only show this field if the description contains the word 'Event'. |
| it.Description === 'Event%' | Only show this field if the description start with the word 'Event'. |
| it.Description === '%Event' | Only show this field if the description ends with the word 'Event'. |
| it.JobStatus === 'Dispatched' | Only show this field when the Job Status is 'Dispatched'. |
| it.JobStatus !== 'Dispatched' | Only show this field when the Job Status is not 'Dispatched'. |
| it.JobStatus === 'Pending%' | Only show this field when the Job Status is either ‘Pending Dispatch' or 'Pending Allocation'. |
| it.CustomCheckbox === true | Only show when the checkbox is checked. |
| it.CustomCheckbox === true && it.CustomField !== '' | Only show when the checkbox is checked and the custom field is not empty. |
| it.Type === 'Installation' || it.Type === 'Upgrade' | Only show this field when the job type is ‘Installation’ or 'Upgrade'. |
Fields on the job object
Show if rules can be defined against any of the core object fields, as well as any custom field (name) defined against these objects in Salesforce (which are mapped to Skedulo).
Important
Although, all these fields are available for show if rules; rules against certain fields (like UID, or Name) would not be very practical, nor useful.-
Job Object
-
AbortReason
-
AccountId
-
ActualEnd
-
ActualStart
-
Address
-
AutoSchedule
-
CanBeDeclined
-
CompletionNotes
-
ContactId
-
CreatedById
-
CustomTextField
-
Description
-
Duration
-
FollowupReason
-
GeoLatitude
-
GeoLongitude
-
JobAllocationCount
-
JobStatus
-
Location
-
LocationId
-
Locked
-
Name
-
NotesComments
-
NotifyBy
-
NotifyPeriod
-
ParentId
-
RecurringSchedule
-
RecurringScheduleId
-
RegionId
-
Timezone
-
Type
-
UID
-
Urgency
Import or export a custom schema
Administrators can upload (import) or extract (export) custom fields using the buttons provided at the top right of the admin settings for custom fields.
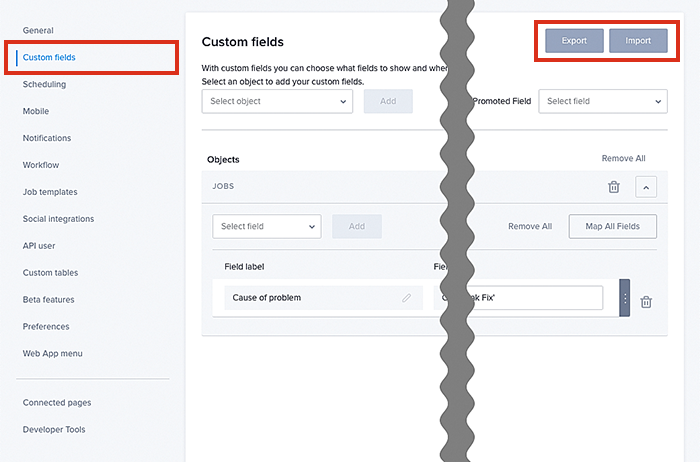
The location of the import and export buttons in the admin settings.
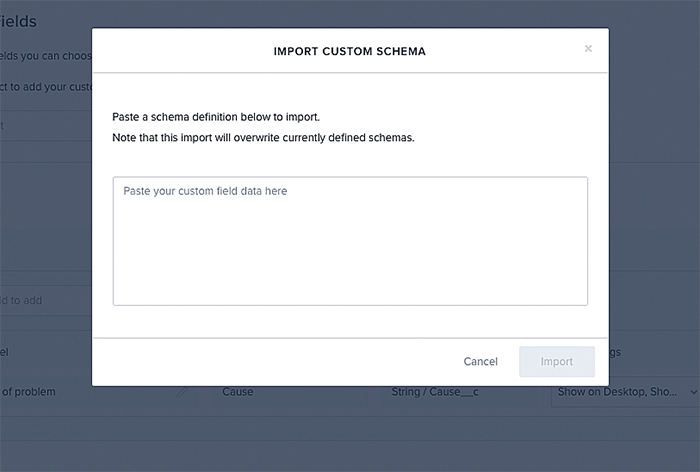
The import custom schema modal in the admin settings.

Exporting or extracting a custom schema using the admin settings.
Feedback
Was this page helpful?