Create, configure, and manage users (deprecated)
Deprecated
Please note that this page relates to functionality that has been deprecated and should not be used.
Please see the General web app configuration settings documentation for how to enable the new Users page, and Manage users for how to use it.
Overview
The User section of the admin settings (on the independent platform) allows admin users to create, configure and manage their organization’s user base.
View current user list
To view the list of available users in your organization, navigate to the Settings menu and select Users from the left panel. The users added during the onboarding process, along with their assigned roles and their status appear here.
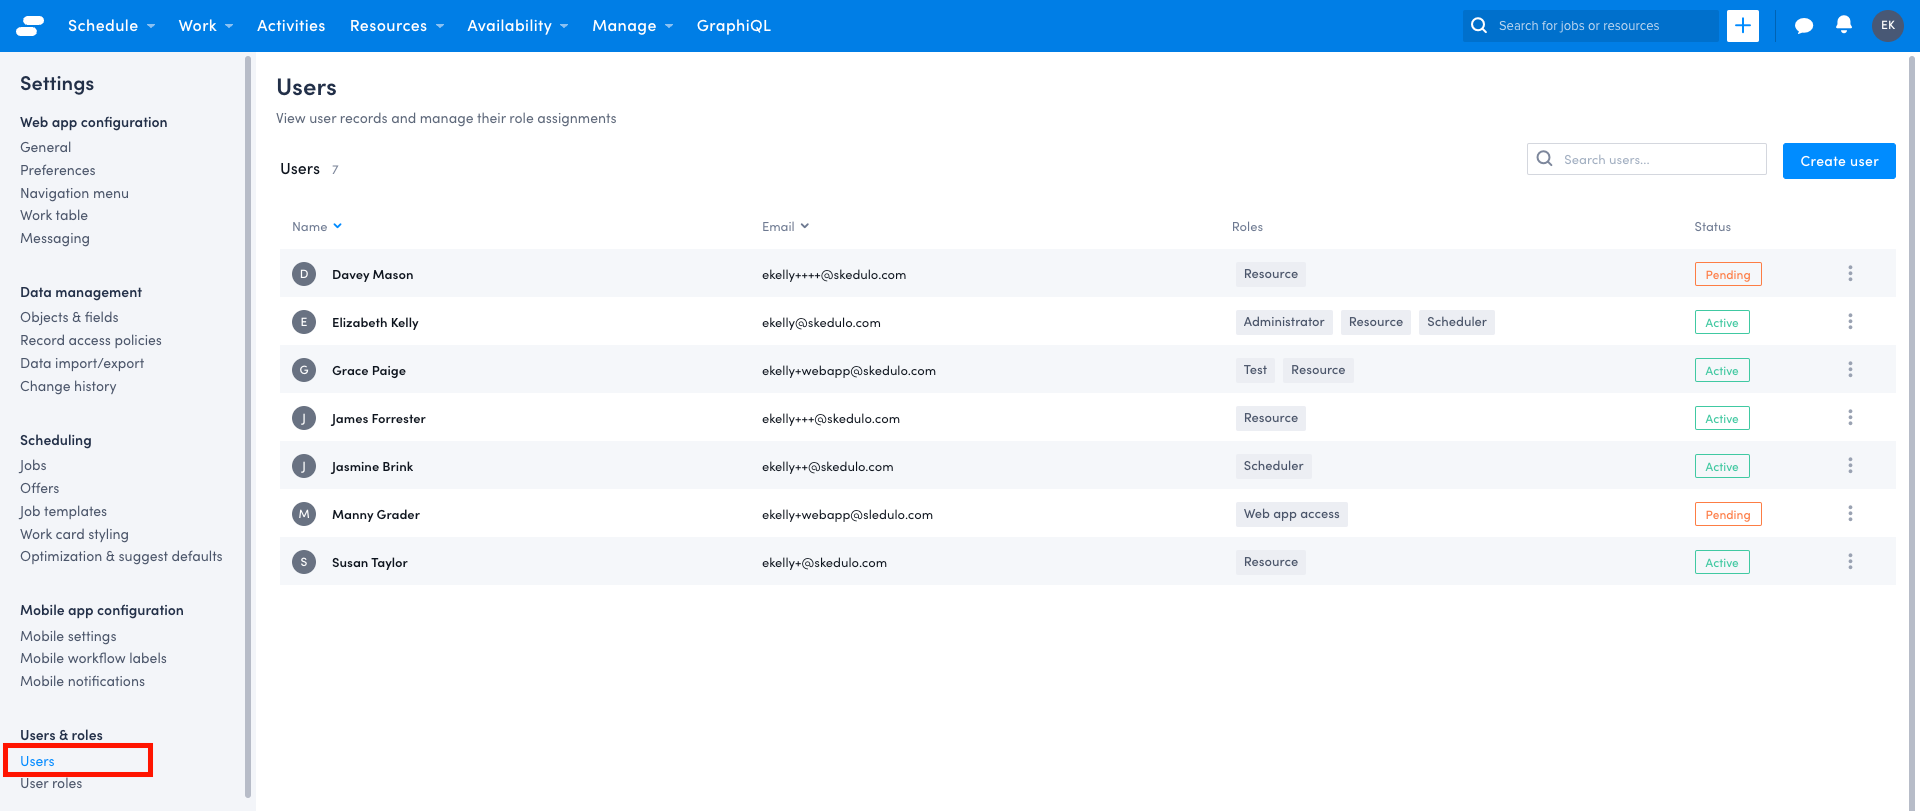
The users are listed alphabetically. You can reverse the order by clicking the blue caret next to the Name heading.
Enter a name in the Search field to quickly locate that user in the list.
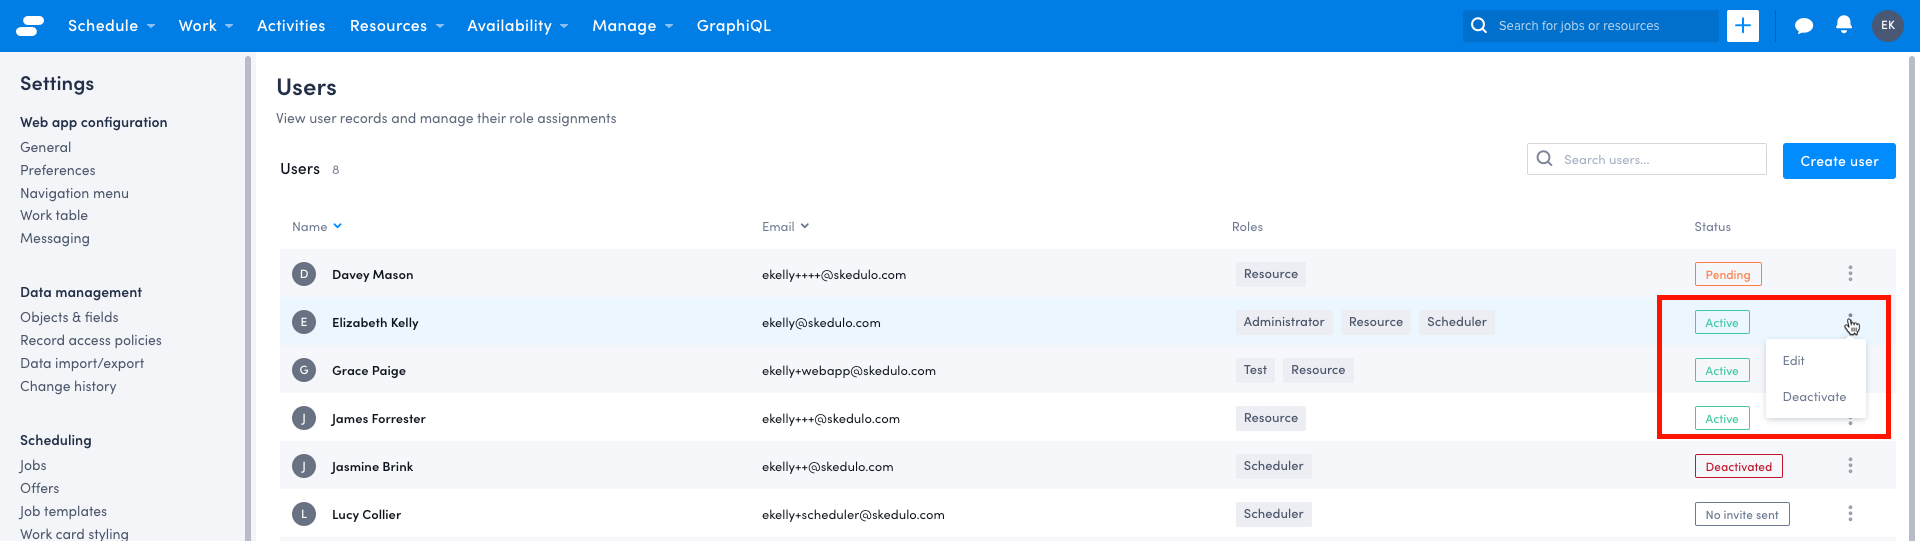
Click the vertical ellipsis at the far right of a user’s entry to display a dropdown menu that offers different options depending on the status of the user.
These options are given below:
| Status | Options |
|---|---|
| Active | Edit. Click to open that user’s details page and edit their name, roles, and profile picture. Deactivate. Click to deactivate the user. A dialog is displayed asking you to confirm the deactivation. |
| Pending | Edit. Click to open that user’s details page and edit their name, roles, and profile picture. Resend user invite. Click to resend an invite to the email address registered for the user. |
| No invite sent | Edit. Click to open that user’s details page and edit their name, roles, and profile picture. Send invite. Click to send an invite to the email address registered for the user. |
| Deactivated | Edit. Click to open that user’s details page and edit their name, roles, and profile picture. Reactivate. Click to reactivate a user that was previously deactivated. |
Note
Each user has a status. The status remains Pending until they have completed their initial login after which it becomes Active. You can Deactivate an active user as well. Deactivating a user will prevent them from logging into Skedulo.Create or add users
To create a new user:
- Click Settings > Users & roles > Users.
- On the Users page, click Create user to display the Create person page.
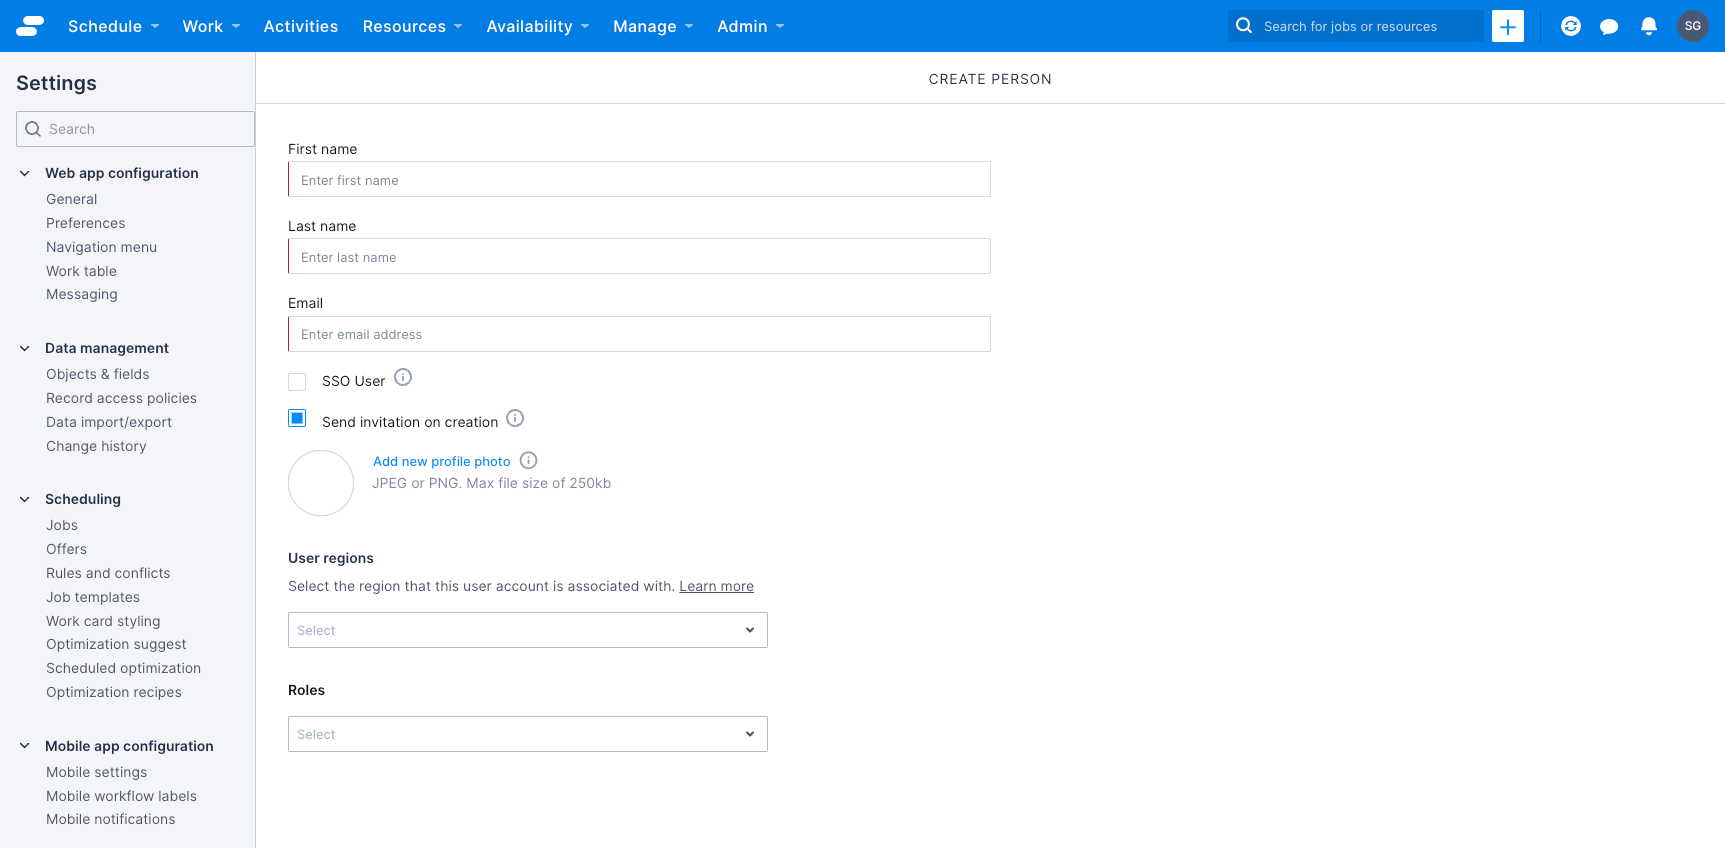
- Enter the following mandatory details for the new user:
- First name
- Last name
-
If SSO has been set up for your team, you can select the SSO user checkbox to add SSO as a login option for the user.
-
Click the Send invitation on creation check box if you do not want to send an email invite to the user when you click Save. If you prefer, you can send the invite manually after creating the user, from the Users page.
-
Click Add new profile photo to attach a profile picture for the user, if required.
-
If applicable, select one or more regions for the user from the User regions dropdown menu.
Note
Whether this field is visible or not is determined by an admin setting and is only available on the Skedulo Pulse Platform.- From the Roles dropdown menu, select one or more roles for the user. If you choose Resource, you need to enter more details:
- Region (mandatory)
- Secondary regions
- Category
- Type
- Address
- Mobile
- Country code
- Preferred notification method
- Working hours
- Click Save.
Note
The maximum image size for the profile photo (.jpg or .png) is 250KB. The photo can be cropped by dragging it around, zooming in or out.Invite users to join
If Single Sign-on (SSO) is not in use, then users need to be invited to log in via email. This is done either when the user record is created or afterwards by manually triggering the email invite. Without an invite, a user will be unable to log in to Skedulo.
If you did not select Send invite on creation when setting up the new user, you can manually send an invite by doing the following:
- Click the vertical ellipsis of the user to whom you want to send the invite.
- Click Send Invite.
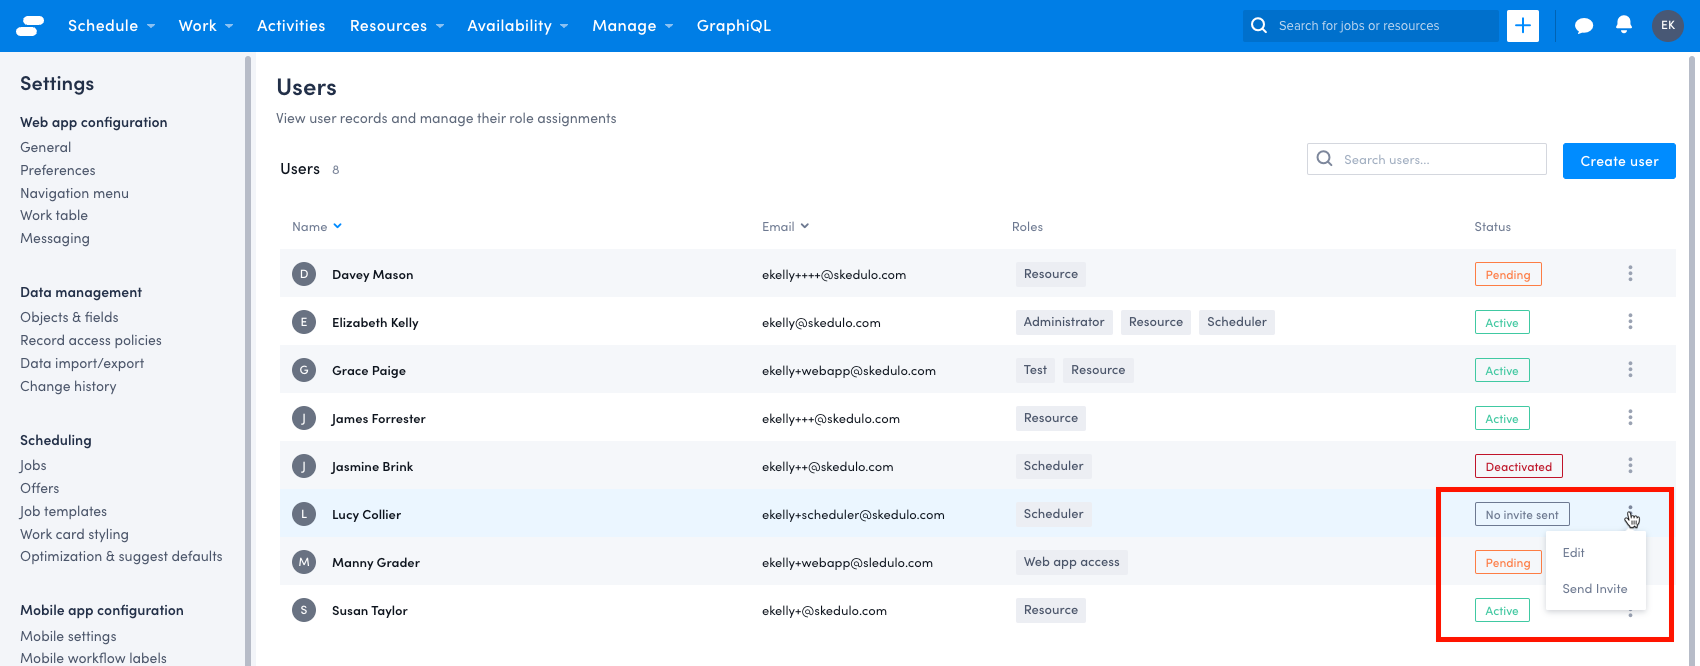
When you click Send Invite, an email invitation is sent out to the user’s email address.
Upon accepting the invitation, the newly created user should reset their password before they can gain access.
Resend an invite
If a user’s status is Pending, you can resend an invite. Click the vertical ellipsis of the user to whom you want to send another invite, and select Resend user invite.
View or edit an existing user’s details
To view or edit a user’s full details, click the vertical ellipsis of the user, and select Edit.
After making the necessary changes to the user’s details, click Save.
Deactivate a user
To deactivate a user, do the following steps:
- Click the vertical ellipsis of the active user, and then click Deactivate.
- If the user is allocated to any jobs, schedulers can reallocate the jobs before deactivating the user by clicking the link to the Jobs page in the Deactivate user notification screen.
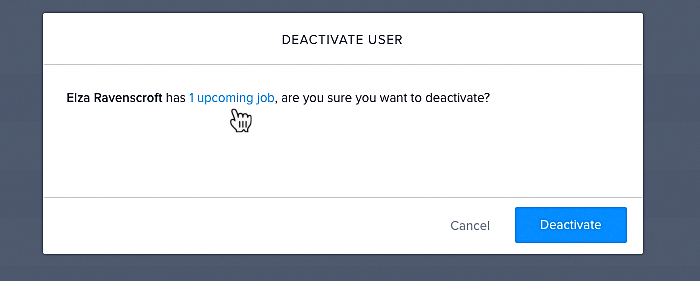
- To proceed with deactivation, click Deactivate on the confirmation message.
Note
Once deactivated, the user will be automatically unscheduled from any outstanding job allocations and shifts.Note
There is a 12-hour delay before the user is actually prevented from accessing the system.Reactivate a user
To reactivate a user, do the following steps:
- Click the vertical ellipsis of the deactivated user, and then select Reactivate.
- To proceed with the reactivation, click Reactivate on the confirmation message.
Feedback
Was this page helpful?