Use Dynamic Messaging in Skedulo Platform
Overview
Dynamic Messaging is a Skedulo accelerator product that injects instant messaging capabilities into the web and mobile apps. It provides a quick and flexible way of communication platform for resources in the office or in the field to stay up to date on information they need to complete their work throughout the day. It is one of Skedulo’s paid add-on products that works across Skedulo’s core web and mobile applications to connect your entire workforce.
Resources can access messaging functionality from their mobile device by tapping the Messages icon on the bottom navigation bar in the Skedulo mobile app.
Note
-
Salesforce Chatter cannot be used at the same time as Skedulo’s Dynamic Messaging feature. Enabling Dynamic Messaging will disable Salesforce Chatter integration in your Skedulo organization.
-
Contact your Skedulo Customer Success Manager to discuss how to add Dynamic Messaging to your organization.
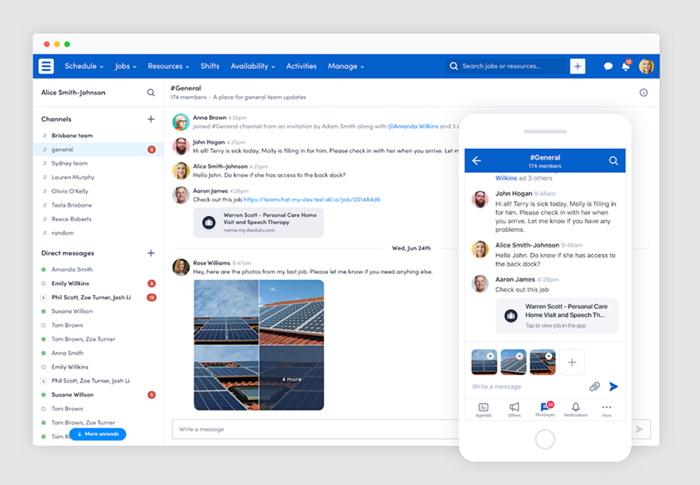
Channels
Channels are dedicated spaces where conversations and discussions over a topic can be held within a group of people. They can be either private or public for any project, client, team, or task. The main rationale for creating a channel is to connect people in one place where they can share and brainstorm ideas, have focused discussions, and determine how a task at hand should move ahead. With the right people and information in one place, channels can provide clarity to a particular piece of work and increase the productivity and efficiency of a team.
See Confirm device compatibility for more information about supported mobile devices.
You can also perform all of the same actions in the mobile UI as you can in the web app.
Dynamic Messaging in the Skedulo web application
To access Dynamic Messaging from the Skedulo web application, click the chat bubble icon in the upper-right corner of the web UI.
The following guide shows you how to create and manage a dynamic message channel in the Skedulo web application.
Prerequisites
- To create and manage a dynamic message channel, you must be an administrator or user with the following permission:
- Messaging > Use messaging
- Messaging > Manage channels
- Users must be logged into the Skedulo application before they can be added to a channel.
- To allow users to view and send messages in a channel, ensure their roles have the following permission:
- Messaging > Use messaging
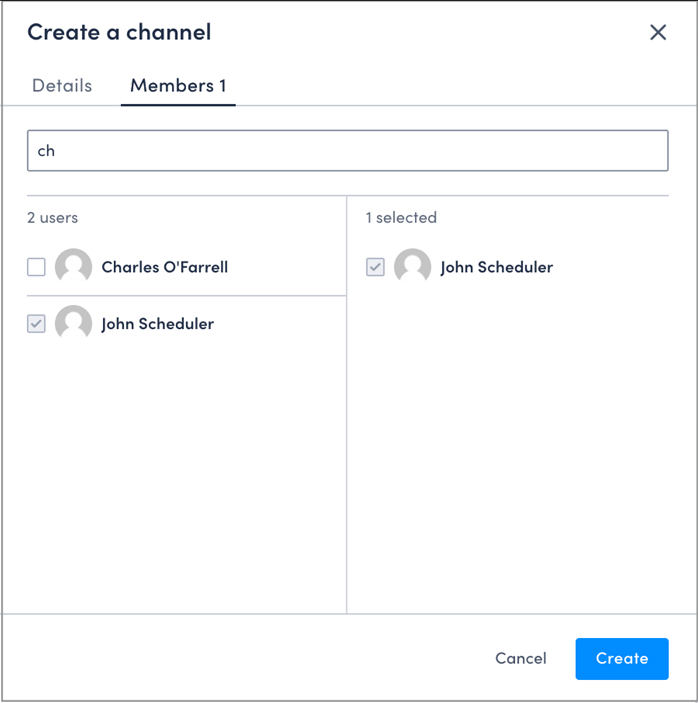
Create a dynamic message channel
Do as follows to create a channel:
-
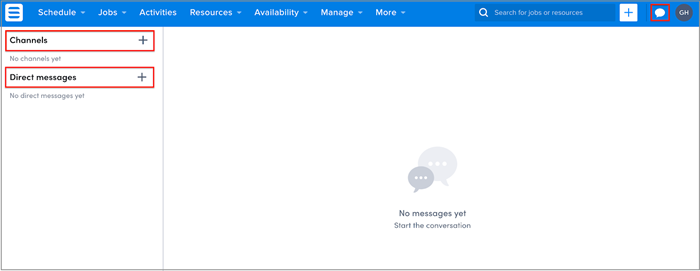
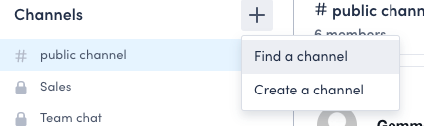
Click the chat bubble in the upper-right corner.
-
Create a channel by clicking the + icon next to Channels.
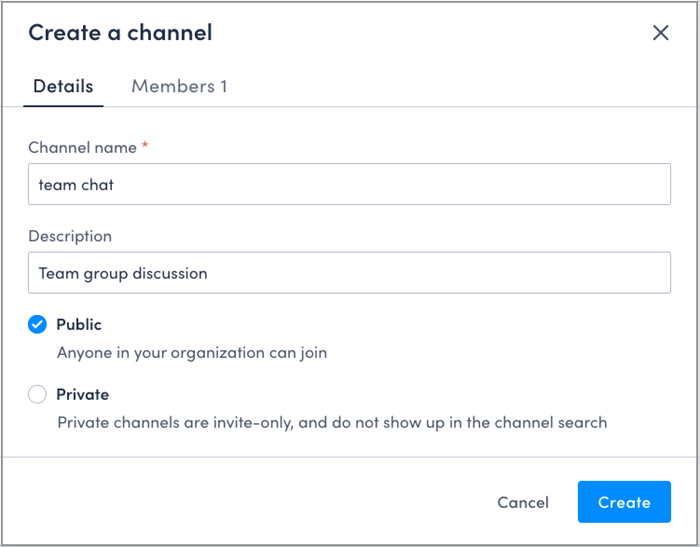
The Create a channel modal displays.
a. Provide a channel name and description (optional).
b. Select whether this channel is public or private.
-
Add users to the channel from the Members tab.
You can add users by selecting one or multiple users from the list, or tapping select all to add all users to your organization.
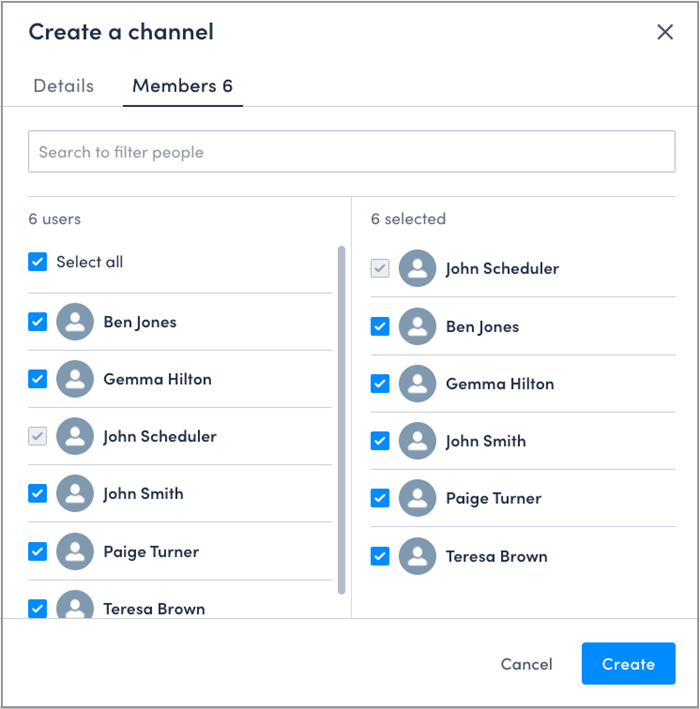
You can also filter the list from the search bar to find the users you want to include in the channel.
-
Click Create when you are finished.
Known issues
If the channels you created are not visible in the Channels section, do as follows:
- Log out of the Skedulo web app and log back in to refresh the page.
You can also find them by selecting the search icon (![]() ) to open the Discover Channels modal, where all channels are listed.
) to open the Discover Channels modal, where all channels are listed.
Send direct messages
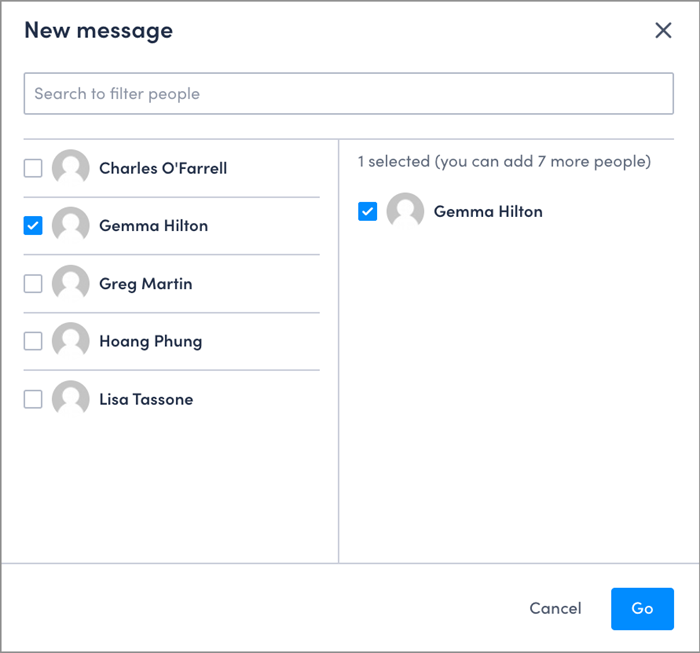
You can use the same process to create a direct message channel in the web application.
-
Click the + next to Direct messages to open a new direct message channel.
-
Select users you want to include in the direct message channel.
You can include up to eight users, including yourself, in the channel.
-
Select Go to create the channel and begin chatting.
You can use emojis, attach files, or add job links in the chat.
Tags and notifications
You can tag a user in a channel from the web app by typing @ and selecting their name from the prompt.

The chat bubble icon in the Skedulo web application displays a notification number when there are new messages available for the logged-in user.

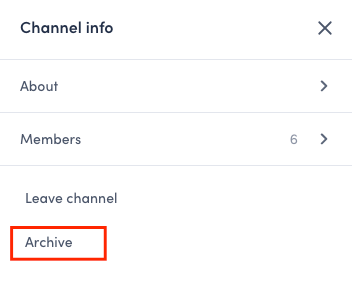
Archive channels
Admins or channel creators can archive channels from the web app.
To archive a channel, do the following steps:
-
Open the channel you want to archive from the channel list.
-
Select the info icon (
 ) on the right side of the messaging window to open the Channel info panel.
 -
Select Archive.
-
The Leave this channel? modal appears. Select Archive to confirm your action.
Restore archived channels
Admins can find, view, and restore archived channels of which they are members using the web app.
Channel creators can also find, view, and restore archived channels that they created.
To restore archived channels, do as follows:
-
Open messaging from the chat bubble icon in the navigation bar.
-
Select the search icon next to Channels.
-
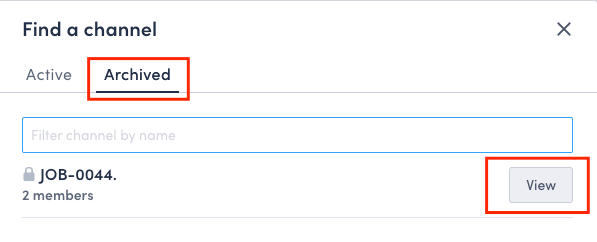
In the Discover channels modal, switch to the Archived tab.
-
Choose the channels that you want, then select View.
-
To restore the channel, select Restore channel in the admonition bar at the top of the message panel.
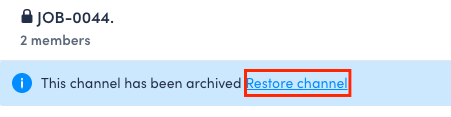
-
Select Restore to confirm your action.
See also
Feedback
Was this page helpful?