Functional permissions and custom roles
Overview
Skedulo Pulse Platform and Skedulo for Salesforce team administrators can create custom user roles and set functional permissions to gain fine-grained control of user access to application features and data.
Custom roles allow administrators to create new roles outside of the standard Administrator, Scheduler, and Resource roles and assign access-level permissions to each of them.
Permission settings apply to the following application functions:
- Application features, such as the ability to dispatch a job.
- Navigation options available to the user in the web app.
- Platform features, such as creating messaging channels.
- Administrative controls, including adding users and modifying their permissions.
- Creating and modifying shared list views.
- Access to Skedulo APIs.
Limits and limitations
Number of custom roles
There is a limit of 20 custom roles that can be created for a team, in addition to the three standard roles, of which Scheduler and Resource can be customized.
Scenarios when standard roles must be assigned
There are some cases where the standard roles must be used (with or without the addition of custom roles):
- Use of the Skedulo mobile app requires the Resource role, which must contain the Mobile app access permission.
- The Resource role is also required for users to be allocated work.
- The Administrator role must be assigned to users who need to manage data in the web app, for example configuring job types and resource categories.
Scenarios when permissions aren’t the appropriate way to control access
Functional permissions restrict access to Skedulo features and are not designed for the following uses:
-
Object and field-level security, that is, control over access to specific data objects and fields.
-
Rule and filter-based record access policies. For more information on these, see Record access policies.
Multiple role assignments
Admin users, and other users with appropriate role permissions, can assign custom roles instead of, or in addition to, the standard roles.
Users with multiple roles are granted all of the permissions from all of their assigned roles.
For example, you may want certain users with a Resource role to also be able to log in to the web app to view their schedule. To do this, you can do one of the following:
- Modify the Resource role permissions to provide web app access to all users with the Resource role.
- Create a custom role with web app permissions and assign it as an additional role to a subset of users with a Resource role so that they have all Resource role permissions and access to the web app.
You can also remove permissions for standard user roles by modifying the role directly. This excludes the Administrator role, which cannot be modified. If you incorrectly modify a standard role and want to return it to its default settings, you can achieve this by deleting the role. See Resetting a standard role for details.
Base permission requirements
If a user does not have the required set of base permissions, they will receive an error when loading the app.
Permissions required for using the web app
Users can access the Skedulo web app with only a custom role; they do not need to have one of the standard roles. At a minimum, users must have a role with the following permissions enabled, which are identifiable in the permissions list with an alert ⚠️ icon in the description:
- Web app > Web app access
- Scheduling > View and modify schedules
- Custom objects and fields >
- View custom data definitions
- View picklist vocabulary items
- Configuration > View organization settings
- Configuration > View user’s own preferences
- Data > View data records
- Extensions > View packages
It is also advisable to give roles that need to use the web app access to the relevant navigation menu items.
Permissions required for using the mobile app and being allocated work
Users must have the Resource role to be assigned work and use the Skedulo mobile app to complete work. Custom roles can be added and the Resource role can be modified, but at a minimum this role must be assigned.
Note
The Administrator role always has all possible permissions and it cannot be modified.Important
Users that are to be assigned work must have the Resource role to be treated as a resource for work allocation.Role management
As a user with the required permissions (or the Administrator role), you can configure roles and permissions in the Skedulo web app.
For detailed information on how to modify existing user roles or create custom roles, see Creating custom roles for functional permissions. An overview is provided below.
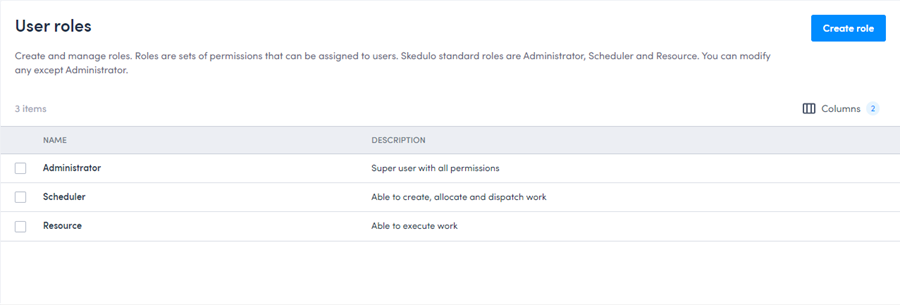
View your team’s roles
To view the roles available on your team, navigate to Settings > User roles.
From this page, you can do the following:
- Create a new custom role - from a copy of an existing role (recommended) or created from scratch.
- Delete a custom role.
- Reset a standard role to its default values.
- Click a role to view the role details and access additional actions.
View role details
To view the details of a role, navigate to Settings > User roles and click the name of a role to view.
The role details page has three tabs with the following functionality:
- Permissions:
- Modify permissions for the role.
- Edit the role description.
- Delete the role if it is a custom role.
- Navigation menu access:
- Configure what features are visible in the navigation menu for users with the role.
- Users:
- View a list of users that currently have the role assigned, as well as any other roles they have assigned to them.
To view the roles assigned to users or assign a role to a user (Skedulo Pulse Platform only), navigate to Settings > Users.
Control access to functions in the web app
Many permissions affect functions or menu items in the web app. For a comprehensive list of permission dependencies and the areas of the web app that are controlled by certain permissions, please see Permission dependencies.
Important
-
The
Restrict resources from logging into the web appsetting under Settings > General > Access has been removed. -
To prevent users from logging in to the Skedulo web app, remove the Web app > Web App Access permission from their assigned role/s.
Control access to the API
Most permissions affect the user’s access to the Skedulo API.
Even if an action appears to be allowed in the Skedulo web app, it may be denied, based on the user’s permissions, by the underlying API.
Feedback
Was this page helpful?