Use the Schedule Calendar view
Overview
The Schedule Calendar view provides schedulers with a way to visualize schedules, work, and resources over a chosen month or week.
The Schedule Calendar view
To display the Schedule Calendar view, click Schedule > Schedule Calendar in the top navigation menu.
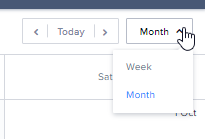
In the Schedule Calendar view, you can choose to display a full calendar month or a week (Sunday to Saturday). Select Month or Week from the drop-down in the top right-hand side of the calendar.
If Month is selected, the calendar displays a full calendar month. Sheduled jobs are displayed as color-coded work cards that contain labels to highlight their current status.
If Week is selected, the calendar shows a complete seven-day week (Sunday to Saturday). It differs from the month view because each day is subdivided by hours and minutes. This means work can be allocated to a date and time in a single movement.
There are three ways to control the visual range of the calendar:
- The date picker (1). Select a target month or week from the calendar, depending on which view you have selected.
- The date switcher (2). Zoom to Today, or step forward or backward one month or one week at a time.
- The view options (3). Select the visible time span, either Month or Week.

Create work from the calendar
To create work from the calendar, right-click on a day and select Create Job. The Create Job page will open with the Start Date field on the Time tab pre-populated. Complete all the required fields (highlighted red) and then click Save.
Note
Creating work on a specific day in the calendar will pre-populate the Start Date for the work but not the End Date, Start Time, or End Time fields. All of these are required fields that must be completed in order to save the work.Schedule work from the calendar
To schedule work from the calendar, drag and drop a work card onto the day you want to schedule it for. In Week view, you can drop the card at a specific time in a day. In Month view, you have to allocate times using the Select time range modal once the card is dropped in place.
Note
Dragging work cards onto the calendar does not assign any resources to the work. This must be done separately. For more information, see Allocate work.Move work in the calendar
After work has been scheduled, you can drag cards from one date to another in both the Month and Week calendar views.
Important
Currently, there is no validation applied to cards that are dragged between dates in the calendar so care should be taken to ensure that applied constraints are not overlooked.View work details in the calendar
A summary of a work item’s details accompanies each card in the calendar. To view the summary, click on a work card.
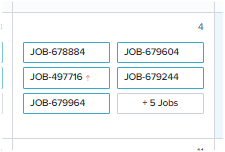
In the Month view, only four work cards can be displayed per day. When more than six work items exist on the same day, the sixth card indicates that more are available. For example, a card displaying +5 JOBS indicates the card is shared by five work items.
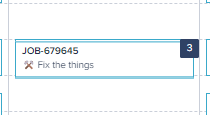
In the Week calendar view, where two or more work items are allocated at the same time on the same day, they are stacked and represented by a small number in the corner of the time block where they overlap. Move the cursor over the number to reveal the stacked work cards and their details.
To open the job details page and view the full details of a work item:
- In the Week view, click on the number on the work card.
- In the Month view, click
 View on the work details summary.
To view the time allocated for work, move the cursor over a card in the calendar. A tool-tip is displayed showing the start and end times.
To view work items that are long in duration (for example, work that extends over two days or more), move the cursor over the card in the calendar. The work card will expand to show the actual dates covered by the work.
Dispatch work from the calendar
To dispatch work from the Schedule Calendar view, right-click on a card in the calendar and select Dispatch. Click Ok when prompted to confirm the action.
Note
This option is available only when a work item has resources allocated and a status of Pending Dispatch. For more information about allocating resources, see Allocate work.Cancel or unschedule work in the calendar
To cancel or unschedule work from the Schedule Calendar view, right-click on a card in the calendar and select the required action from the menu options.
- Unschedule. The card is removed from the calendar and the date and time fields are reset. You can reschedule the work by using one of the methods detailed above.
- Cancel Job. The Cancel Job modal is displayed prompting you to provide a reason for the cancelation. If you confirm the cancelation, the card is removed from the calendar, its status changed to Cancelled, and it is locked. You can restore canceled work.
Lock or unlock work in the calendar
Locking a job prevents any change to work details from within the scheduling pages across the web application. This includes changes to work details, like the scheduled date/time, or work requirements, like allocations. If a job is locked, none of these details can be altered.
Although locked jobs prevent further schedule details from being changed within the web application, this is not applicable to the mobile application, and resources can still successfully progress and complete a job that is locked in the web app.
When a job is locked, a lock icon appears closed on the work card.
To lock or unlock a job, users with the appropriate permissions can do the following steps:
- On the job card, click the lock icon to toggle between locked and unlocked states.
Filter the calendar
Apply filters to control which work items are visible in the calendar. For example, you could set filters to:
- Show all work assigned to a resource.
- Show all work pending that has a high urgency.
- Show all work with a Pending Allocation status.
- Show only the work items that are associated with a certain account.
Related links
Feedback
Was this page helpful?