Enable and manage job products
Overview
Skedulo’s inbuilt “Job Products” functionality allows schedulers to track which products are used at a job.
To get up and running with job products, there are three steps to take:
- Permissions must be granted to those resources who require access (via a custom permission set on the CRM–specifically created for job products).
- The job products custom forms need to be built and deployed using the Skedulo SDK.
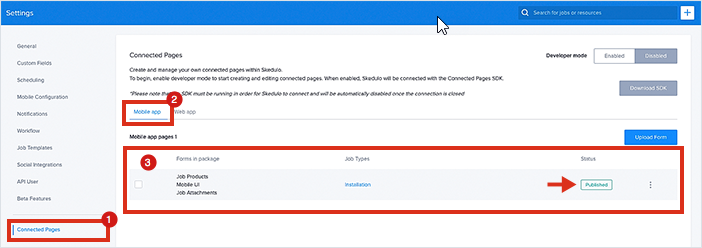
- The custom forms need to be “published” (via Skedulo’s web app admin settings) to expose them on the Skedulo v2 mobile app.
Note
Skedulo will help build, configure and deploy your custom forms. Contact your Skedulo Customer Success Manager (CSM) for more information.Enable Job Products
Important
To enable the generic job product functionality, additional Salesforce permissions must be granted (not available by default in the standard Skedulo managed package). Your Skedulo CSM will arrange this on request.
By default, users with a “Salesforce Platform” license do not have access to objects in the Salesforce “Orders Platform” permission set (part of which includes job products). Because of the dependencies on the Salesforce license type, if the Salesforce license permissions are not changed, the functionality will not be available–even if it is turned on.
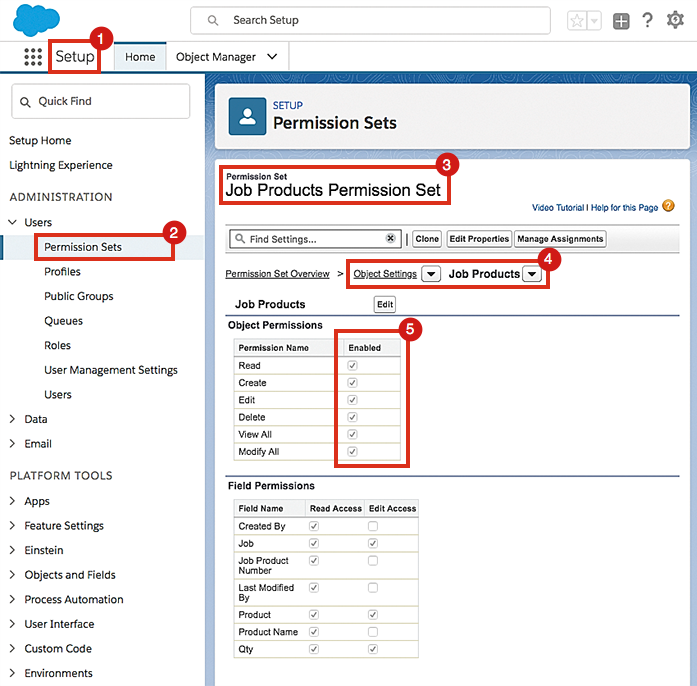
Job Products Permission Set
Admins are required to create a custom permission set–it will be assigned to those standard platform users who need to access the applicable job product objects. They also need to grant “Modify” permissions to the Salesforce “Job Products” object (which is not enabled by default).
Job Products Admin Settings
 .
.
Manage Job Products on the Skedulo v2 mobile app
To add a job product to an allocated job, perform the following:
- Open a job’s details (tap on a job card in the agenda).
- Scroll down to the section marked “Forms.”
- Tap on the “Job Products” button to open the “Job Products” view.
- Tap the green “plus” button (top right) to open the “Search Products” view.
- Select one of the job products on the list.
- The “Add Product” screen opens.
- Fill in the form and tap “Save.”
Feedback
Was this page helpful?