Manage availability
Important
The new Skedulo Plus mobile app is currently available to selected customers.
Skedulo v2 mobile app users should refer to the Skedulo v2 mobile app user guide.
All customers will be upgraded to Skedulo Plus over time. To find out when your organization will be eligible to upgrade to Skedulo Plus, please contact your organization’s Skedulo Administrator or Skedulo Customer Success Manager.
Overview
The Skedulo Plus app allows users to view and manage their availability based on the team’s mobile app settings and the permissions granted by their organization’s administrator.
In the Skedulo mobile app, users can view their current availability schedule and request time off (unavailability) or request more work (availability). Users can also view and manage their pending availability and unavailability requests.
Availability and unavailability
Using the Availability screen, users can request availability or time off, depending on the organization’s settings for mobile users. This is particularly useful for casual or part-time workers who may not be available to work every day of the week or have a flexible schedule.
Unavailability can include sick leave, annual leave, or any other reason why a user is not available to work.
By default, the following unavailability types can be used in the Skedulo mobile app:
- Sick
- Leave
- Occupied
Availability can be added for overtime or weekend shifts, or any other availability category configured by the team administrator.
By default, users can request the following availability types:
- Overtime
- Weekend shift
Request unavailability
To view your availability and request time off (unavailability) in Skedulo Plus, do the following:
-
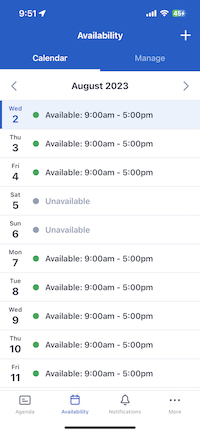
In the Skedulo Plus mobile app, tap Availability on the navigation bar.
This shows the availability calendar with your current availability.
-
Tap the + button in the top right corner of the screen to create a new request.
-
Tap Unavailability request to open the request form.
-
Complete the details of the unavailability request. The fields are as follows:
-
Unavailability type: Select the type of unavailability from the drop-down list.
-
All day: Toggle this option if the unavailability is for the whole day. By default, this is On. Toggle this option Off to select the start and end times of the unavailability.
-
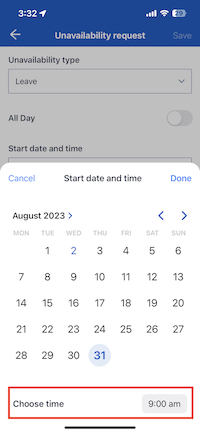
Start date or Start date and time: Select the start date of the unavailability. If you are not requesting to be made unavailable for the entire day, select the start time for the period of time off as well.
-
End date or End date and time: Select the end date of the unavailability.
-
Notes: Enter any notes about the unavailability.
-
-
Tap Save to submit the unavailability request.
View and manage unavailability requests
To view and manage your unavailability requests in the Skedulo Plus mobile app, do the following:
-
In the Skedulo Plus mobile app, tap Availability on the navigation bar.
-
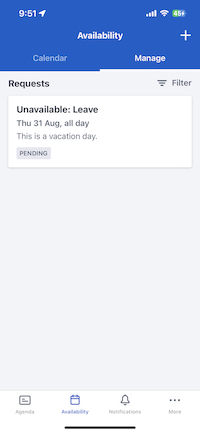
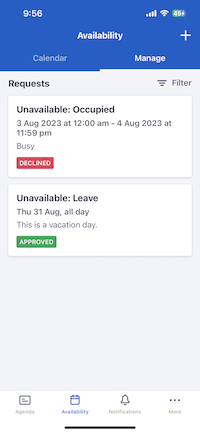
Tap Manage to open the unavailability requests screen.
By default, the screen shows all upcoming unavailability requests. To filter requests by their status or to view past requests, tap the Filter button in the top right corner of the screen.
-
When requests are approved or denied by schedulers or administrators, the request will automatically update in the Skedulo mobile app. The status of the request will change to Approved or Denied.
-
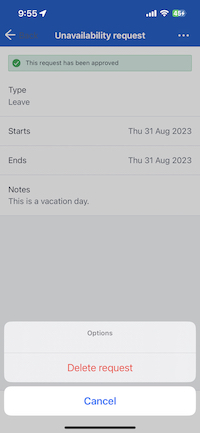
To view the details of a request, tap the request in the list. This shows the details of the request, including the status, the dates and times of the unavailability, and any notes.
-
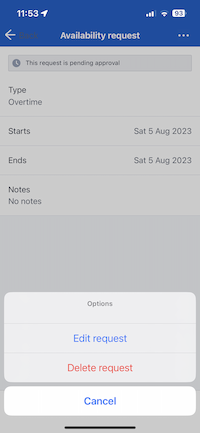
To delete an unavailability request, tap the request in the list, then tap the Options (
 ) menu button.
 -
Tap Delete request.
When prompted, tap Confirm to confirm the delete request. This will remove the request from the list.
Request availability
To view your availability and request more work in Skedulo Plus from the Availability button on the app navigation bar, do the following:
-
In the Skedulo Plus mobile app, tap Availability on the navigation bar.
This shows the availability calendar with your current availability.

-
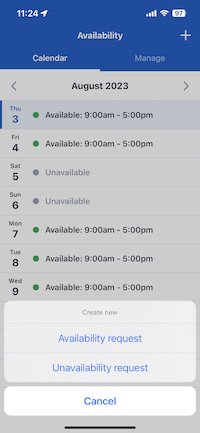
Tap the + button in the top right corner of the screen to create a new request.
-
Tap Availability request to open the request form.
-
Complete the details of the availability request. The fields are as follows:
-
Availability type: Select the type of availability from the drop-down list.
-
All day: Toggle this option if the availability is for the whole day. By default, this is On. Toggle this option Off, to select the start and end times of the availability.
-
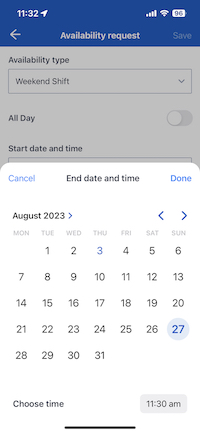
Start date or Start date and time: Select the start date of the availability. If the availability is not an all day availability, select the start time as well.
-
End date or End date and time: Select the end date of the availability.
-
Notes: Enter any notes about the availability.
-
-
Tap Save to submit the availability request.
Edit a pending availability or unavailability request
While an availability or unavailability request is pending, you can edit the request. To edit a pending request, do the following:
-
In the Skedulo Plus mobile app, tap Availability on the navigation bar.
-
Open the pending request that you want to edit.
-
Tap the Options (
 ) menu button.
 -
Tap Edit request.
-
Make the changes to the request, then tap Save to submit the changes.
Note
Only pending requests can be edited. If the request has been approved or denied, you cannot edit the request.Create and manage recurring availability
Recurring availability allows you to create a pattern of availability that repeats over a period of time. This is useful for users who have a regular schedule, such as part-time workers who work the same hours every week.
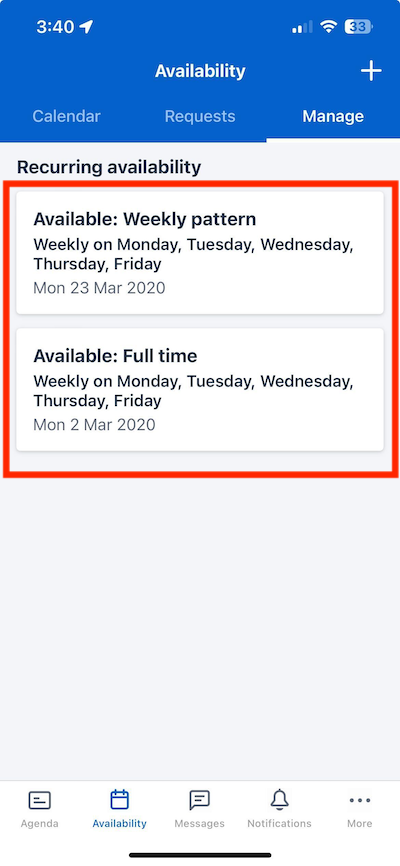
Once mobile users are allowed to create and manage their own recurring availability, a Manage tab is included in the Availability screen in the Skedulo Plus app.
The Manage tab shows any existing recurring availability patterns you are assigned to. You can view the details of each pattern, including the start and end dates, and the days of the week the pattern repeats, by tapping the recurring availability pattern card.
Prerequisites
To create and manage recurring availability, an Administrator must allow users to create their own recurring availability in the web app admin settings by doing the following steps:
- Navigate to Settings > Mobile app configuration > Mobile settings.
- Select the Availability > Allow resources to create their own recurring availability (Skedulo Plus only) checkbox.
- Click Save.
Create a new recurring availability pattern
To create a new recurring availability pattern, follow these steps:
-
In the Skedulo Plus mobile app tap Availability > Manage.
-
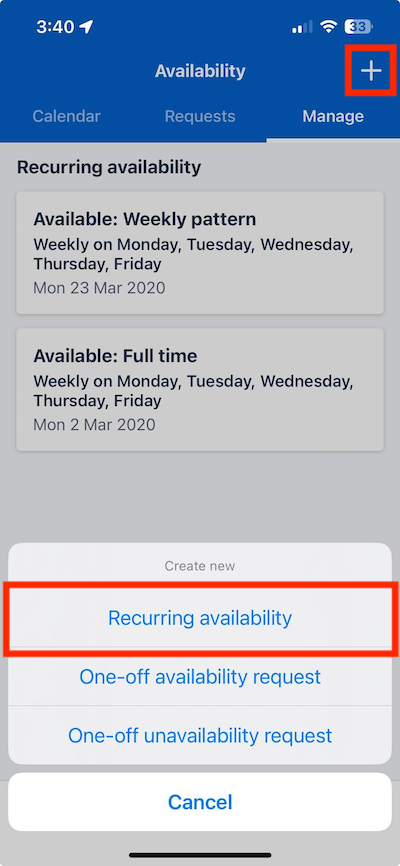
Tap the plus button(
 ) in the top right corner of the screen, then select Recurring availability from the Create new menu.
-
In the Set my availability form, provide a name for the recurring pattern of availability, then select a start date for the first day of the pattern from the date picker.
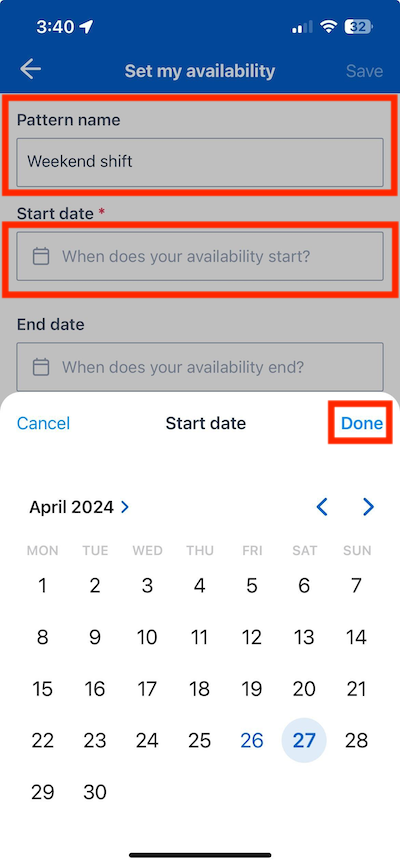
Tap Done to save the start date.
-
(Optional) Provide an end date for the pattern. If no end date is provided, the pattern will repeat indefinitely until it is manually deleted.
-
Select the days of the week the pattern repeats by tapping the days in the Weekly Pattern section.
-
By default, availability for selected days is set to All day. To set specific start and end times for the availability, tap the day in the pattern you want to set a start and end time for, then un-toggle the All day switch. This displays the time pickers.
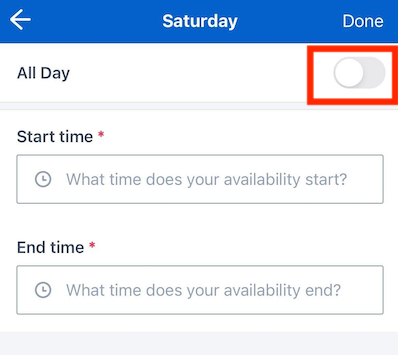
Tap the time input fields to use the time picker to set the start and end times for the availability, then tap Done to save the times.
-
Repeat the previous step for other days in the pattern that require specific start and end times.
Tip
To set the same start and end times for multiple days in the pattern, uncheck the other days in the pattern, then re-select them to apply the same times. -
By default, patterns are set to repeat weekly. To change the frequency of the pattern, tap drop-down menu for Repeats every, then select the desired frequency from the list. Options are
Week,Two Weeks, orFour weeks.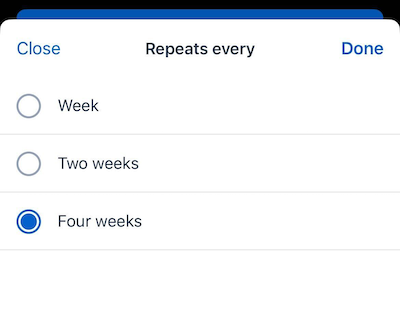
Tap Done to save the frequency.
-
Tap Save to create the recurring availability pattern.
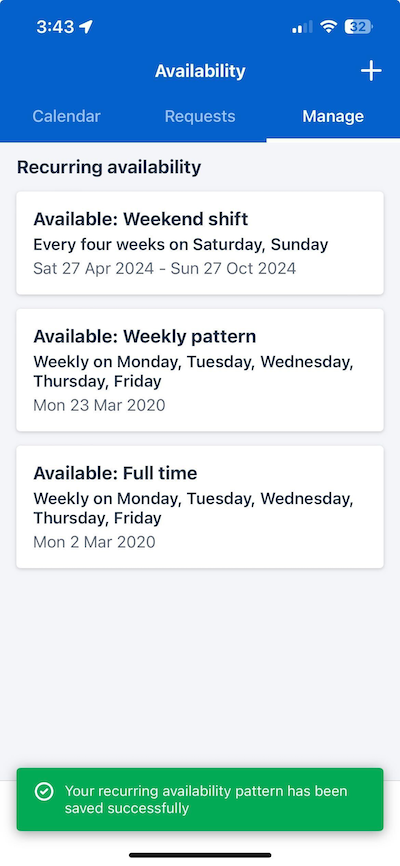
The pattern will be added to the Manage tab in the Availability screen, and a green banner will appear at the bottom of the screen to confirm the pattern has been saved successfully.
Edit or delete a recurring availability pattern
Users can edit or delete recurring availability patterns they have created.
Note
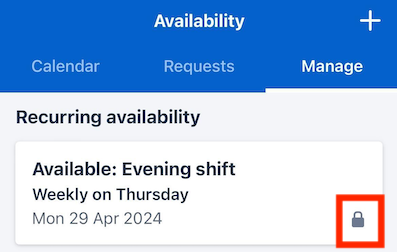
Patterns created for the user by someone else, such as an administrator or scheduler, cannot be edited or deleted.
These patterns are indicated in the Manage tab by a lock icon in the top right corner of the pattern card.
To edit or delete a recurring availability pattern, follow these steps:
-
In the Skedulo Plus mobile app, tap Availability > Manage.
-
Tap the recurring availability pattern card you want to edit or delete.
-
(Option) To edit the pattern, tap the Options (
 ) menu button, then select Edit recurring availability.
The pattern will open in the Set my availability form, where you can make changes to the pattern. Tap Save to save the changes.
-
(Option) To delete the pattern, tap the Options (
 ) menu button, then select Delete recurring availability.
A confirmation dialog will appear. Tap Yes, Delete to delete the pattern.
Feedback
Was this page helpful?
