Object import order
Overview
This article provides recommendations for the order in which to begin importing data.
Data does not have to be imported for all objects. Data may also be configured or defined via the Skedulo Onboarding Wizard, the Web App, API, custom processes, etc. To learn more about the tools available for data import and export, see Migrate data to Skedulo.
Core objects
In almost all circumstances, the following objects are required to set up your Skedulo environment:
- Users
- Regions
- Resources (dependencies on Users and Regions)
- Job Types
For more information, see the Onboarding wizard.
Additional data may be imported to core objects after the onboarding process.
Standard objects (no dependencies)
The following objects do not have any dependencies on other objects and can be imported in any order:
- Accounts
- Availability Templates
- Holidays
- Locations
- Products
- Tags
Standard objects (with dependencies)
- Account Resource Scores (Account, Resource)
- Activities (Resource)
- Availabilities (Resource)
- Availability Template Entries (Availability Template)
- Availability Template Resources (Availability Template, Resource)
- Contacts (Account)
- Holiday Regions (Holiday)
- Job Allocations (Job, Resource)
- Job Products (Job, Products)
- Job Tags (Job, Tags)
- Job Tasks (Job)
- Job Time Constraints (Job)
- Location Resource Scores (Location, Resource)
- Jobs (Region)
- Resource Requirement Tags (Resource Requirement, Tag)
- Resource Requirements (Job)
- Resource Shifts (Resource, Shift)
- Resource Tags (Resource, Tag)
- Shifts (Region)
Custom objects
Custom objects should be imported with the same considerations as standard objects related to their dependencies.
Import activities for resources
Step 1: Obtain a resource UID
You can obtain the Resource UID in one of the following two ways:
- From a resource’s record page. Navigate to a resource’s record page and then obtain the Resource UID on the URL.
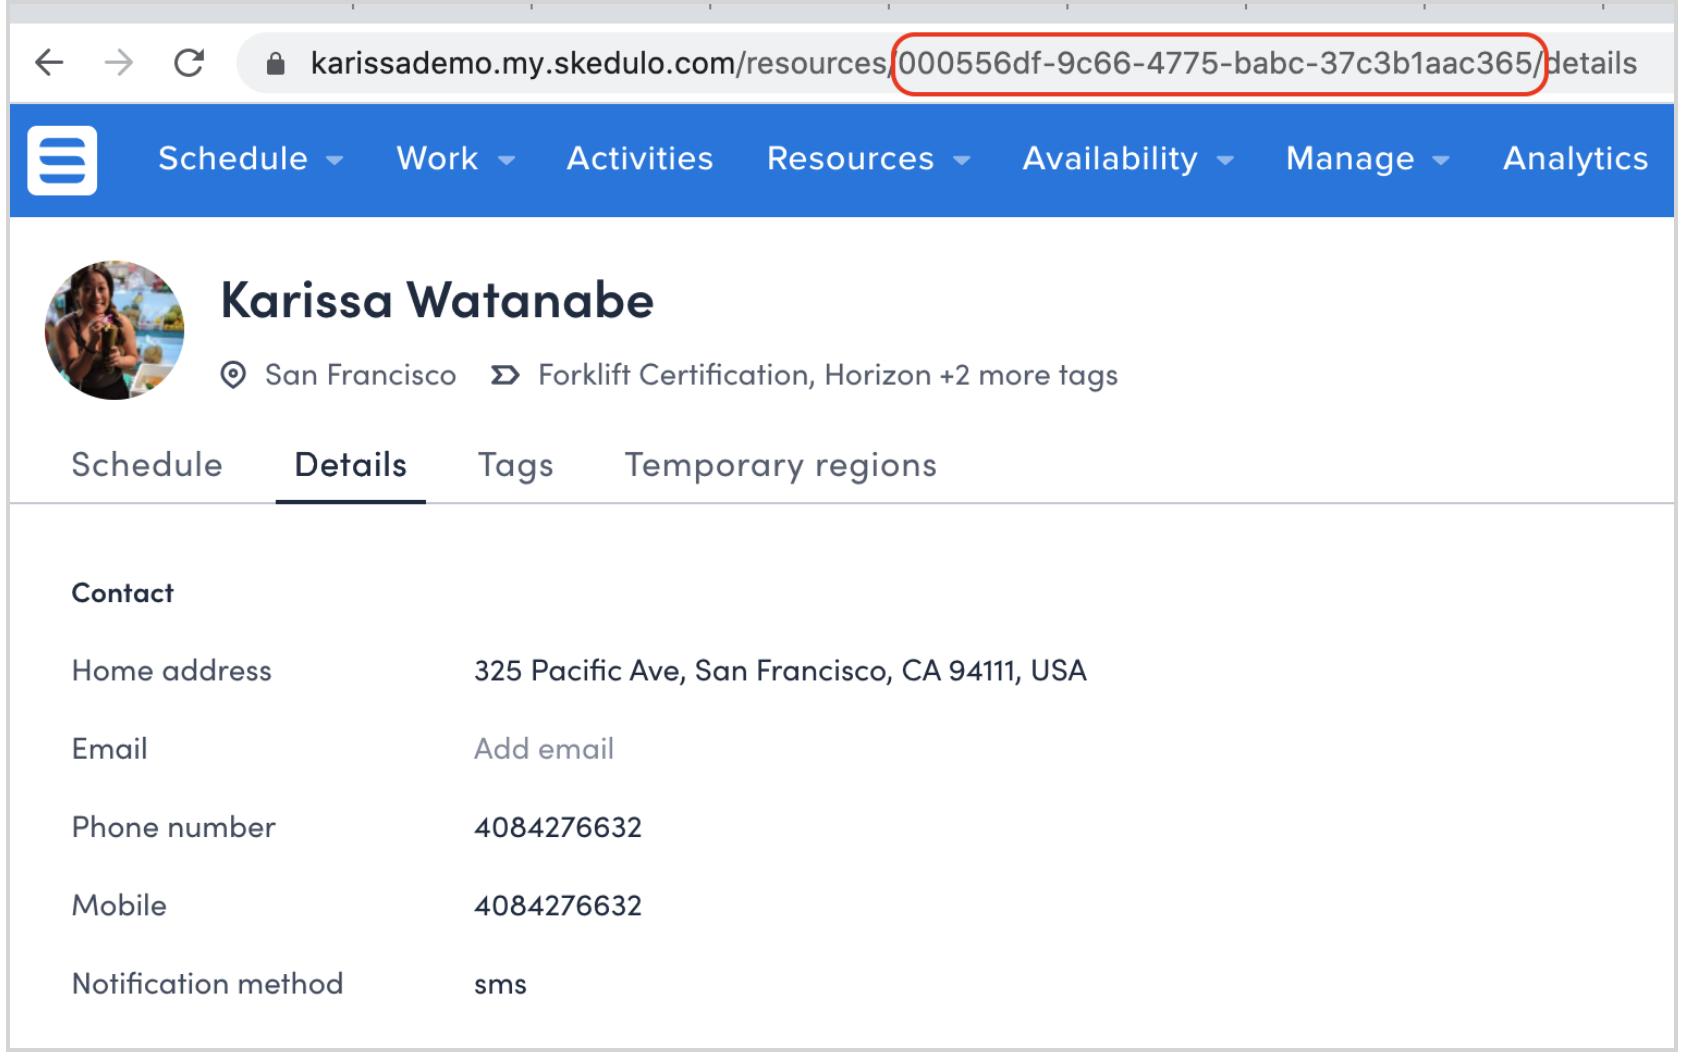
- By exporting the Resources object with the Data import/export tool.
Step 2: Create a CSV file for import
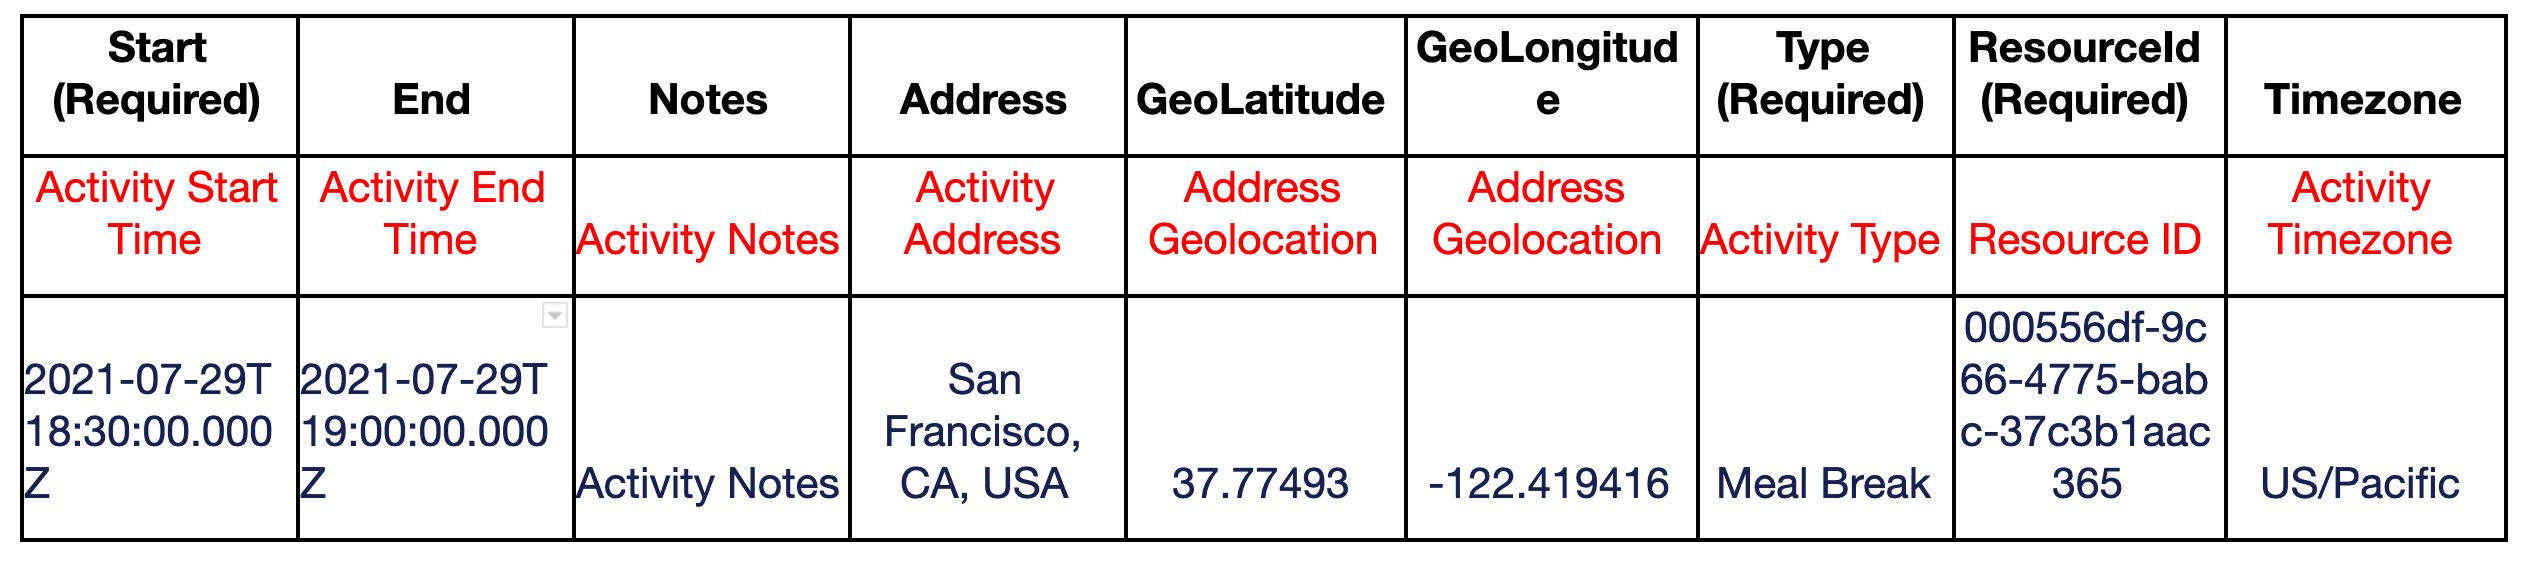
Step 3: Import the activities CSV
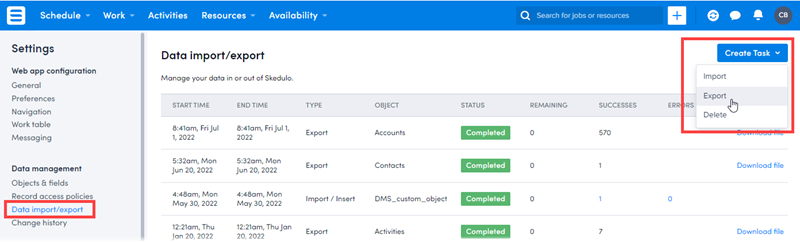
To import the Activities CSV:
- Navigate to Settings > Data import/export.
- Click Create Task.

- Select Import to display the Import Data page.
- On the Task Details tab:
- Select Insert from the Operation Type dropdown menu.
- Select Activities from the Object dropdown menu.
- Select the CSV file created in the previous step and click Continue.

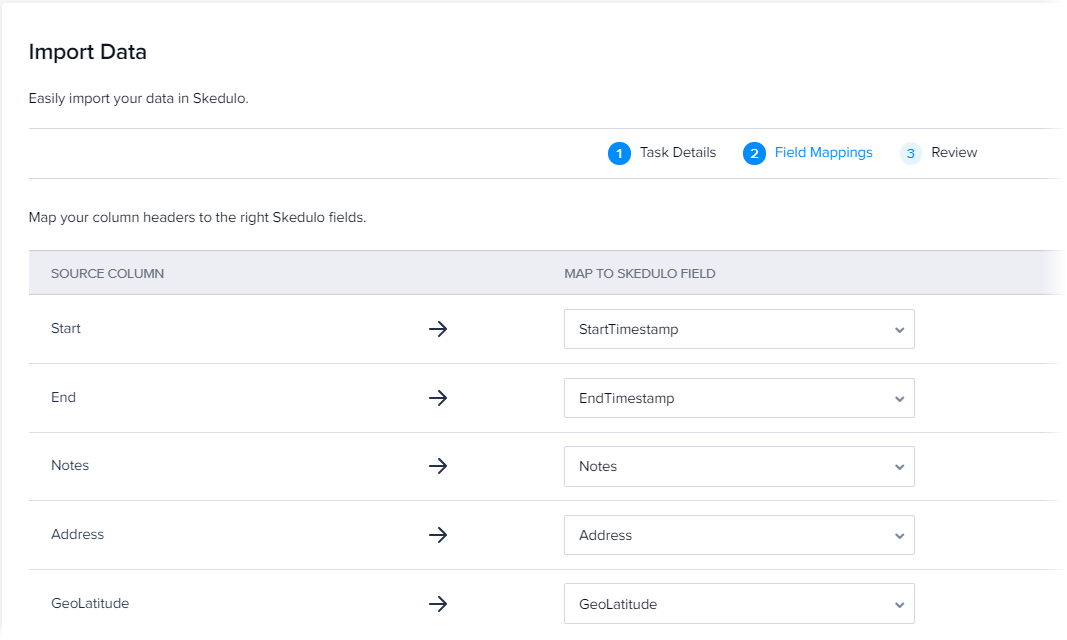
- Map the fields in the CSV file to Skedulo fields and click Continue.
- Check the import data and click Create Task.

- A message in the top right corner confirms the successful data import.
Feedback
Was this page helpful?