Manage packages (Beta)
Beta feature
-
Beta features should be considered “in development” and may not be fully supported or complete.
-
Beta programs are invaluable for helping to validate the value and impact of features through feedback and insights. If you would like to participate in beta programs and access this feature, please contact your Skedulo Customer Success Manager.
Overview
In the Skedulo web app, a package is a way of collecting, or compiling, elements so that they are easily portable across tenants. Packaging automates the process of replicating changes across tenants, making it possible to push changes across multiple tenants in one go, rather than manually updating each tenant. This both saves time and reduces the likelihood of error.
Currently, you can package elements of the following features:
- Standard objects and fields.
- Custom objects and fields.
- Global navigation configurations.
- Roles (except admin roles.)
Note
If you want to package a Global Navigation configuration with a Role condition, for example, an item on Global Nav that is set to only be visible by certain Roles, you must include the Role in the package too or the package import will fail.Package management settings page
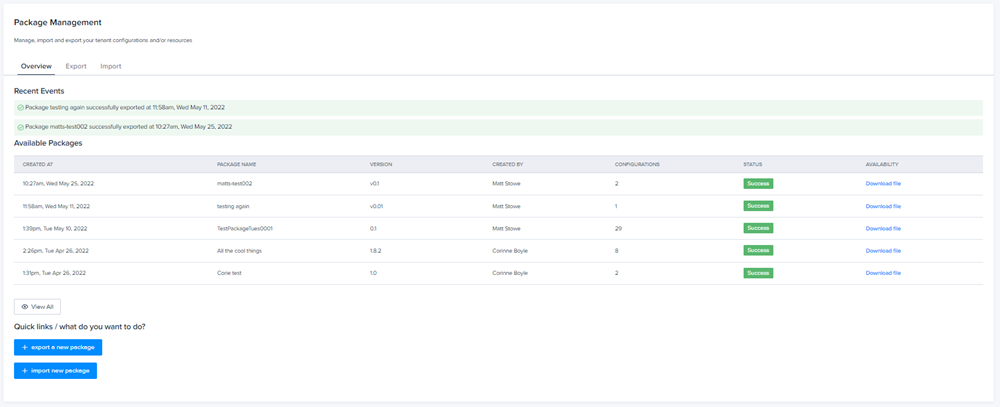
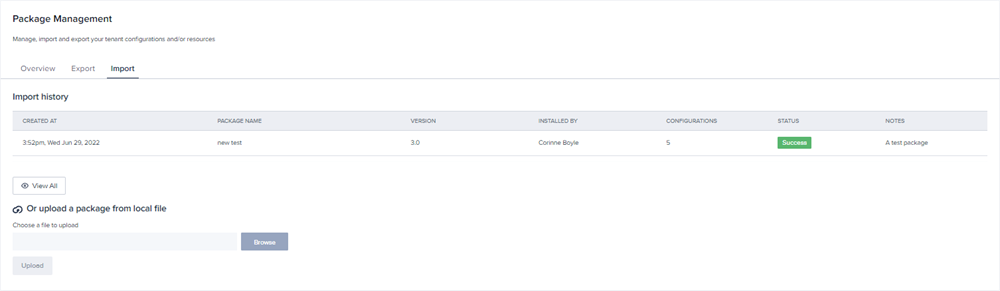
The Package management settings page enables you to import and export packages, view your import history, and view the packages you’ve created. To access this page, select Settings > Manage Packages.
Create a package
To create a package on your tenant:
- Navigate to Settings > Manage Packages.
- On the Package Management page, select the Export tab.
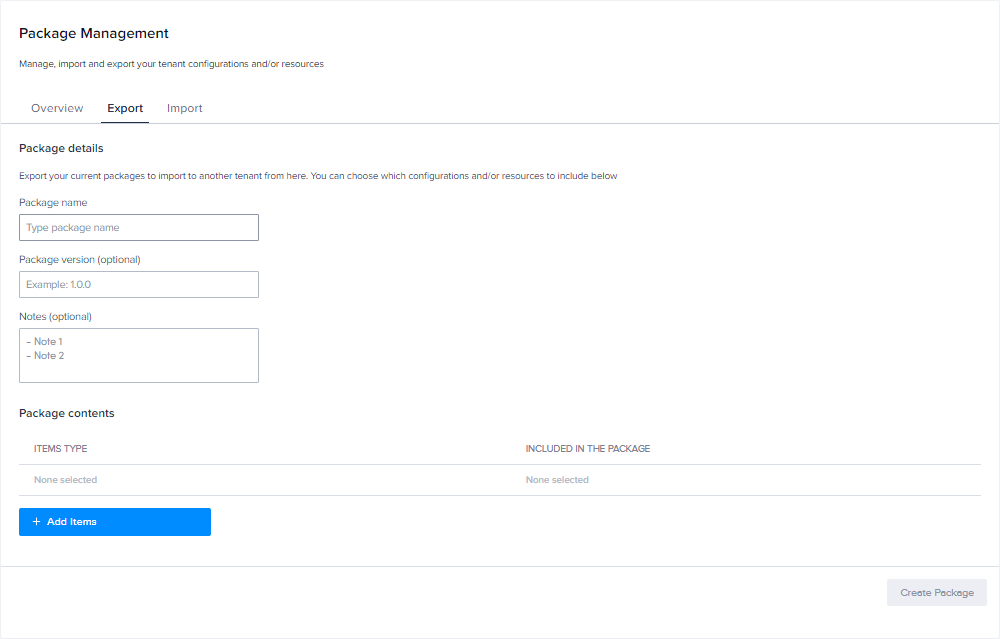
- In the Package name field, enter a name for the package.
- If required, enter a version number for your package in the Package version field. A version number will help you to identify the package on the Available Packages list.
- Enter any notes you want to include with the package. This information will help you to identify the package on the Available Packages list.
- Click Add Items to display the Add Items modal.
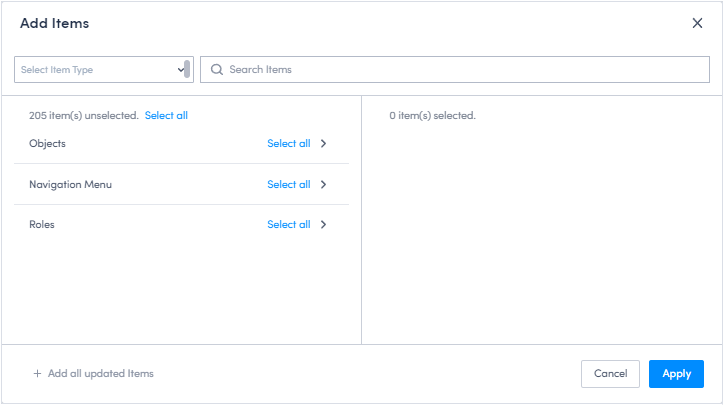
- Use the options on the modal to build your package. You can:
- Select an item type from the dropdown to narrow down which items are visible in the list.
- Click a chevron beside an item type to show the available items for that item, then individually select the items you want to include.
- Click Select all to add all listed items to your package.
- If you want to include all items that have been updated, select Add all updated items.
- Review the items you have selected in the panel on the right-hand side, and then click Apply to save your changes and return to the Export tab.
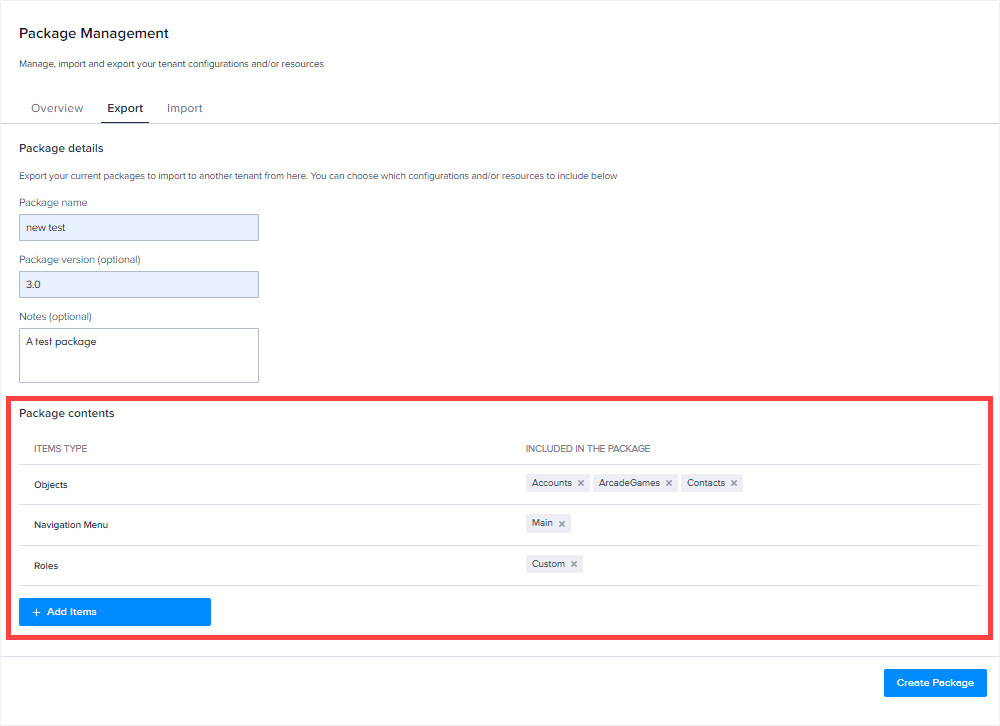
- On the Export tab, the items you’ve selected to be packaged are displayed in the Package contents list, separated by type. Easily remove unwanted items by clicking the x in an item’s lozenge. Please note that currently, you cannot export more than 30,000 items.
- Click Create Package to create the package. You are taken back to the Overview tab, and the new package is visible at the top of the Available Packages list.
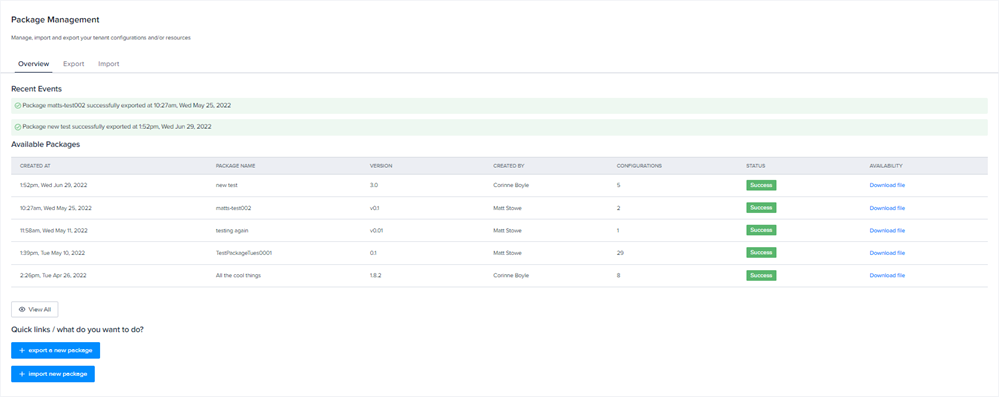
- Click Download file to download the package ready for sending to your destination tenants.
Import a package
To import a package from another tenant:
- On the Package Management page, select the Import tab.
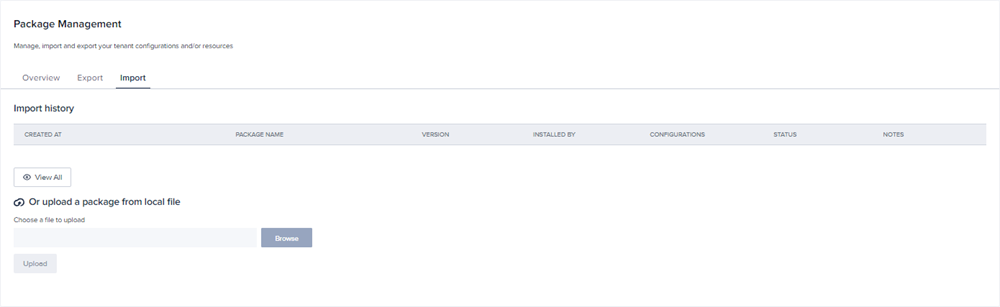
- Click Browse and navigate to the file you want to import.
- Click Upload. The Confirm configurations modal is displayed, which lists the items contained within the file.
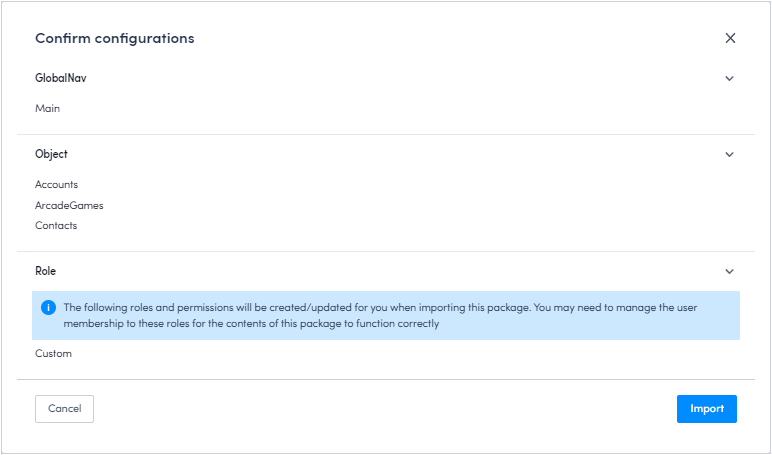
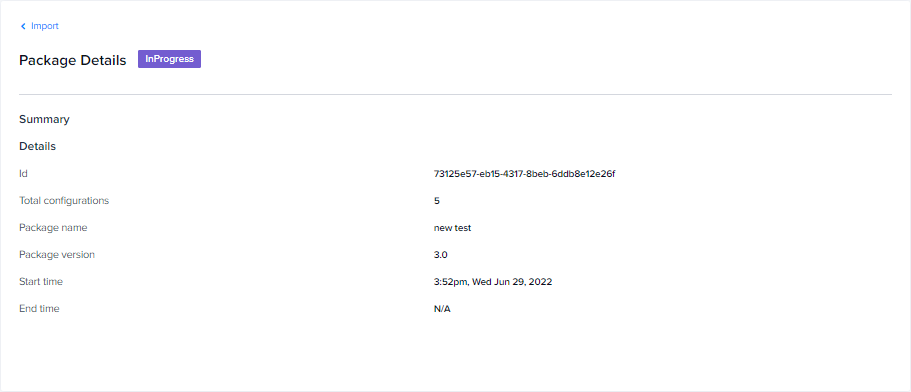
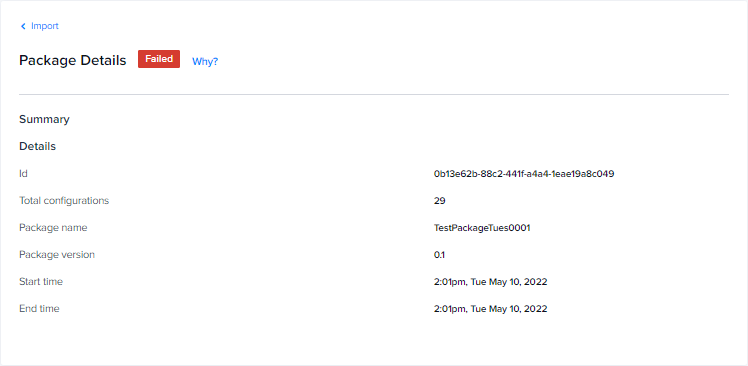
- Click Import. The modal closes and the Package Details page is displayed, which shows a summary of the file and the status of the upload.
-
If the package imports successfully, the status changes from InProgress to Success. Click Import at the top left-hand side of the page to return to the Import tab, where you can view your import history.
-
If an error prevents a package from importing, the status changes from InProgress to Failed. Click Why? beside the status lozenge to open the error log and view more details.
Feedback
Was this page helpful?