Creating records with modal popups
Beta feature
This feature is currently in beta, and should be considered ‘under development’, learn more here.Overview
Allowing a user to perform a task without navigating away from their current page reduces context switching and eliminates unnecessary page loads for the user. A good example of this is creating a new child record, such as a Contact related to an Account.
Create a record using a modal popup
We showed you how to add a create button to the list of contacts related to an account in a previous tutorial, if you haven’t completed that tutorial do that before proceeding!
In this tutorial we’ll change the behaviour of the “Create new” button, so that your users are presented with a modal popup instead of navigating away from the Account page. We’ll be using two components:
- Modal launcher - which allows us to configure a button that launches another component in a modal popup
- Create field layout - which allows us to display a list of fields used to create a record
Open page builder for an account detail page
- Navigate the accounts list, https://<your-team>.my.skedulo.com/p/accounts
- Click on an account to open the detail view
- Open the page builder by clicking on the gear icon in the lower right of the screen
Replace the link button with modal launcher
- Click the pencil icon on the Contacts tab
- Locate the “Related contacts header” component in the list of children components, click the pencil icon to edit it
- Locate the “Create contact button” component in the list of children components, click the pencil icon to edit it
- Change the Component property from “Link button” to “Modal launcher”
- Set the “Button label” property to “Create new”
- Click the + Optional property link, and add Button type and Modal Title properties
- Set the Buton type property to Primary
- Set the Modal Title property to “Create contact”
- Click Save to save changes to the “Create contact button”
- Click Save again to save change to the “Related contacts header”
- Click Save again to save change to the “Contacts” tab
You page should look something like the image below. Please note the page builder is showing the properties of the Modal launcher component, whereas yours should be showing the list of tabs.
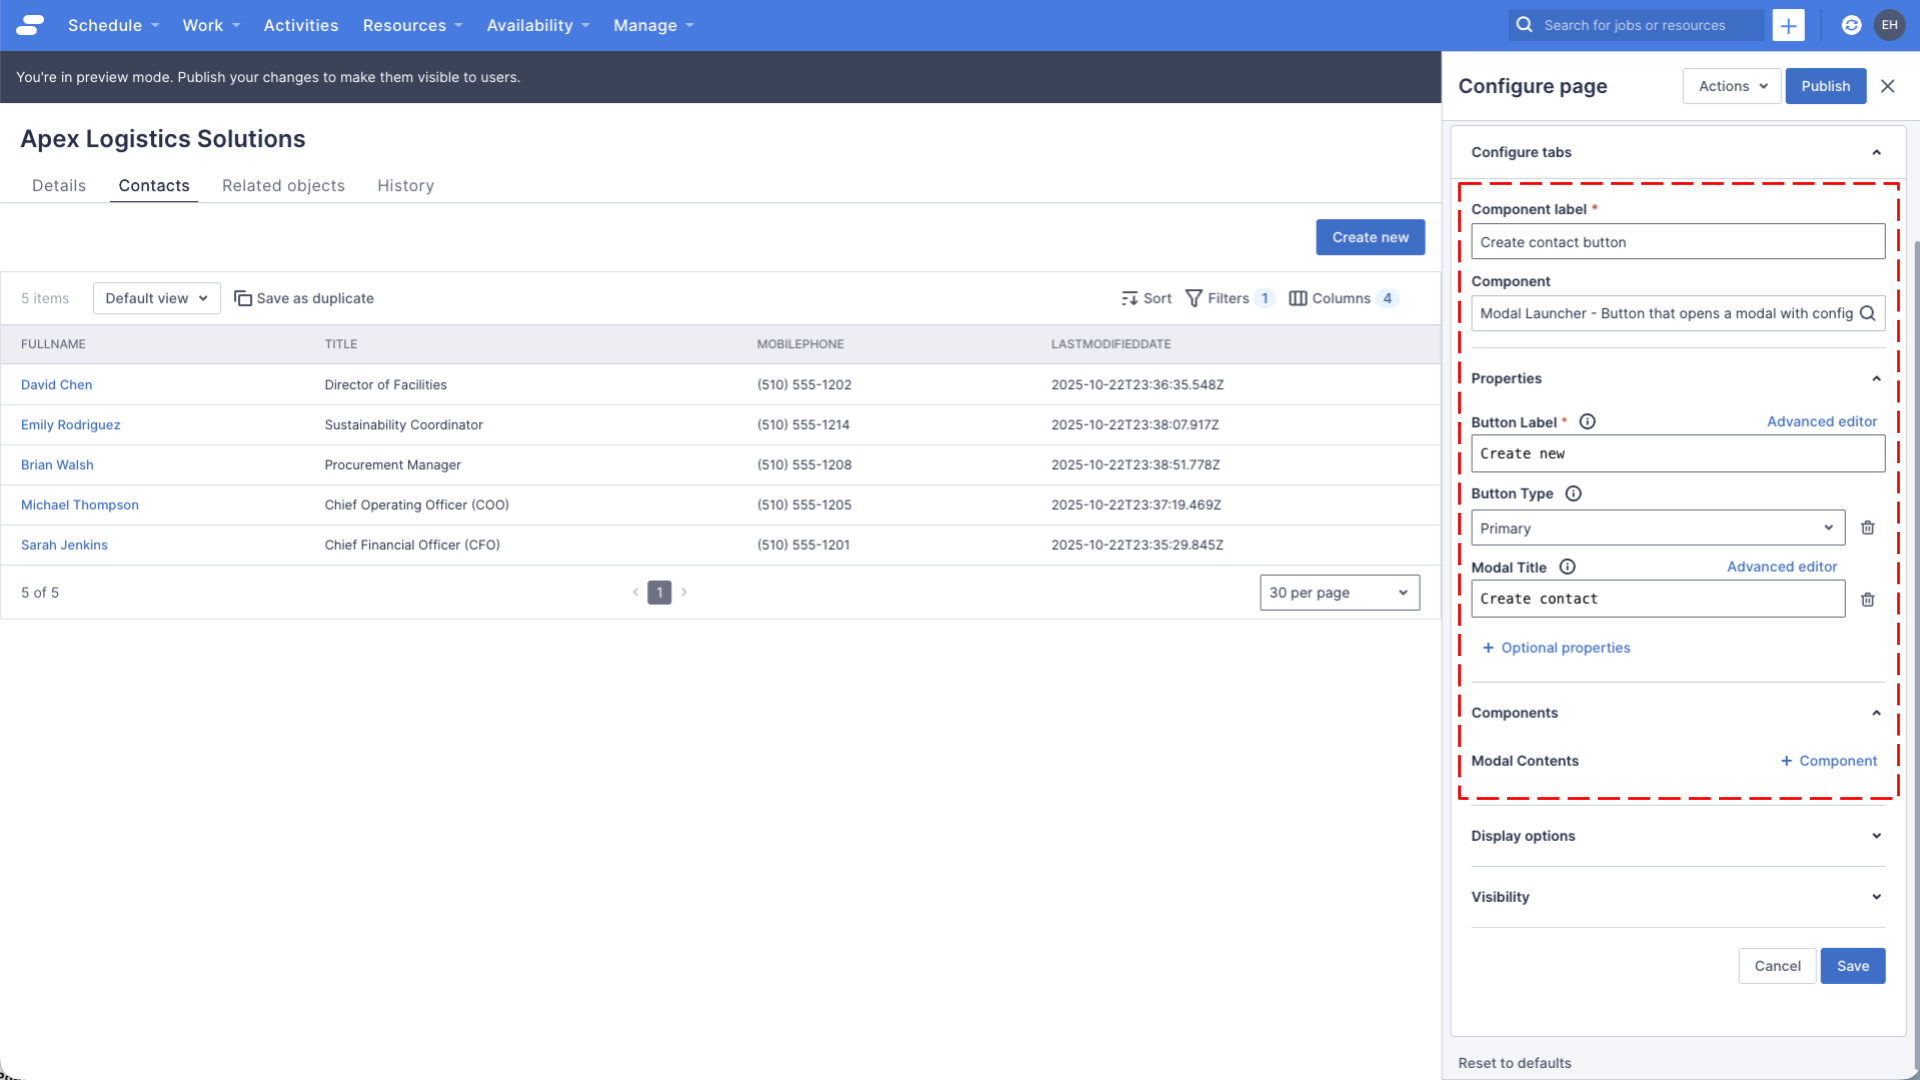
Try clicking on the “Create new” button, you should see an empty modal popup displayed, this is because we haven’t configured any contents for the modal launcher.
Add the Create field layout component to the modal
- Click the pencil icon on the Contacts tab
- Locate the “Related contacts header” component in the list of children components, click the pencil icon to edit it
- Locate the “Create contact button” component in the list of children components, click the pencil icon to edit it
- In the Components section, click the + Component link to add a new component to the Modal Contents
- Set the Component label to “Create contact layout”
- Set the Component to Create Field Layout
- Set the Resource name property to “Contacts”
- Set the After submit property to “Refresh current page”
- In the Field layout mode property, make sure “Organize fields manially” is selected
- Use the + Add fields link to add the following fields: Account, Email, First name, Lastname
- Drag all the fields so that they are no longer under the Details section, and delete the Details section
- Check the “Render full width” option, this will make the field layout render nicer inside the modal
- Click Save to save changes to the “Create contact layout”
- Click Save to save changes to the “Create contact button”
- Click Save again to save change to the “Related contacts header”
- Click Save again to save change to the “Contacts” tab
Try clicking the “Create new” button, you should see a modal popup with the list of fields we just configured, it should look something like the image below. Please note, the page builder in the image is showing the properties of the “Create contact layout” component, whereas yours should be showing the list of tabs.
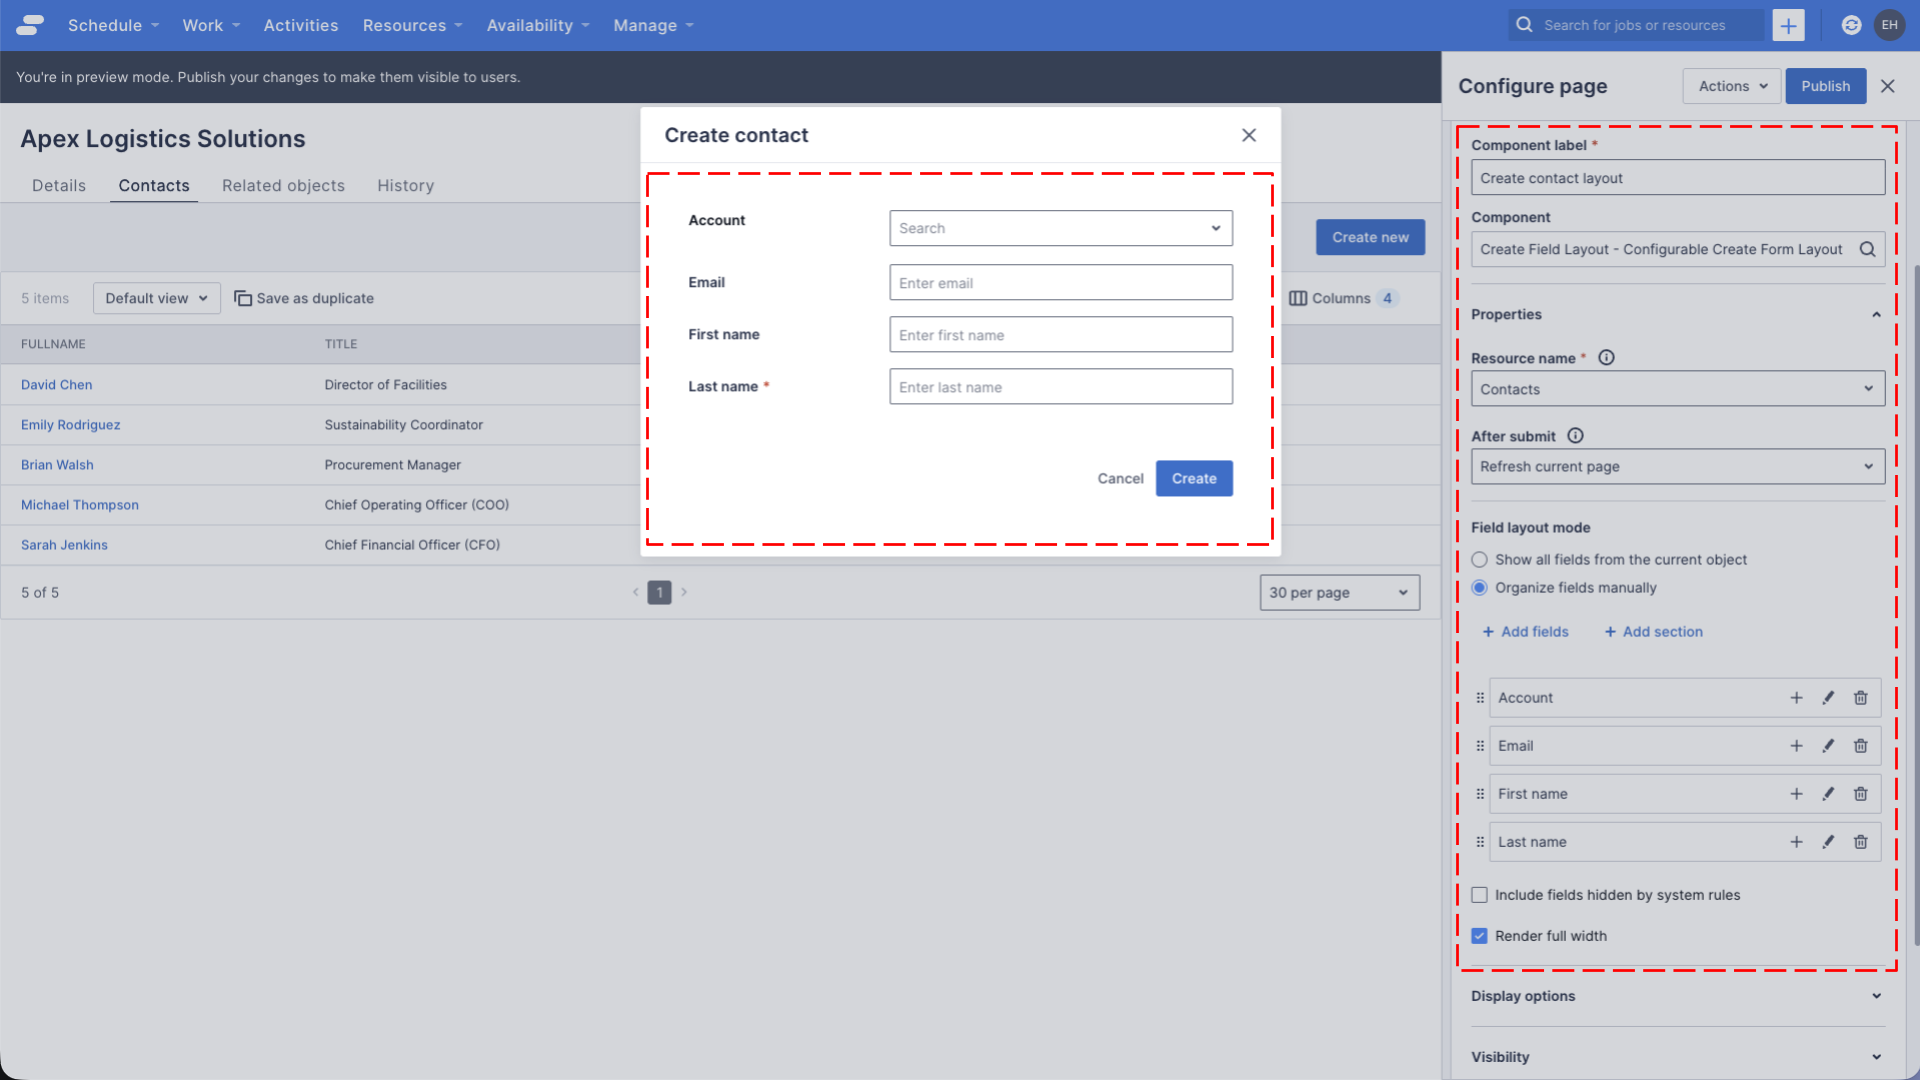
You’ll notice that the Account lookup field is not set, this means that our users have to populate this field themselves. Let’s update the page so that the Account lookup defaults to the Account we’re looking at.
Default the account field to the current account record
- Click the pencil icon on the Contacts tab
- Locate the “Related contacts header” component in the list of children components, click the pencil icon to edit it
- Locate the “Create contact button” component in the list of children components, click the pencil icon to edit it
- Locate the “Create contact layout” component in the Modal Contents list, click the pencil icon to edit it
- Locate the “Account” field in the list of fields, click the pencil icon to edit it
- Set the Default Value property to “{{ UID }}”, this represents the ID of the current account record
- Click Save to save changes to the “AccountID” field
- Click Save to save changes to the “Create contact layout”
- Click Save to save changes to the “Create contact button”
- Click Save again to save change to the “Related contacts header”
- Click Save again to save change to the “Contacts” tab
- Click Publish to make these changes available to all users
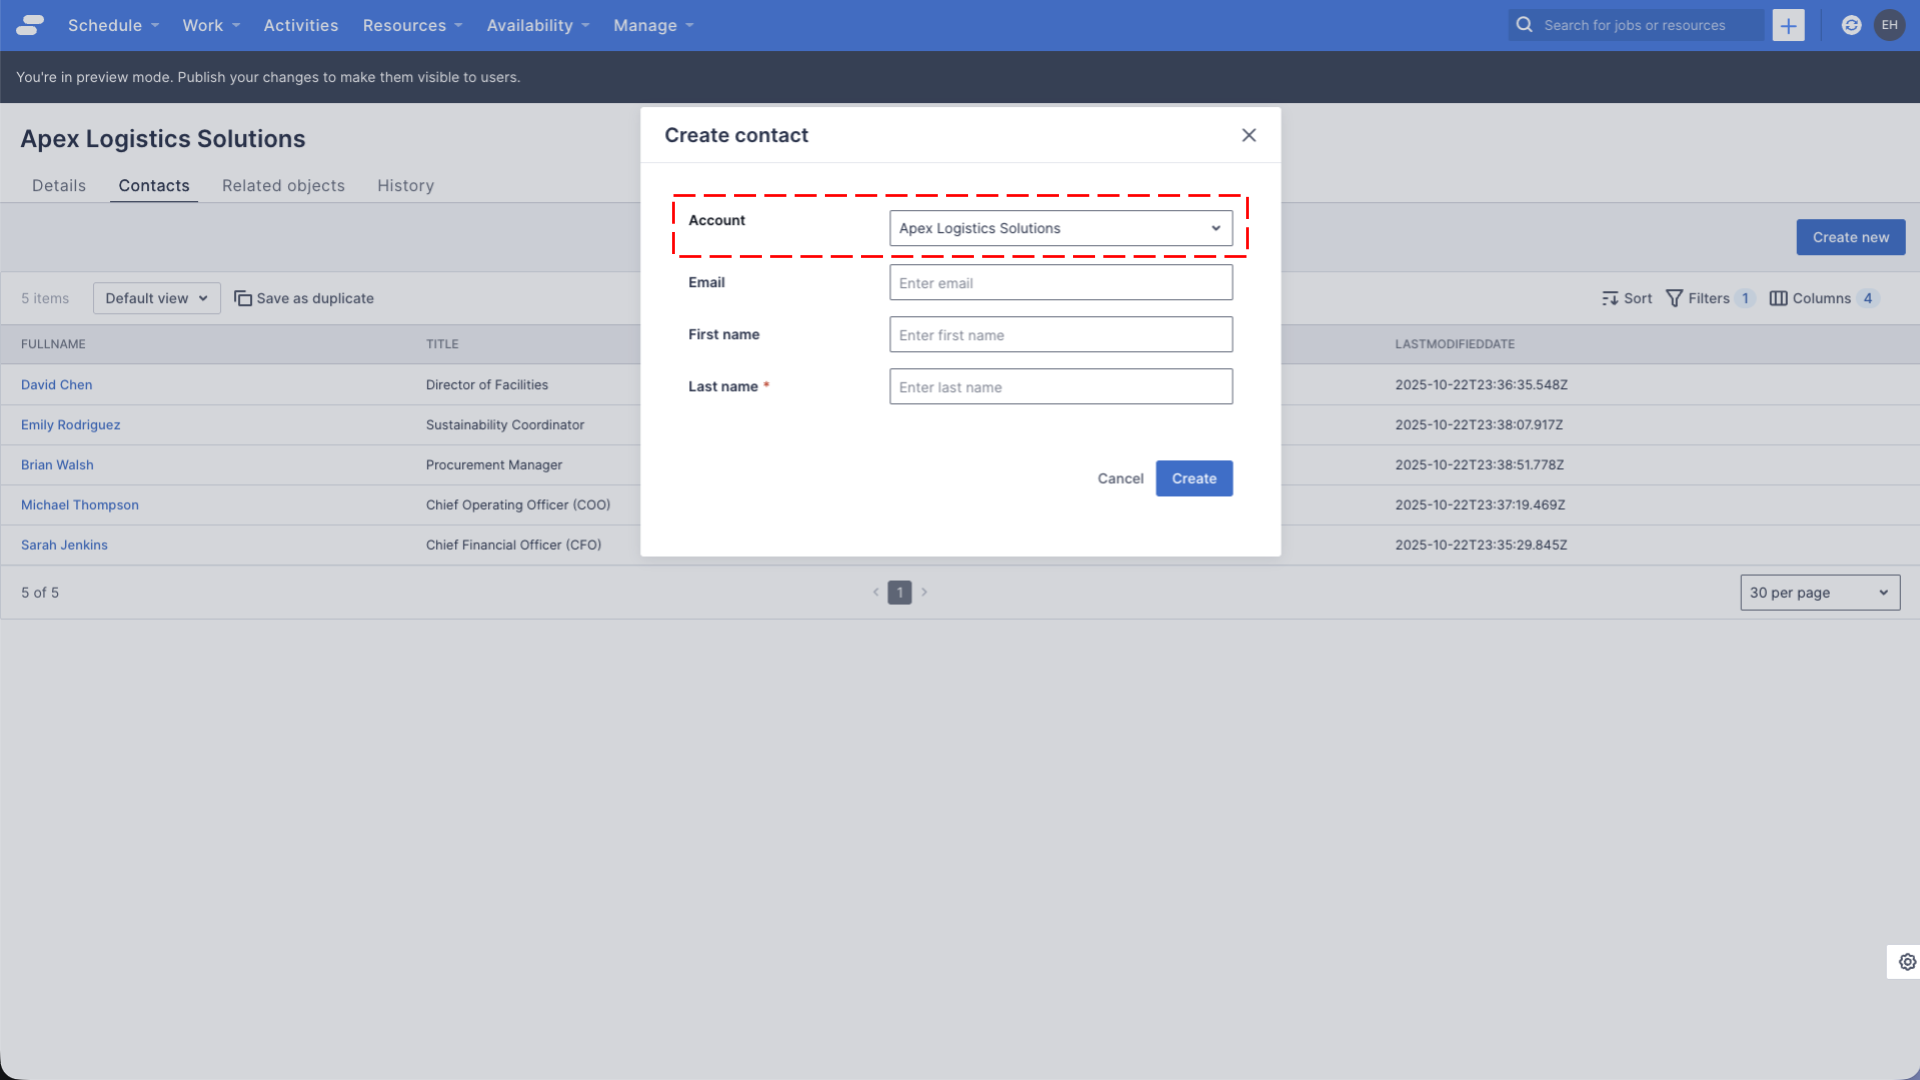
Try clicking the “Create new” button on, when the modal opens, the Account field should default to the current account. Your page should look like something like the image below.
See also
Feedback
Was this page helpful?