Customizing create pages
Beta feature
This feature is currently in beta, and should be considered ‘under development’, learn more here.Overivew
Record create pages allow your users to create new records for an object, such as an Account, Contact, or Resource.
Page builder generates a default create page for any object in the platform, standard or custom.
What can be customized on a list page?
The basic elements of a detail page are the same as a list or detail page, the page header, and the tabs. You can learn more about these elements in the Customizing list pages documentation.
The most common requests for customizations on a record create page are:
- Changing the order of fields
- Adding or removing fields, especially adding custom fields
- Making a field required
Adding, removing or changing the order of fields
Changing the order of fields on a create page is essentially the same as changing the order of fields on a detail page. The only real difference is that instead of a “Field Layout” component, the create page uses a “Create Field Layout” component.
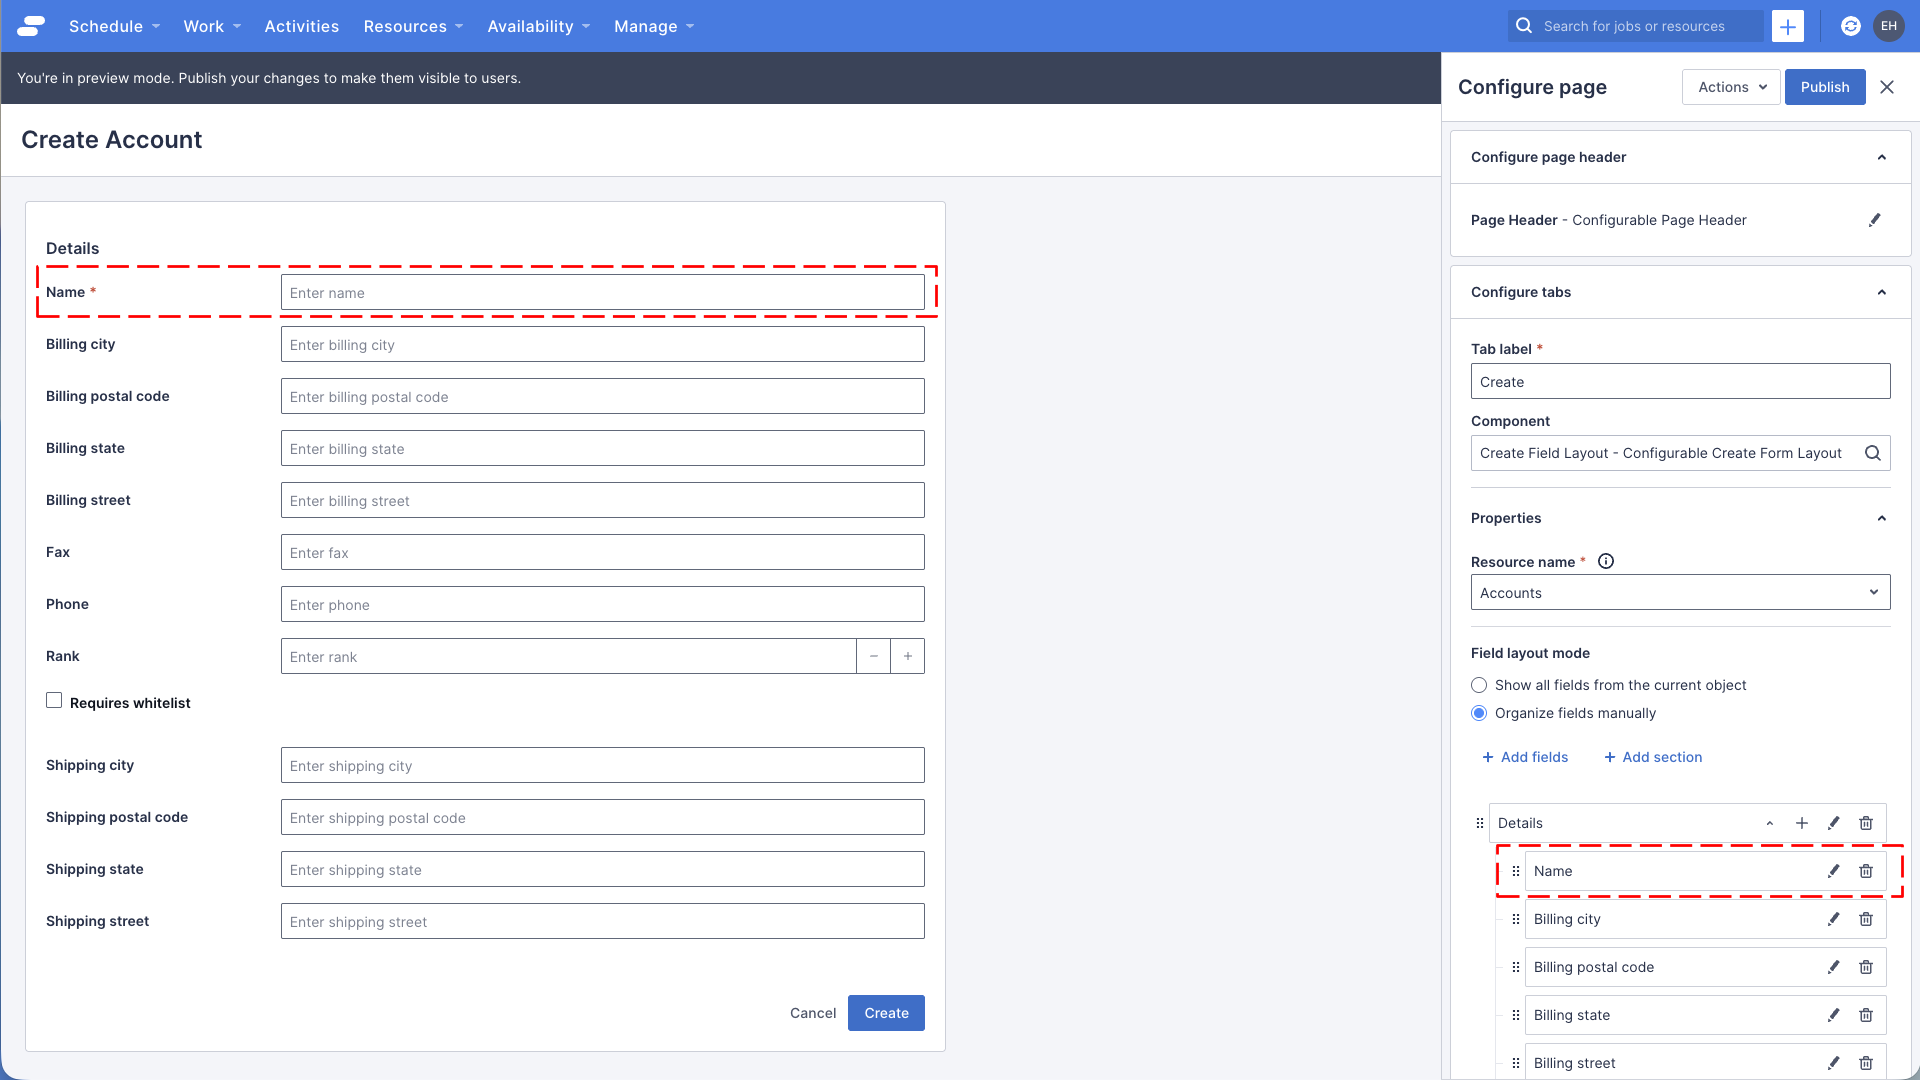
Move the Name field to the top
Since the default layout is alphabetical, the name field is halfway down the page! That’s not right, lets fix it!
- Navigate the accounts create page, https://<your-team>.my.skedulo.com/p/accounts/create
- Open the page builder by clicking on the gear icon in the lower right of the screen
- In the page builder’s properties panel (on the right of the screen), find the Configure tabs section, and click the pencil icon on the Create tab
- In the Properties section, you should see an option to Organise fields manually, check that radio button
- Click the + Add fields link
- A popup will appear, showing a list of fields to add to your view, find the check box labelled Standard Fields (13)"** and select it, then click Import selected
- The popup will close, and a list of all those fields should now be visible in the properties panel
- By default, all the fields are added alphabetically, let’s change that, and move the Name field to the top, by clicking and dragging the field. Drop the field on the Details section to have it appear as the first field in that section.
- Click the Save button at the bottom of the section, to save your changes to the component
- The page preview will update to reflect the change, a banner informing you that you have unsaved changes will display, and you should see the Name field as the first within a Details section on “Details” tab.
Your page should look something like this:
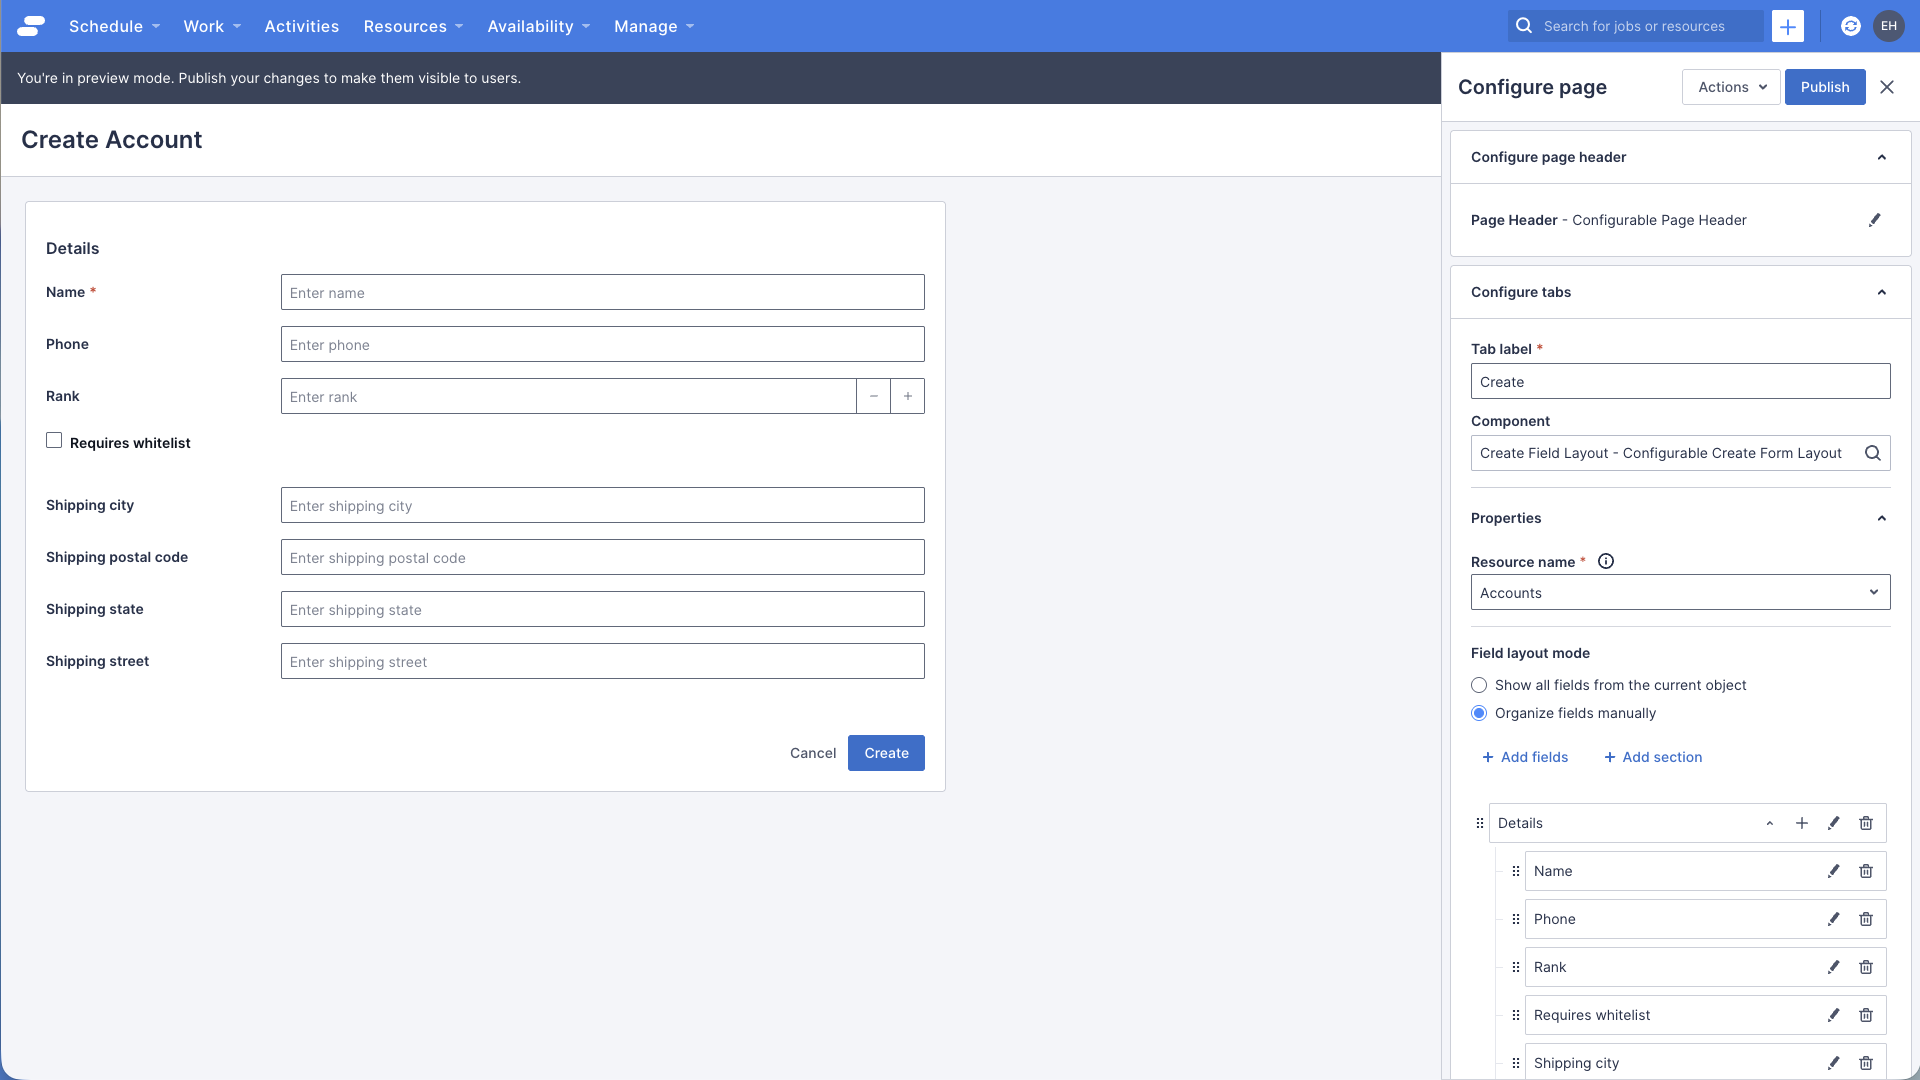
Remove fields from the create page
Customers often ask us to simplify the account creation page, removing fields that aren’t needed, or not relevant to their use case. And really, who uses fax machines these days?
- Make sure you’re looking at the account create page, and open the page builder
- In the page builder’s properties panel (on the right of the screen), find the Configure tabs section, and click the pencil icon on the Create tab
- For any field that starts with “Billing” click the trash can icon to remove it from the layout
- Find the field labelled “Fax” and click the trash can icon to remote it too
- Click the Save button at the bottom of the section, to save your changes to the component
Your page should look something like this:
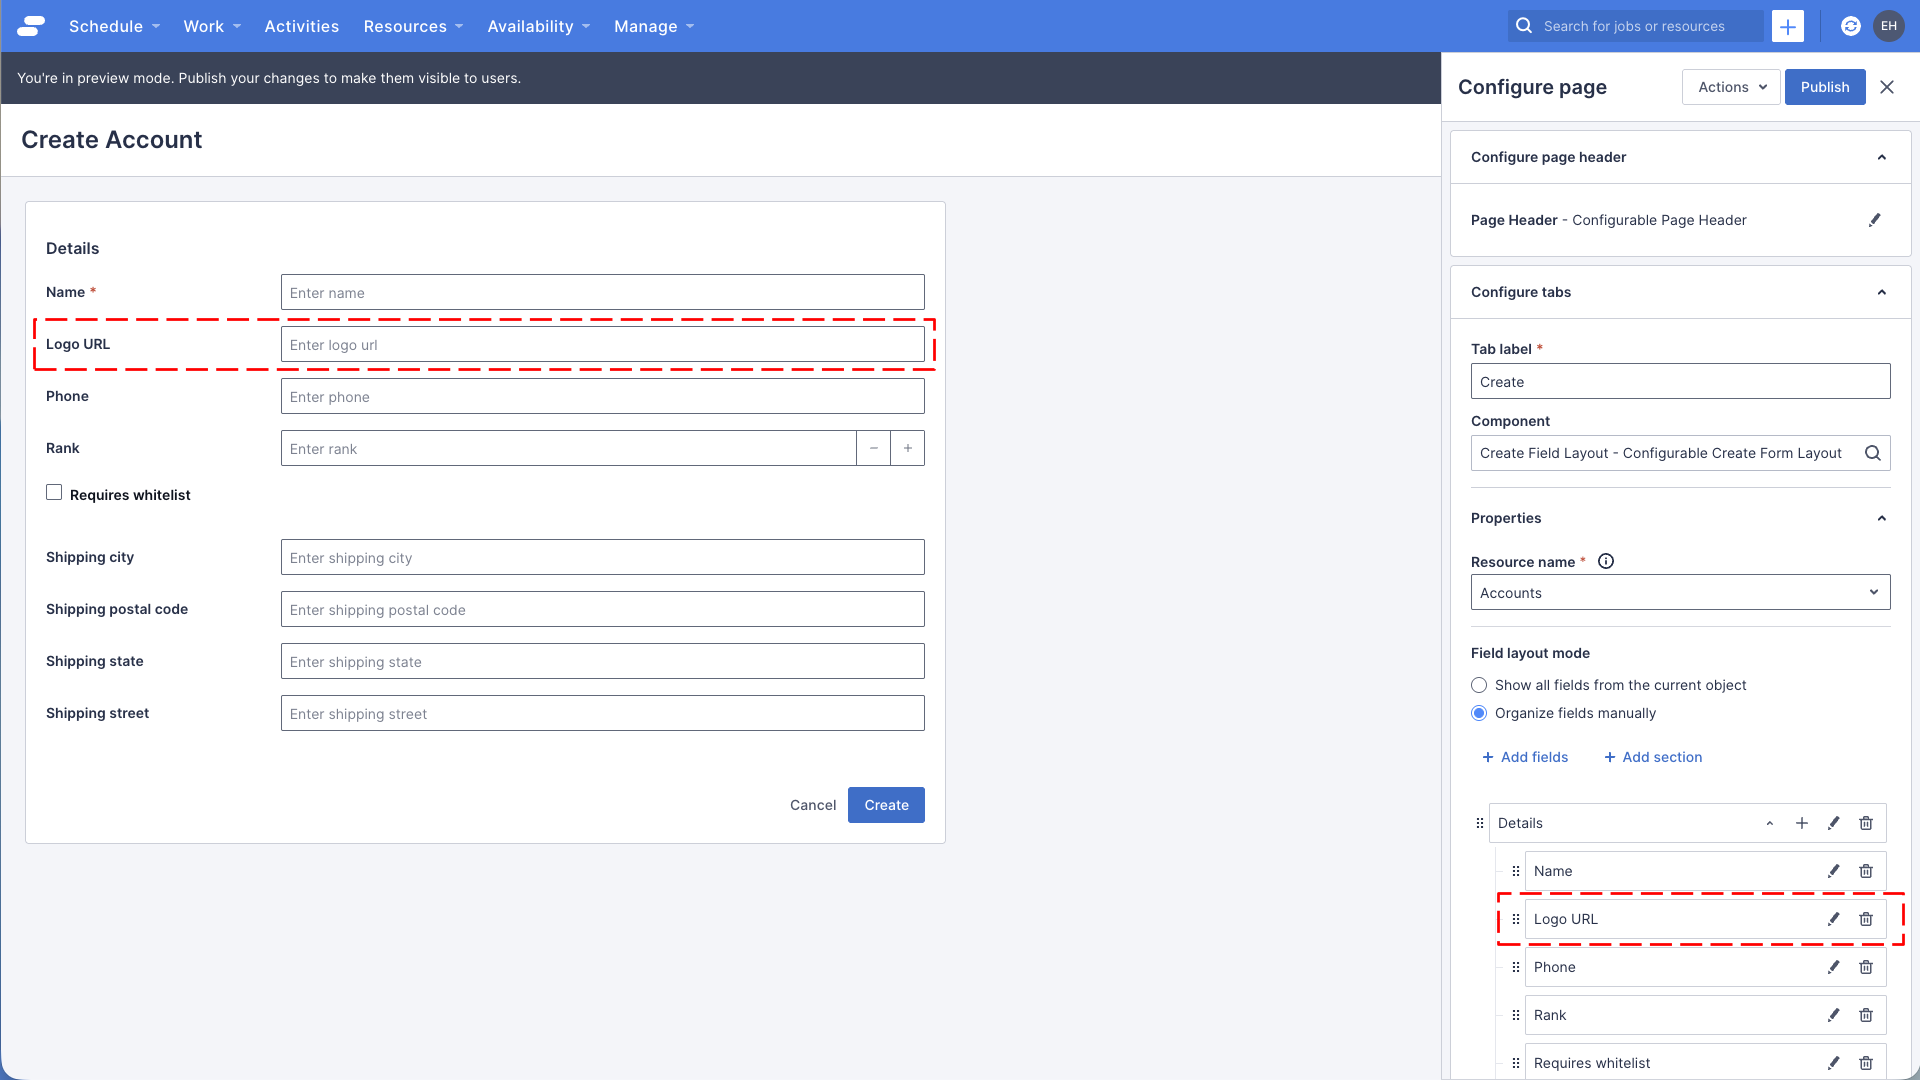
Add a custom field to the create page
Customers often add their own custom fields to standard Skedulo objects, lets try adding a custom field called “LogoURL”. You can find the some instructions in the section “Create a LogoURL custom field”, in the documentation for Customizing page headers.
If you’ve already created that field, feel free to go to the next step, otherwise go create that field now.
- Make sure you’re looking at the account create page, and open the page builder
- In the page builder’s properties panel (on the right of the screen), find the Configure tabs section, and click the pencil icon on the Create tab
- Click the + Add fields link
- A popup will appear, showing a list of fields to add to your view, find the “Logo URL” field, and select it, then click Import selected
- The popup will close, and the “Logo URL” field will be displayed at the bottom of the list of fields
- Move the field up into the original “Details” section, put it anywhere you like, and delete the now redundant/empty “Details” section at the bottom of the list
- Click the Save button at the bottom of the section, to save your changes to the component
- Click Publish in the top right, if you want to make this change available to all users
Your page should look something like this:
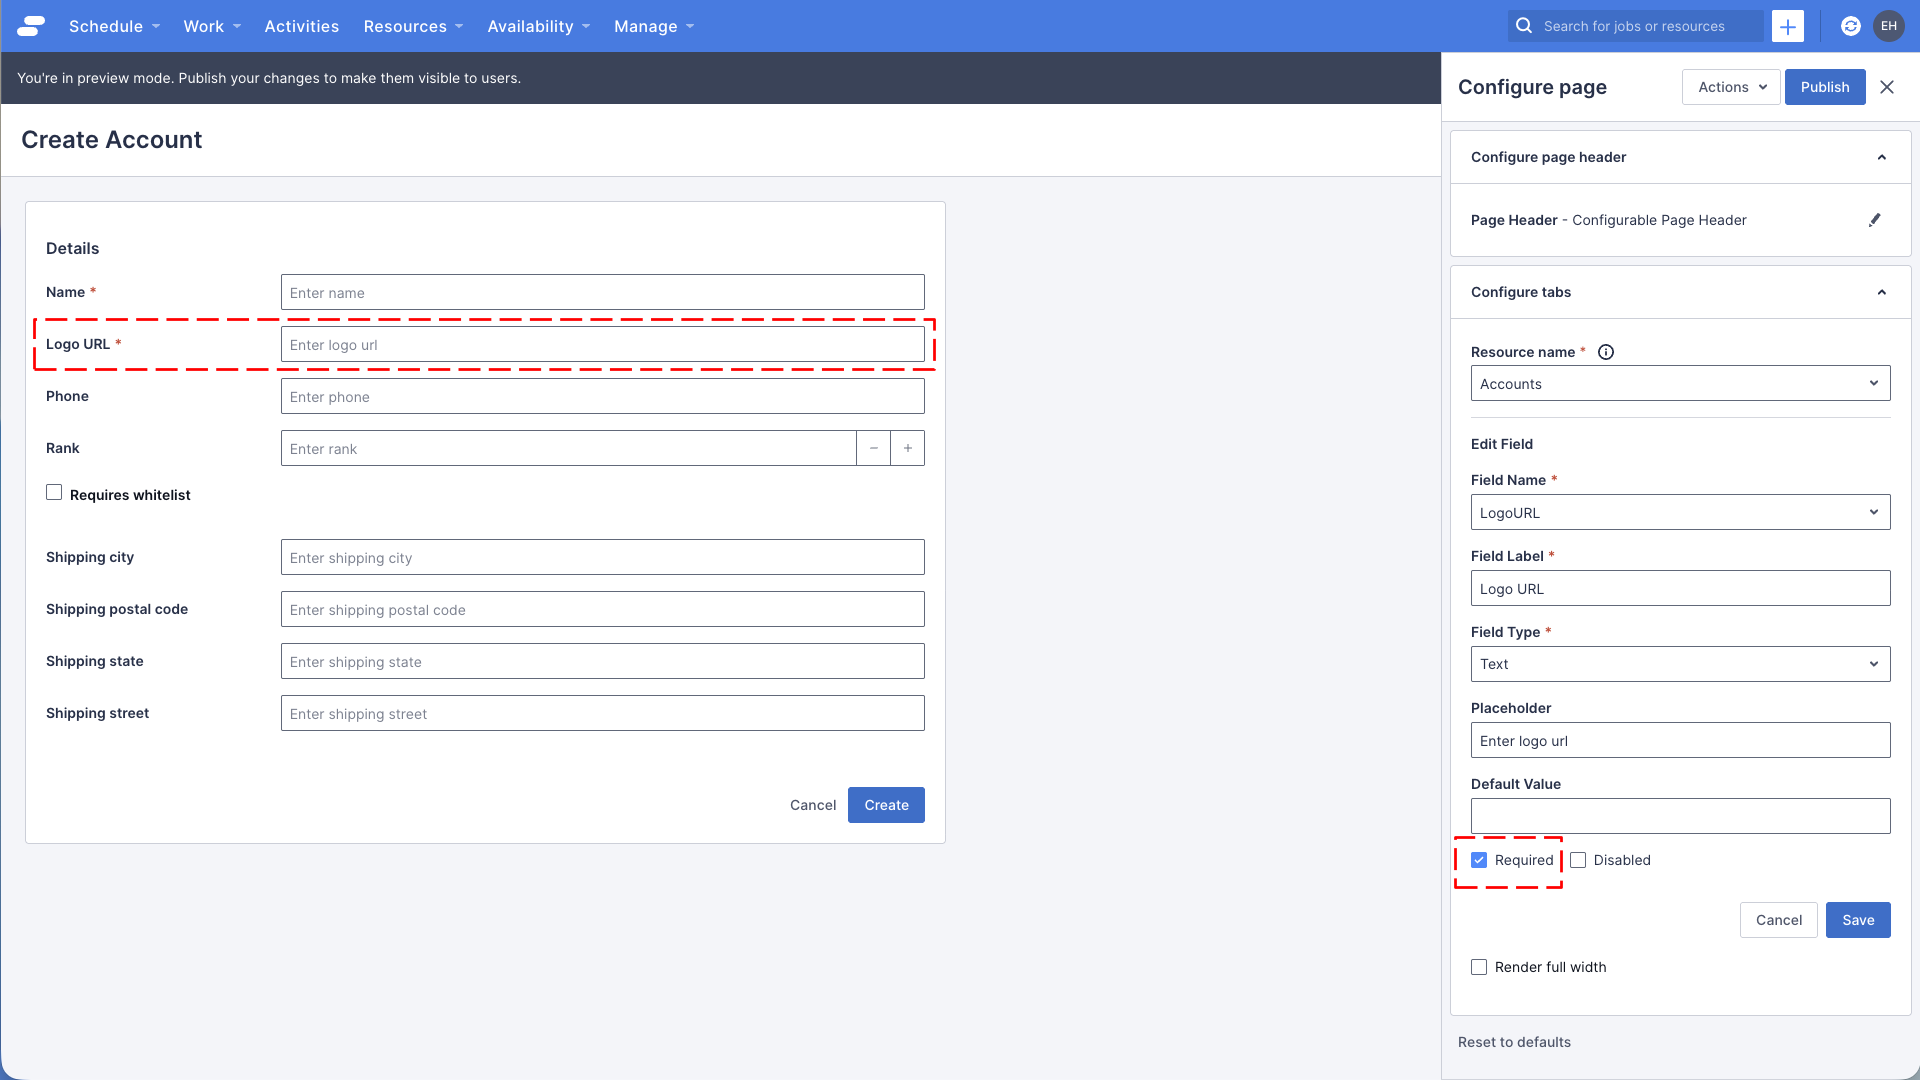
Making a field required
Sometimes you want to make sure a field is populated when a user creates a record. The field layout component allows you to set some basic properties on the fields it renders. Let’s learn how to make a field required.
- Make sure you’re looking at the account create page, and open the page builder
- In the page builder’s properties panel (on the right of the screen), find the Configure tabs section, and click the pencil icon on the Create tab
- Find the Logo URL field we added earlier, and click the pencil icon
- At the bottom of the list of properties for this field, you will see a checbox title Required, select it
- Click the Save button at the bottom of the section, and the click Save again, to save your changes to field, and the Create Field Layout components
Your page should look something like this, note the red asterix after the “Logo URL” marking it as required:
See also
Feedback
Was this page helpful?