Customizing page headers
Beta feature
This feature is currently in beta, and should be considered ‘under development’, learn more here.Overview
The page header sets the context for the page, helping the user understand quickly what record they’re looking at.
The are several properites of the page header that can be modified to provide more context:
- Title: The title renders in a large font, and is meant to provide a clear identifier of the record. You can embedd templates to reference multiple fields
- Subtitle: The subtitle renders in a smaller font below the title, it’s often used to highlight important fields on the record. Also supports templates
- Avatar: The Avatar can display a two letter summary of any text supplied, or an image url. Also supports temaplates
- Actions: The actions property allows you to embedd other components within the header, typically action buttons that can link to other pages, or invoke modals
Let’s try customizing the page header for an account record, first we’ll experiment with by showing some data from the record in the Subtitle.
Showing data in the subtitle
- Navigate the accounts list, https://<your-team>.my.skedulo.com/p/accounts
- Click on an account to open the detail view
- Open the page builder by clicking on the gear icon in the lower right of the screen
- In the page builder’s properties panel (on the right of the screen), find the Configure page header section, and click the pencil icon on the Page Header component
- Locate the + Optional properties link, underneath the Title property, click it
- Select Subtitle from the popup list
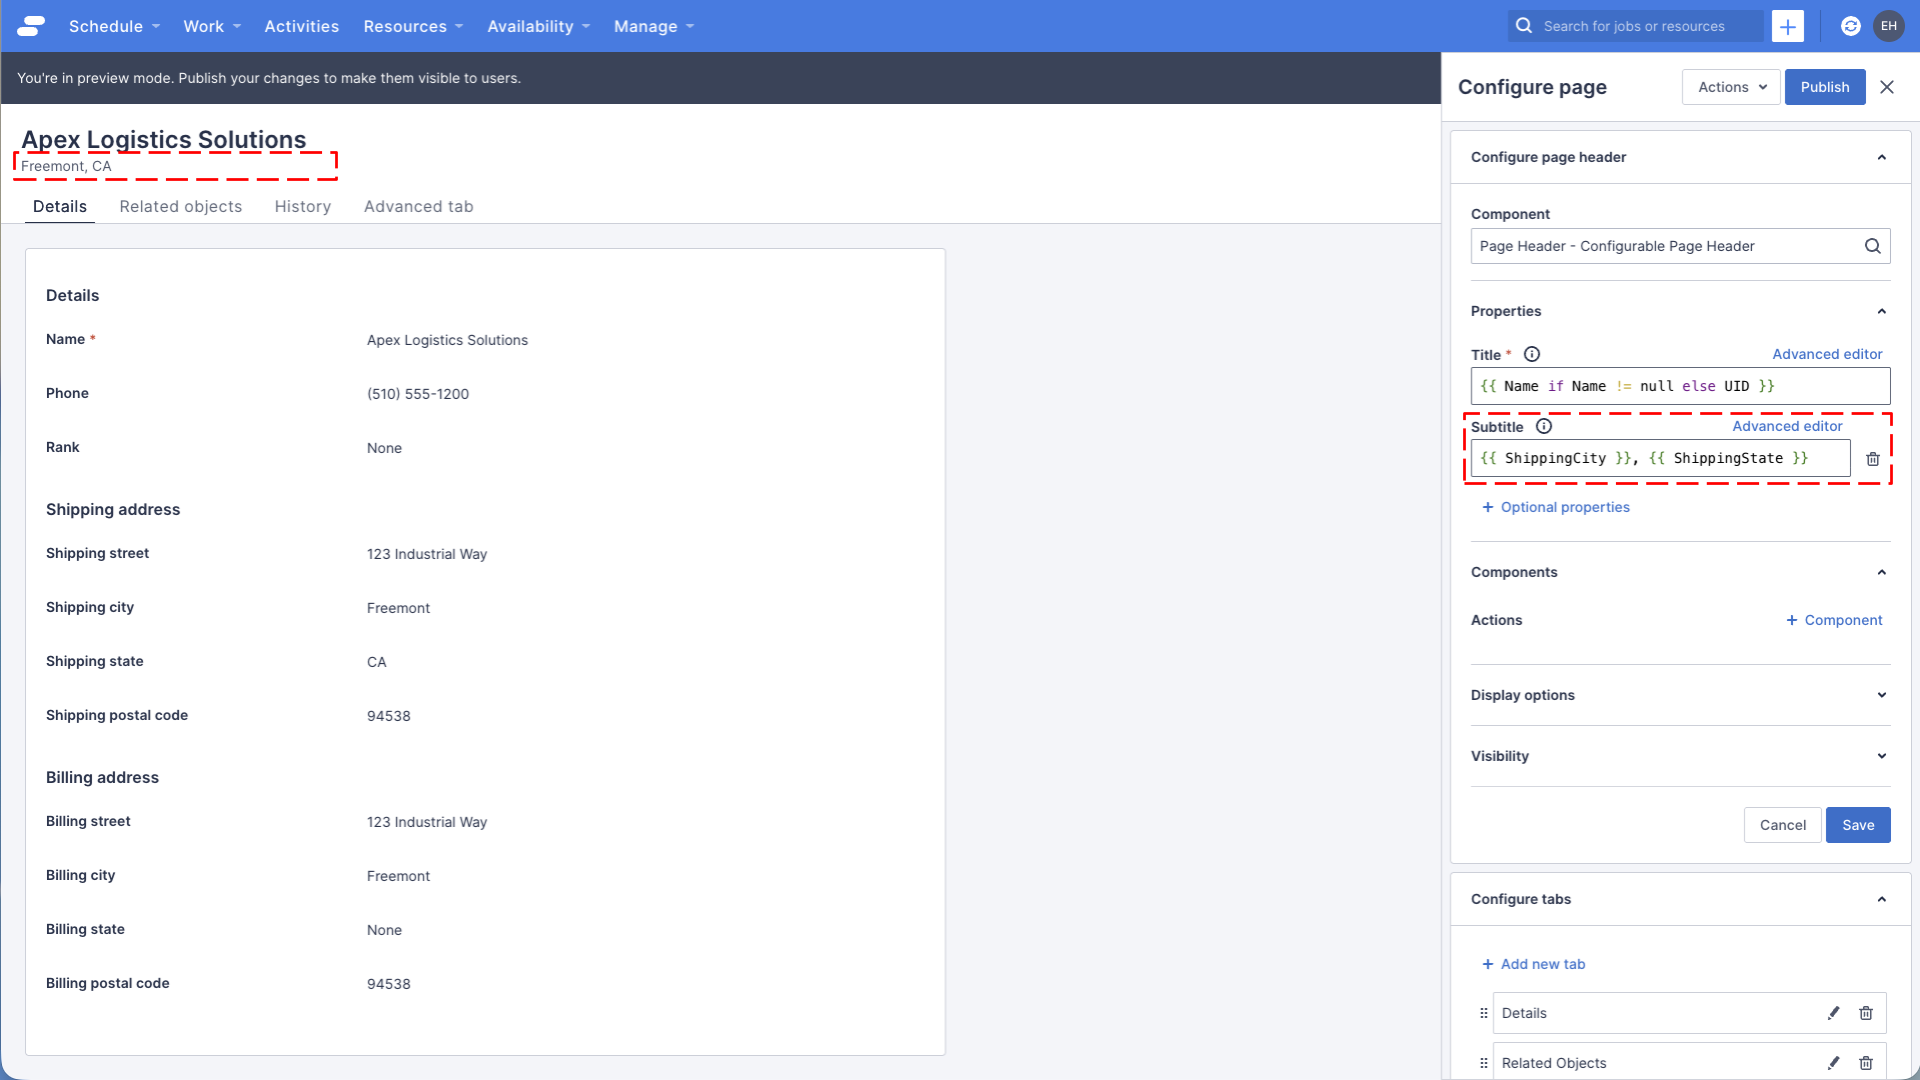
- Enter the following into the Subtitle property: “{{ ShippingCity }}, {{ ShippingState }}”
- Click the Save button at the bottom of the section, to save your changes to the component
- Your changes should be visibile in the page preview
Your page should look like the image below, if you have some data in the ShippingCity & ShippingState fields.
Adding an avatar
The avatar can show the initials of the first two words passed to the Label property, optionally you can include a link to an image. In this example, we’re going to create a new URL field called “LogoURL” and that points to a image representing the logo for the account.
Create a LogoURL custom field
- Navigate to Settings > Objects and fields, select the Accounts object
- Click the Add custom field button in the top left
- Chose the field type of URL, click Next
- Set the label to “Logo URL” and the field name to “LogoURL”, check “Show on Desktop” in the Display settings section, then click Create
- Navigate to an account record and edit it, setting the Logo URL field to “https://placehold.co/128x128/orange/white?text=APEX+Logistics"
The URL links to an app that generates placeholder images, handy for writing tutorials!
Configuring the avatar
- Make sure you’re looking at the account record you just set the LogoURL on, and open the page builder
- In the page builder’s properties panel (on the right of the screen), find the Configure page header section, and click the pencil icon on the Page Header component
- Locate the + Optional properties link, underneath the Title property, click it
- Select Avatar from the popup list
- Enter the following into the Label property: “{{ Name }}”
- Enter the following into the Image source property: “{{ LogoURL }}”
- Click the Save button at the bottom of the section, to save your changes to the component
- Your changes should be visibile in the page preview
![]()
Adding an action
The Page Header component is a little bit special, in that it can actually host other components inside it. This is primarily so you can add custom “Actions” to the header. In the example below we will create another custom field to store the website of the Account, and add a Link Button to navigate to it.
Create a Website custom field
- Navigate to Settings > Objects and fields, select the Accounts object
- Click the Add custom field button in the top left
- Chose the field type of URL, click Next
- Set the label to “Website” and the field name to “Website”, check “Show on Desktop” in the Display settings section, then click Create
- Navigate to an account record and edit it, setting the Website field to “https://www.skedulo.com” or any URL that you prefer
Configuring the Link Button
- Make sure you’re looking at the account record you just set the Website on, and open the page builder
- In the page builder’s properties panel (on the right of the screen), find the Configure page header section, and click the pencil icon on the Page Header component
- Locate the section Components, and the property Actions, click the + Component link
- Notice how the context of the page header component changes to become the new child component
- Set the Component label property to “Website Link”
- Set the Component property to “Link Button”
- Notice how the properties of the Link button component are now visible
- Locate the + Optional properties link, click it
- Add Label, Type and Path properties from the popup list
- Enter the following into the Label property: “Open website”
- In the Type property select: “Primary”
- Enter the following into the Image source property: “{{ Website }}”
- Click the Save button at the bottom of the section, to save your changes to the component
- Your changes should be visibile in the page preview
- Click Publish in the top right, if you want to make this change available to all users.
Your page should now look something like this:
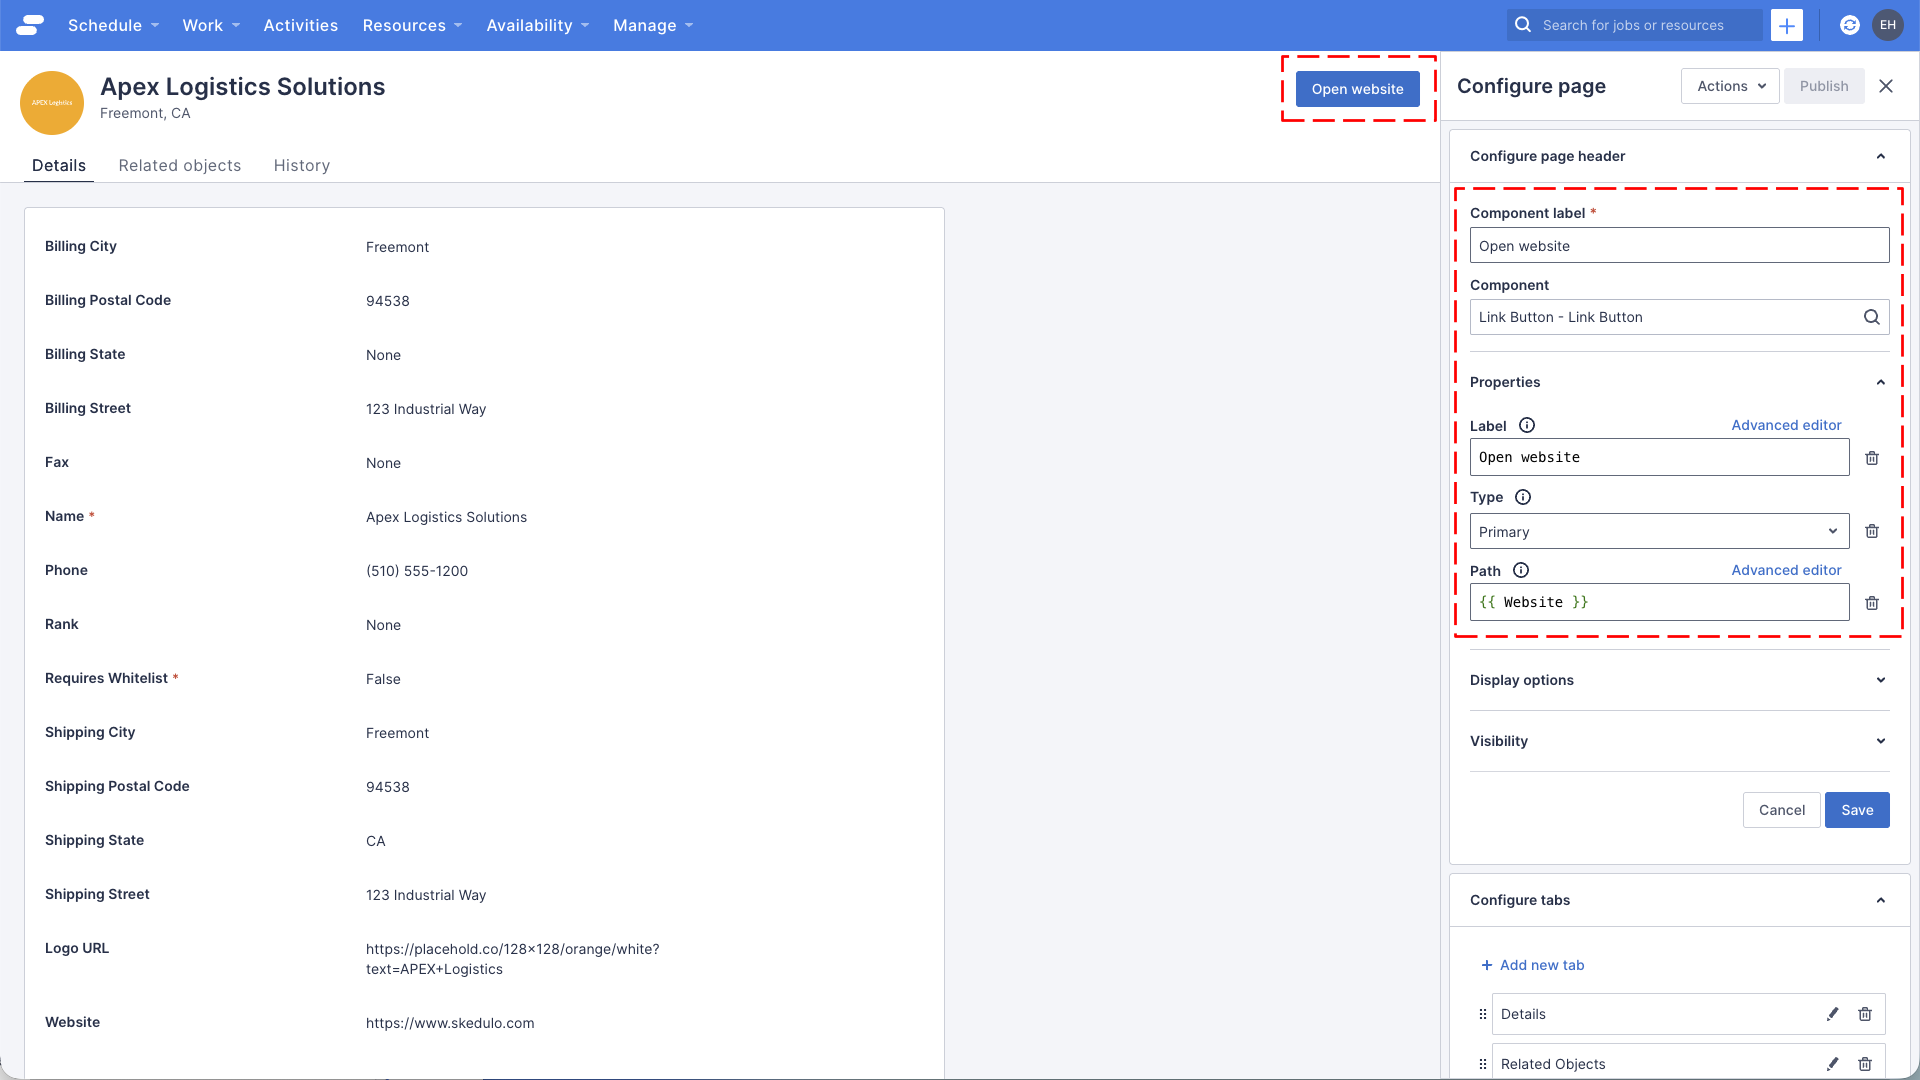
Try clicking on the button, it should navigate you to the URL you entered into the Website field on the account record.
See also
Feedback
Was this page helpful?