Create custom roles for functional permissions
Overview
Administrators can edit the permissions of the standard Scheduler and Resource roles or create custom user roles with specific sets of permission. Users can be assigned any combination of roles.
Users with multiple roles are granted all of the permissions from all their assigned roles. For example, a user with a standard Scheduler role (which includes permission to dispatch resources) and a custom role without the permission to dispatch resources will still be able to dispatch resources.
Required permissions (⚠️)
Certain permissions are required to access the Skedulo web app and Skedulo mobile app.
Users assigned a role that does not include these base-level permissions will not have access and will receive an error when attempting to log into the app.
Additionally, some pages in the web app may require users to have multiple permissions to access them, such as both view and modify permissions.
Web app access
Users can get basic read access to the Skedulo web app with only a custom role; they do not necessarily need one of the standard roles (although the standard roles are recommended to ensure that base functionality works as intended). At a minimum, to access the web app, users must have a role containing the permissions identifiable by an alert ⚠️ icon in the description.
Mobile app access
Users must have the Resource role to be allocated work and to access the Skedulo mobile app. Custom roles can be added and the Resource role can be modified, however, without the Resource role, they cannot be allocated work or log into the mobile app.
Modify standard role permissions
Skedulo’s standard roles have a pre-defined set of permissions by default. These roles can also be modified to add or revoke permissions for users with these roles.
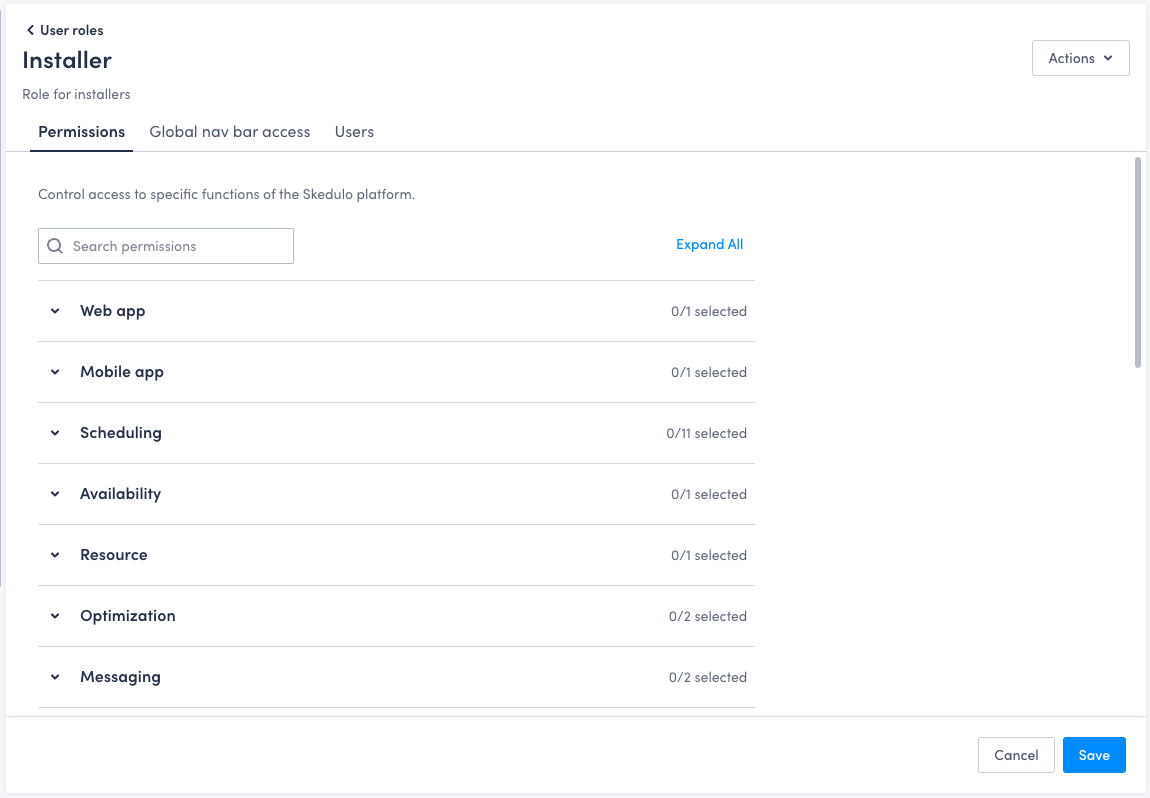
- Navigate to the Settings > User roles page.
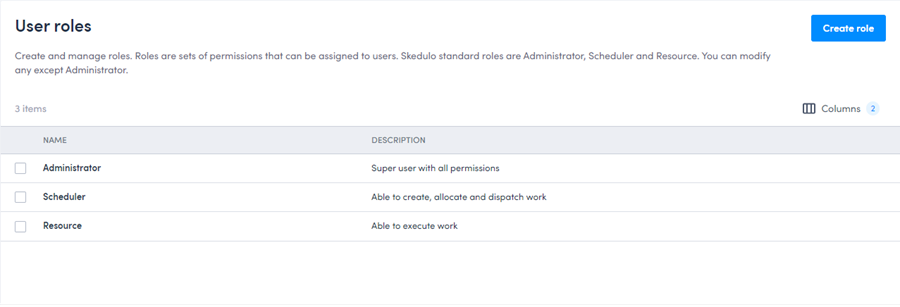
- Click the standard role for which you want to adjust the permissions, for example, Scheduler.
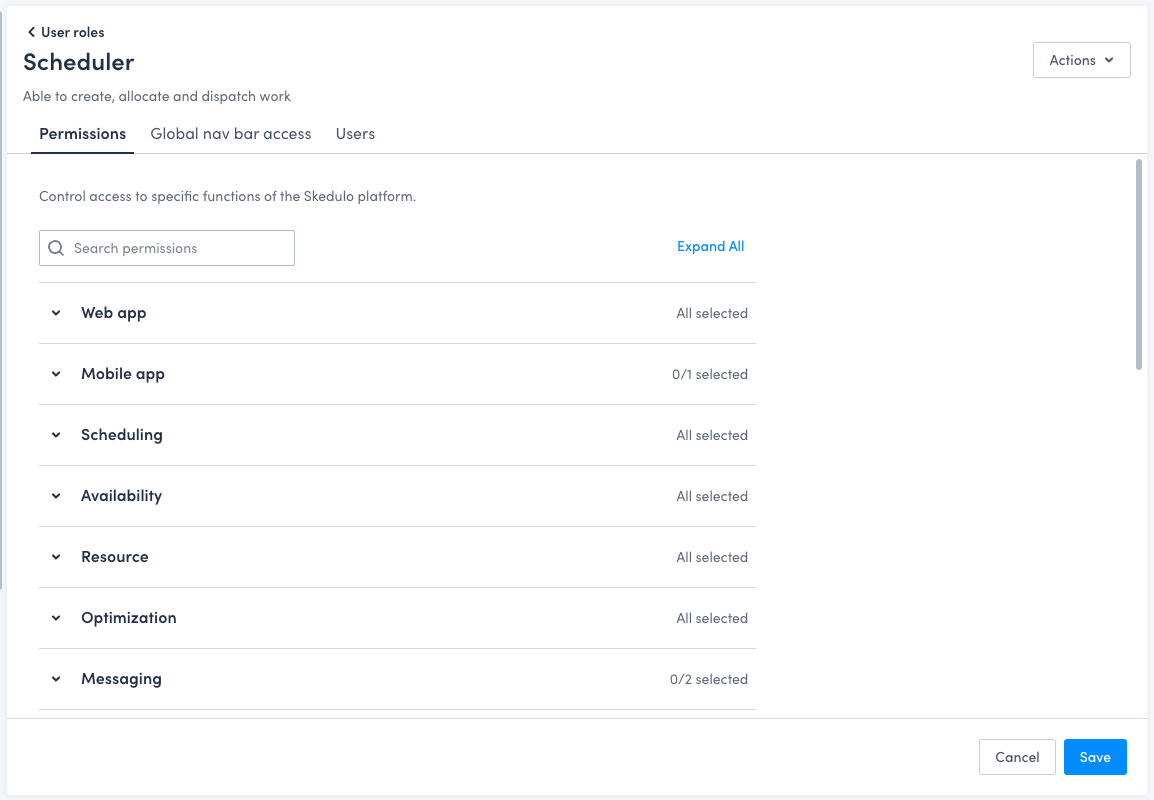
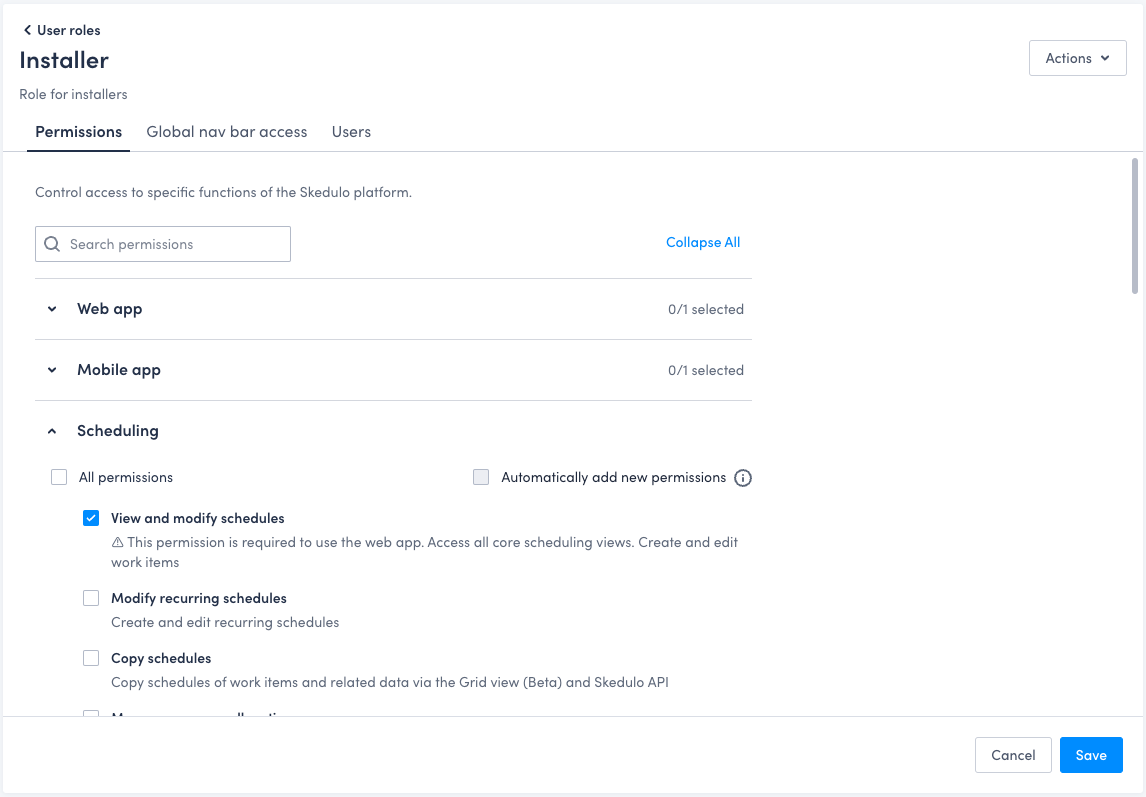
- On the Permissions tab, click a chevron to expand a section and then select or deselect permissions as required. When you make changes to a permission, a
non-defaultlabel is added beside it and the label on the section header of its category updates to show how many non-default permissions there are within it.

- Click Save.
Tip
When the permissions for a role are changed, users with that role need to reload their page for the changes to apply.Reset a standard role
If you make changes to the permissions assigned to the standard Scheduler or Resource roles, you can easily reset to the default permissions set.
To reset any changes you’ve made to the standard Scheduler or Resource roles:
- Navigate to the Settings > User roles page.
- Select the standard role you want to reset.
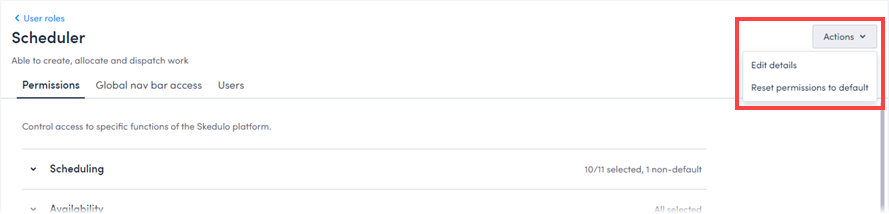
- Click Reset permissions to default on the Actions dropdown menu.
Tip
When the permissions for a role are changed, users with that role need to reload their page for the changes to apply.Clone a standard Skedulo role to create a custom role
Custom roles can be created by cloning one of the standard Skedulo roles and modifying the default permissions to add or revoke permissions.
Skedulo recommends this approach for creating new custom roles to prevent roles from being created without the required base permissions to use the Skedulo apps. A custom role with a small number of permissions can, however, be used to add onto an existing role.
The following procedure shows how to clone the standard Resource role to create a custom role that contains the standard Resource permissions and, additionally, permissions to provide access to the Skedulo web app.
- Navigate to the Settings > User roles page.
- Click Create role.
- Provide a name and description for the new custom role.
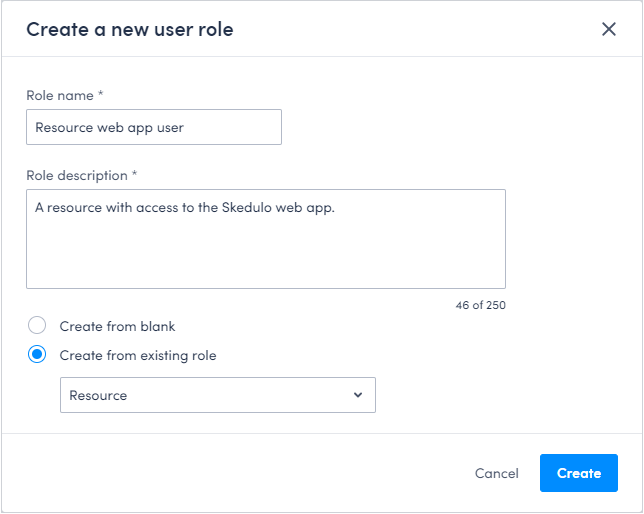
- Select Create from existing role and select the role you want to clone from the dropdown menu. For this scenario, click Resource.
- Click Create to save your changes and create the role. The permissions page for your new role displays.
- Expand the permission section headings and select or deselect the permissions as required. To add web app access, enable the Web app access permission and the other permissions it requires, which are marked with a warning icon.
- Click Save. Your custom role is saved and you are returned to the User roles list view page.
Alternative approach using a complementary role
An alternative approach to providing web app access to a resource by cloning the Resource role (as described above) is to create a “Web app user” role that contains only the permissions required to use the web app and then to give the appropriate users both the Resource and the Web app user roles.
Assign a custom role to a user
The procedure for assigning a custom role is the same as assigning a standard role.
To assign a custom role to a user:
- Navigate to the Settings > Users page.
- Click the name of the user to whom you want to assign the role. The user’s details page displays.
- Select the custom role from the Roles dropdown menu.
- Click Save to apply the role to the user.
Tip
When a user’s roles are updated, they need to log out and log back in for the changes to take effect.Feedback
Was this page helpful?