Request availability
Overview
Schedulers can create new availability requests at any time directly from within the web app. In the top-right corner of the console, there is a large + (plus) button, clicking on this reveals a dropdown menu with options to create Unavailability or create Availability.
Availability filter options
In the top-right corner of the availability request view filter (a dropdown menu) that allows a scheduler to view upcoming requests only, past requests only, or all requests.
Additionally, the filters in the filter bar can be really useful to locate specific assets or resources. The following filters are available to be used on the availability request list:
- Region.
- Resource type.
- Availability type.
- Availability status.
- Resource.
For instance, if a scheduler wants to see all requests for a single resource (in this example “Dexter”), then all they do is add and apply a resource filter.
To remove a filter click on the small cross next to the filter in the filter bar.
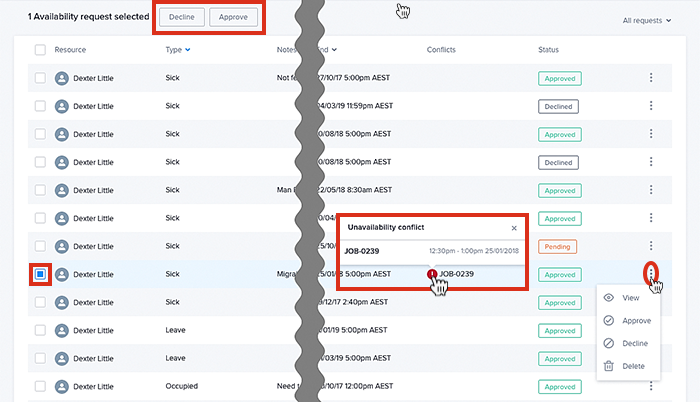
Approve or decline an availability request
When either a resource or a scheduler creates a request for Unavailability, the request will be logged in the availability console.
From here, the scheduler can approve, decline or delete a request using either the three-dot menu (to the right-hand side of the request) or by selecting the individual and using the Decline/Approve buttons just beneath the main filter bar.
The following details are available on the console:
- Resource (name).
- Type (e.g., sick leave, occupied).
- Notes (text comments).
- Created (date).
- Start (date/time).
- End (date/time).
- Conflict (Job Name).
- Status (Pending/Approved).
Some of the columns (type, created, start and end) can be sorted. The default sort is based on the column named Created (with the most recent date first). When you go off-page and return, this default will apply.
Tip
Need to cancel an availability or unavailability request?
Look under the more options menu (to the far-right of each request), there is an option to delete the request.
Feedback
Was this page helpful?