Configure Work list views
Note
The Pulse Scheduling Experience is only available on the Skedulo Pulse Platform.Overview
Use the Sort, Filter, and Customize columns options to create a custom view of the Work list. Each different combination of these elements comes together to create a specific list view. You can then, depending on the permissions assigned to your role, save and share these custom views with your team or create private views that are visible only to you.
Note
Some of the functionality described in this documentation requires that users have specific permissions for managing work and resource records.Sort the Work list
Sort the data in your Work list by ascending or descending order. Click Sort on the top right-hand side of the Work list header to display the Sort data modal.
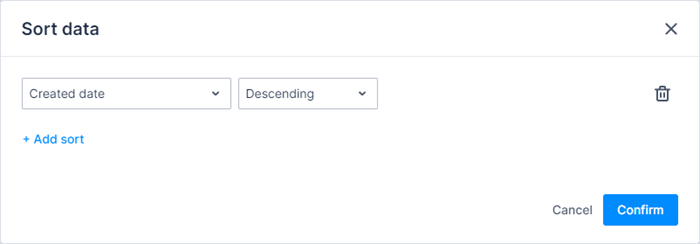
In the first drop-down, select the field to you want to sort by, then in the second drop-down, select the sort order, Ascending or Descending.
Click Add sort to select further columns to sort the data by.
Related links
Filter the Work list
Apply filters to the Work list to restrict the data that is presented. Click Filters on the top right-hand side of the Work list header to display the Filter records modal, which you can use to build your filters and customize your list.
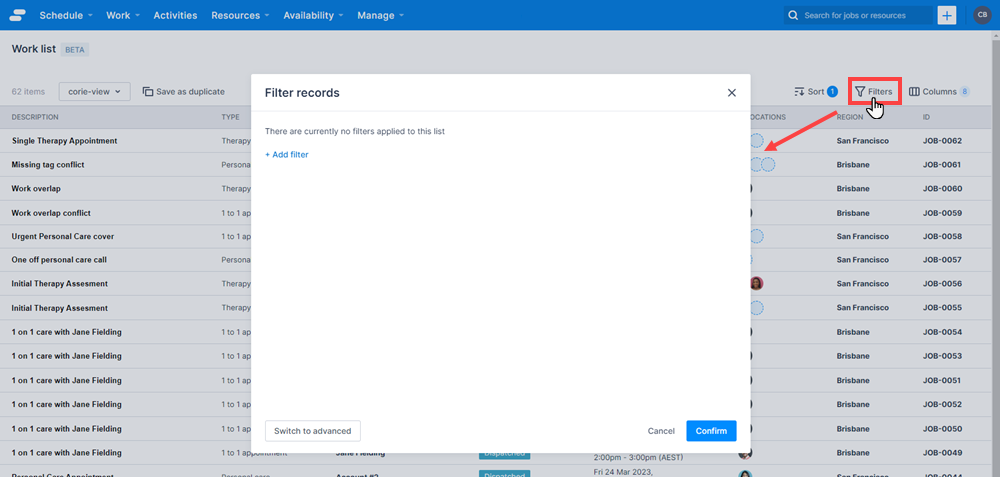
Multiple filters can be combined to refine which records appear in the Work list. Click Add filter to create additional filters. The appearance and type of menus available on the Filter records modal depend on the type of field selected. For more information, see Filter list views.
When using the query builder to combine multiple filters, the AND operand is assumed. Alternate operands can be used in advanced filtering mode.
For example, if you want to filter the Work list so that only jobs that are pending allocation in Brisbane are displayed:
-
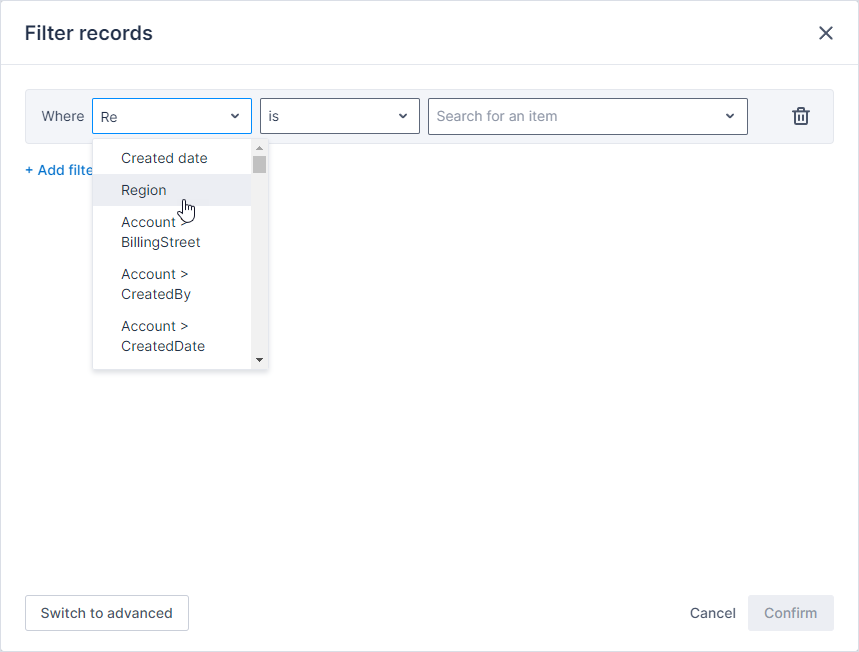
On the Filter records modal, click Add filter.
-
From the first drop-down menu, select Region. You can scroll through the list or highlight the text and start typing, then select Region when it is displayed.
-
From the middle drop-down menu (the operator menu), select is.
-
In the third field, enter the first three letters of the region you’re searching for, in this case, Bri, and then select Brisbane.
-
Click Add filter again to add a second filter.
-
From the first drop-down menu, select Status.
-
From the operator menu, select is.
-
From the third drop-down, select Pending Allocation.
-
Click Confirm. The modal closes and your Work list refreshes to display only those jobs that match the specified filters.
Advanced filter logic
Click Switch to advanced on the Filter records modal to display the Lucene filter query view and enable the advanced filtering mode, which can be used to construct more sophisticated queries. You can find out more information about building advanced filter queries in Filter list views.
Related links
Customize which columns are visible
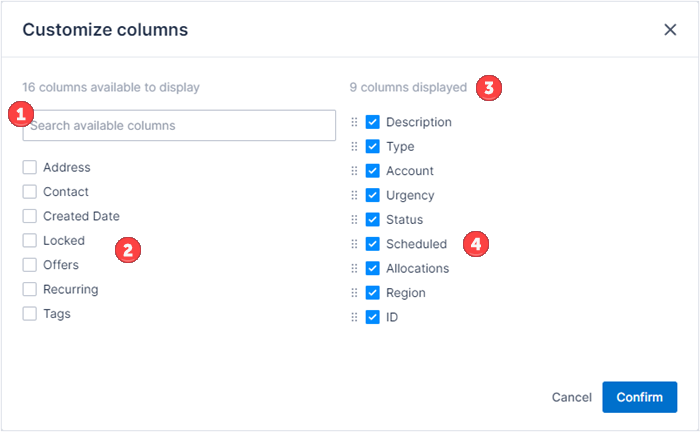
To configure which of the default columns are visible in the Work list, click Columns on the top right-hand side of the Work list header. This displays the Customize columns modal. You can now deselect the columns you want to hide from view.
The Customize columns modal is made up of four elements:
- A search field to quickly find an available column to display (1).
- The columns that are available to be added to the work list (2).
- The columns that are currently selected for display (3).
- The display order of the columns (4).
Click and drag the grab icon ![]() beside each column to change the display order.
beside each column to change the display order.
Note
Only an administrator can configure which fields are available for use in the Work list, but once configured, a general user can choose which ones are displayed and change the order in which they appear. For more information, see Configure default columns for list viewsSave a custom view
Saved Work list views can be private or can be shared across your organization depending on which permissions are assigned to your role. Admins have access to all list view functionality, but other roles will have have different access depending on the permissions set on the User roles page.
Once you have customized your Work list, you can either save the changes to the currently selected list view, or you can save it as a duplicate of the current view.
Note
If you make changes to the Default view, the only option available is Save as duplicate.Save as duplicate
Click Save as duplicate to display the Save a duplicate view modal and save a new version of your currently configured Work list.

Enter a name for your view in the View name field, then set the view’s visability.
- Select Only me to create a private Work list view, which will be visible only with your login. This feature is available to all users.
- Select Everyone to create a shared Work list view, which will be visible to all users across your system. This feature is available only to administrators.
You can also duplicate a view using the Duplicate view option on the menu beside each saved view in the list.
Save changes
The Save changes option is displayed above the Work list once you have made changes to a previously saved view. Please note that you cannot save changes to the Default view. The Default view can only be saved as duplicate.
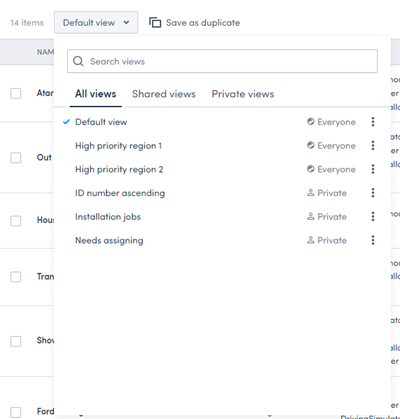
Access your saved list views
To access your saved list views, click the saved view drop-down list on the top left-hand side of the page.
The saved views drop-down menu lists all the views which are available to you. You can sort by All views, Shared views, or Private views by clicking on a tab header.
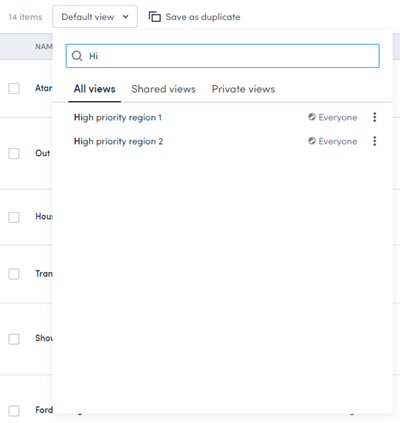
Search for a saved list view
Use the Search field to search for a specific list view. The search bar utilizes auto-suggest to help you find the saved view you are looking for.
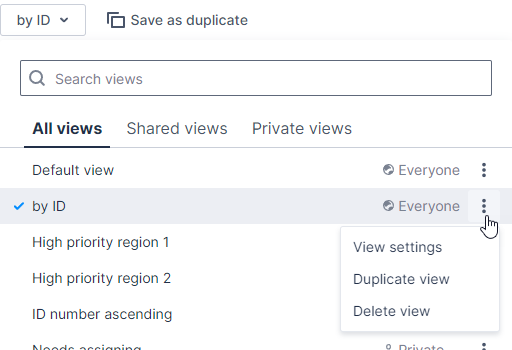
View settings
To update the visibility or change the name of a saved view:
- Click the More options button (
 ) beside the view you want to edit.
 - Select View settings from the menu to display the View Settings modal.
- Use the options on the View settings modal to:
- Modify the name of the saved view.
- Change the visibility of the saved view.
Please note, if you are not an administrator, the View settings option is grayed out for shared views.
Delete a view
To delete a saved view, click the More options button () beside the view you want to delete, and select Delete view from the menu.
Both administrators and general users can delete private views, but only administrators can delete shared views.
Feedback
Was this page helpful?