Create a data-mapped form with Form Builder to create new data records in Skedulo for Salesforce
Overview
Data-mapped forms allow mobile users to submit data values through forms in the Skedulo Plus mobile app that either create new records or update existing records in the Skedulo database.
The instructions in this article cover the steps to create a mobile form for the Skedulo Plus mobile app that allows users to create new data records in Skedulo. The term data-mapped means that the fields in the forms are mapped to fields in Skedulo data objects such that by submitting data via the form, new data records are created in Skedulo.
For this to be possible, some prior planning and data setup is required before creating the form. See the prerequisites section below for details.
Important
Currently, Form Builder only supports the creation of new records for custom objects.Prerequisites
- Administrators can configure forms in Form Builder.
- Resources need permission to create and edit the data object that is mapped in the form.
- Form Builder can only be used in teams using the Skedulo Plus mobile app, as the forms created using the Form Builder can only be installed on the Skedulo Plus mobile app.
Data schema preparation
Before creating a data-mapped form to create new data records, you must do the following steps:
-
Create a custom object in Salesforce to store the form data. For details on how to do this, see Create custom objects in Salesforce.
-
Add custom fields to the object to fulfill your form’s data-creation requirements. Take note of the field types, as you will need to configure corresponding data entry components in the form for each field.
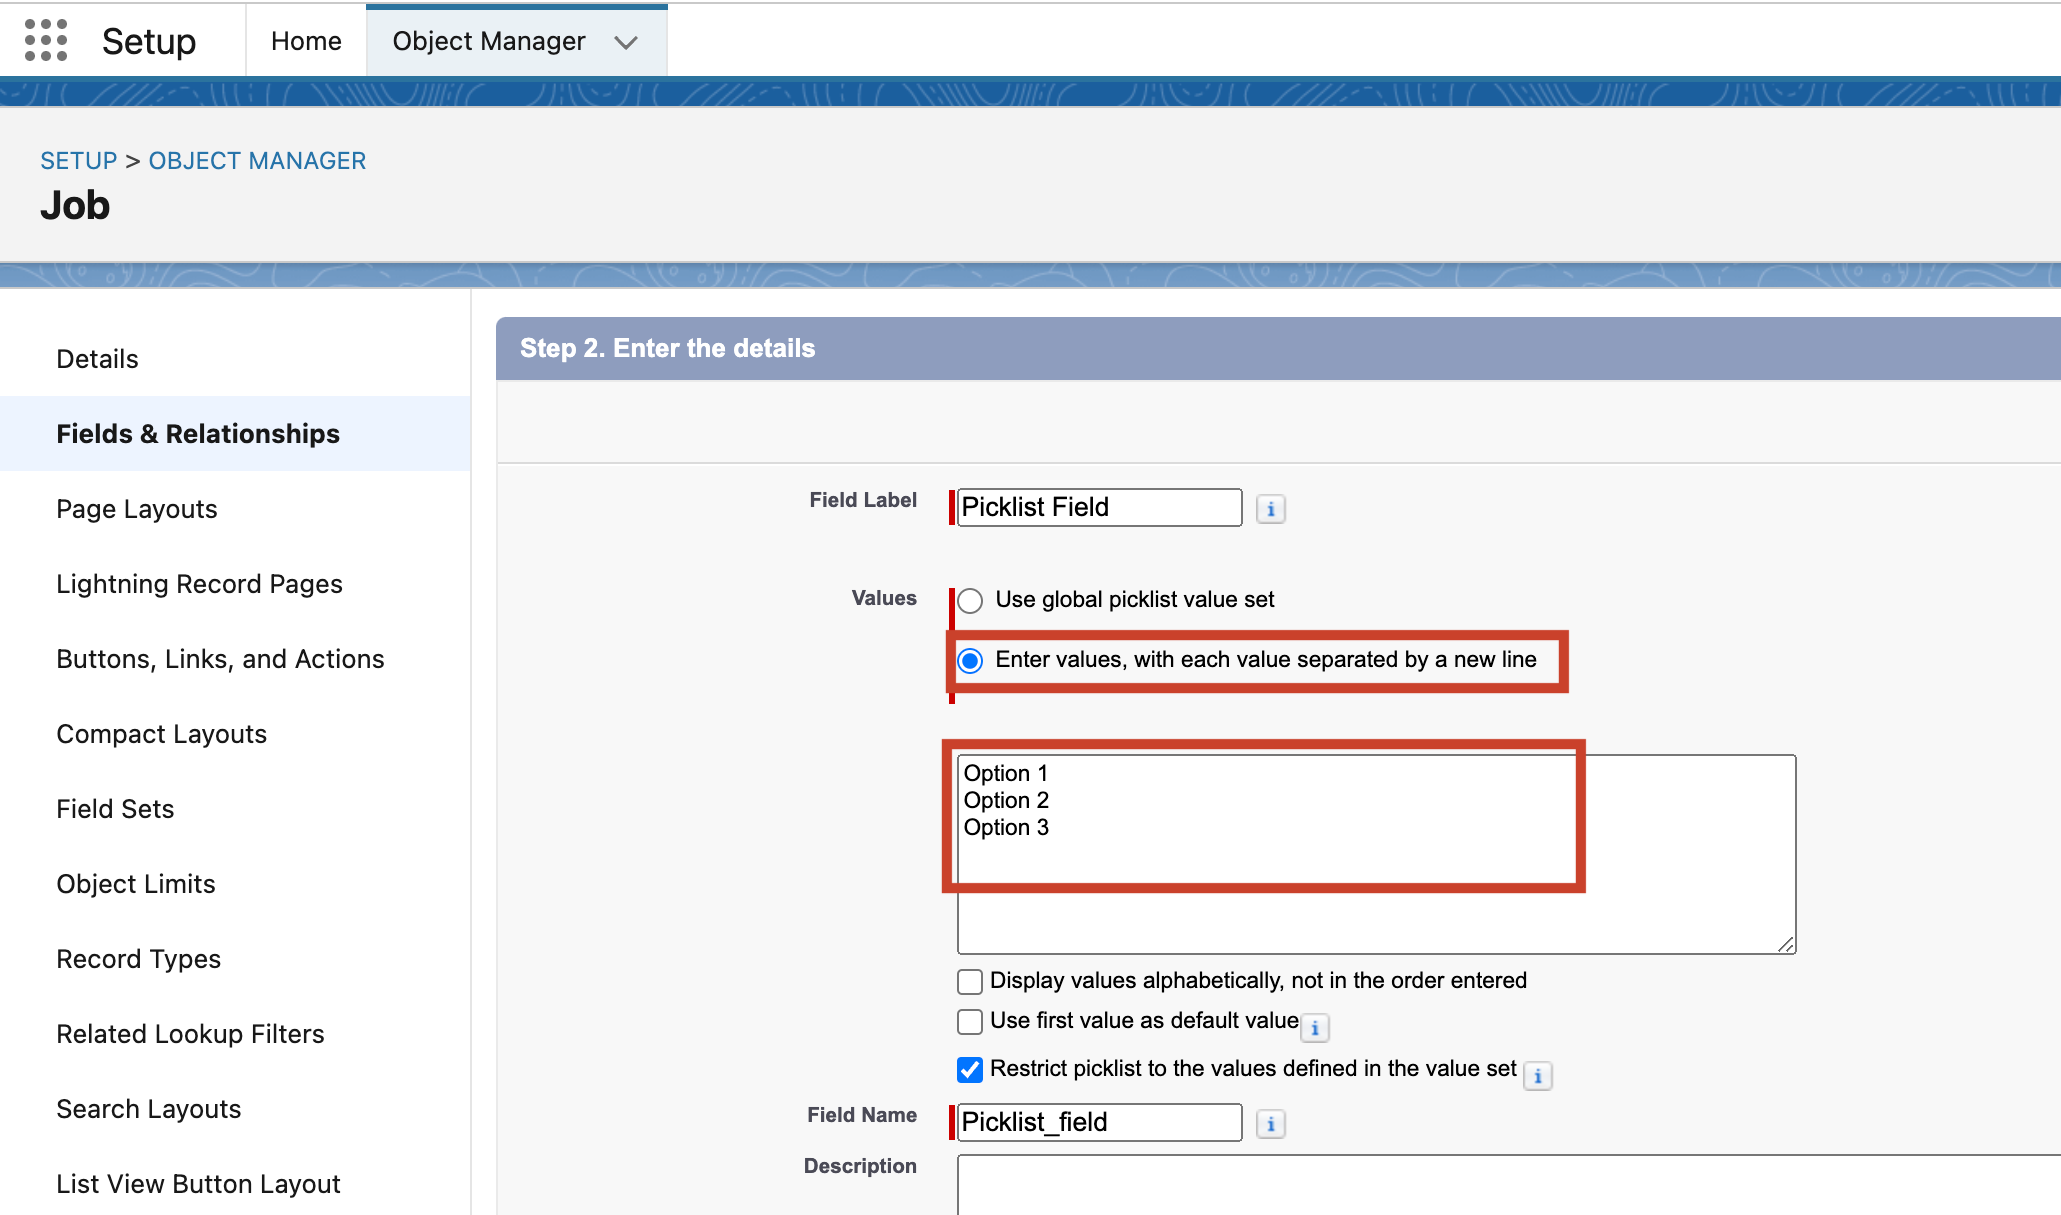
If you want to use the picklist field type, set Values to Enter values, with each value separated by a new line to add the options when creating a new custom field, as shown in the screenshot below. The global picklist value set is currently not supported.
-
Add two custom fields to the object with the following properties:
| Custom field | Field type | Field label | Field name |
|---|---|---|---|
| The Job field | Lookup (refer to the Job object) | Job |
Job |
| The FormUID field | Text | FormUID |
FormUID |
- Map the following fields to Skedulo:
Job,Form UID,Created Date,Created ID, and all custom fields to be used in the form. For details on how to map fields, see Map custom objects and fields.
Create a Skedulo Plus form to create new data records
Creating a form in Form Builder is a two-step process. First set up the form and then configure the form’s visual components that map to the custom fields configured above.
Set up the form
To set up a data-mapped form for new data records, do the following steps:
-
Navigate to Settings > Mobile app configuration > Mobile forms in the Skedulo web app.
The Mobile forms page displays all Skedulo Plus mobile forms that are created using Form Builder.
-
Click Create form.
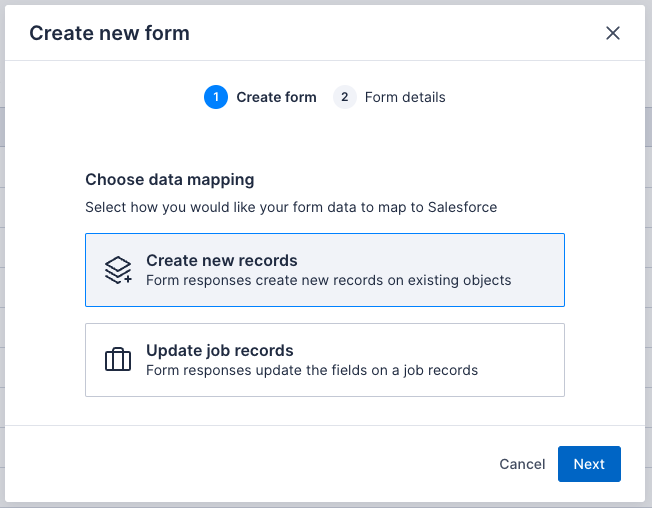
The Create new form window displays.
-
On the Create new form > Create form window, click Create new records and then click Next.
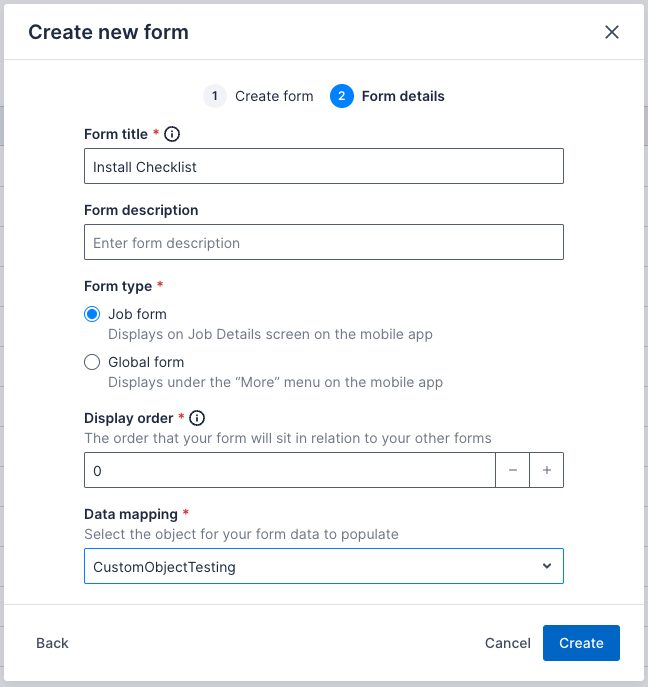
-
On the Create new form > Form details window, complete the following fields:
| Field | Description |
|---|---|
| Form title | (Required) The title or name of the form that mobile users will see in the Skedulo Plus app. Character limit is 38. Title can include alphanumeric characters, spaces, and special characters, but must start with an alphabetic character. The form title can be edited after the form is created. |
| Form description | (Optional) Text that appears underneath the form title in the Skedulo Plus app. |
| Form type | (Required) Where the form appears in the Skedulo Plus app; either in the job details screen or in the More menu screen. |
| Display order | (Required) Where there are multiple forms shown in the same location, the display order determines where the form displays in the list. The lower the number, the higher it appears in the list. |
| Data mapping | (Required) The data object to which the form is linked and for which a new record will be created when the user submits form responses. Each form can only be linked to one object and it cannot be changed after the form is created. |
Important
- If your object does not appear in the drop-down, then check that you’ve set up the object and fields as specified in the prerequisites above, and that they are correctly mapped in Skedulo.
- Click Create. The form details page displays.
Add components to the form and map them to the custom object’s fields
Before adding components to your form, ensure you have a record of the custom object and its fields that you would like the form to map to, including the field names and types.
To add UI components to the form, do the following steps:
-
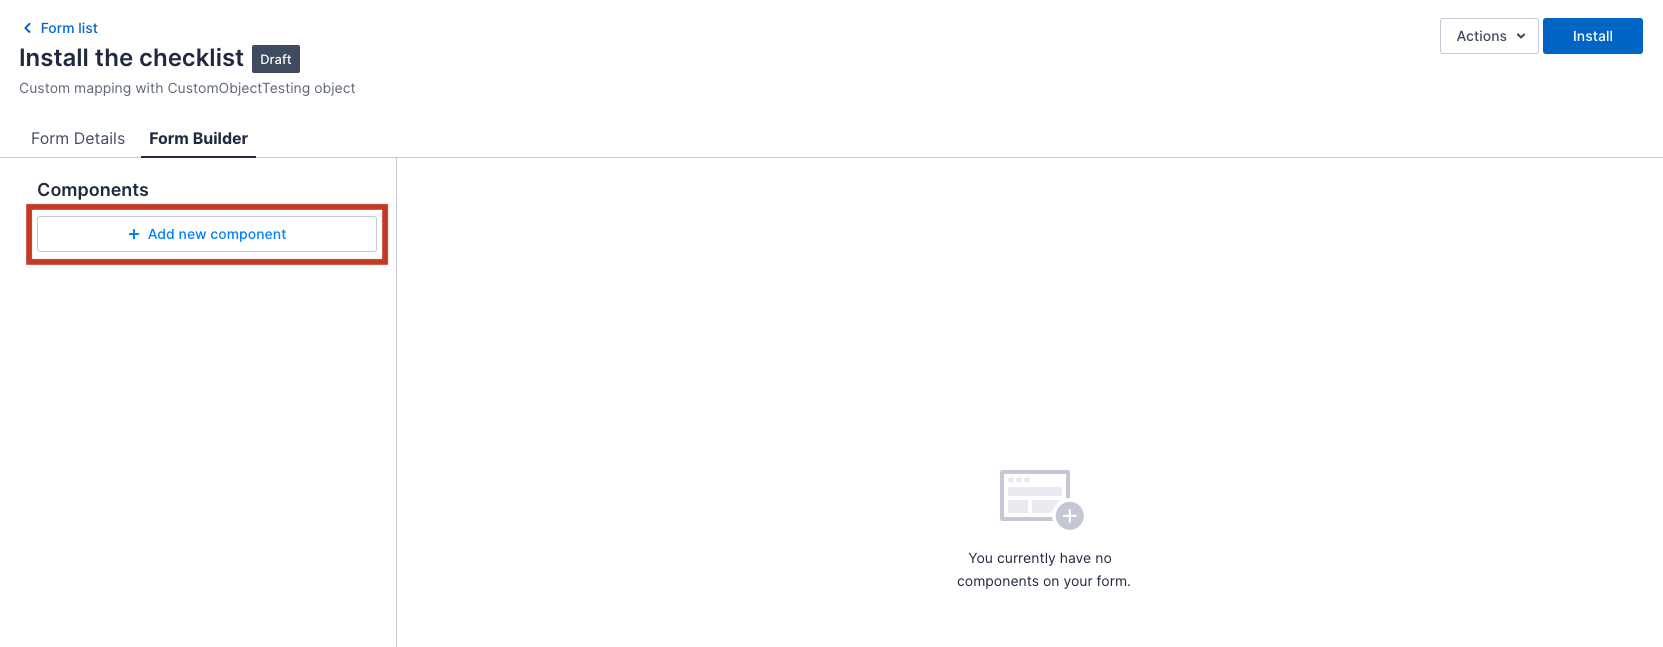
On the Form Details page, switch to the Form Builder tab.
-
Click Add new component and then select the component type that you want to create.
To learn about available components, see Components available in the Skedulo Plus Form Builder.
-
After adding a component, the Component details configuration panel displays.
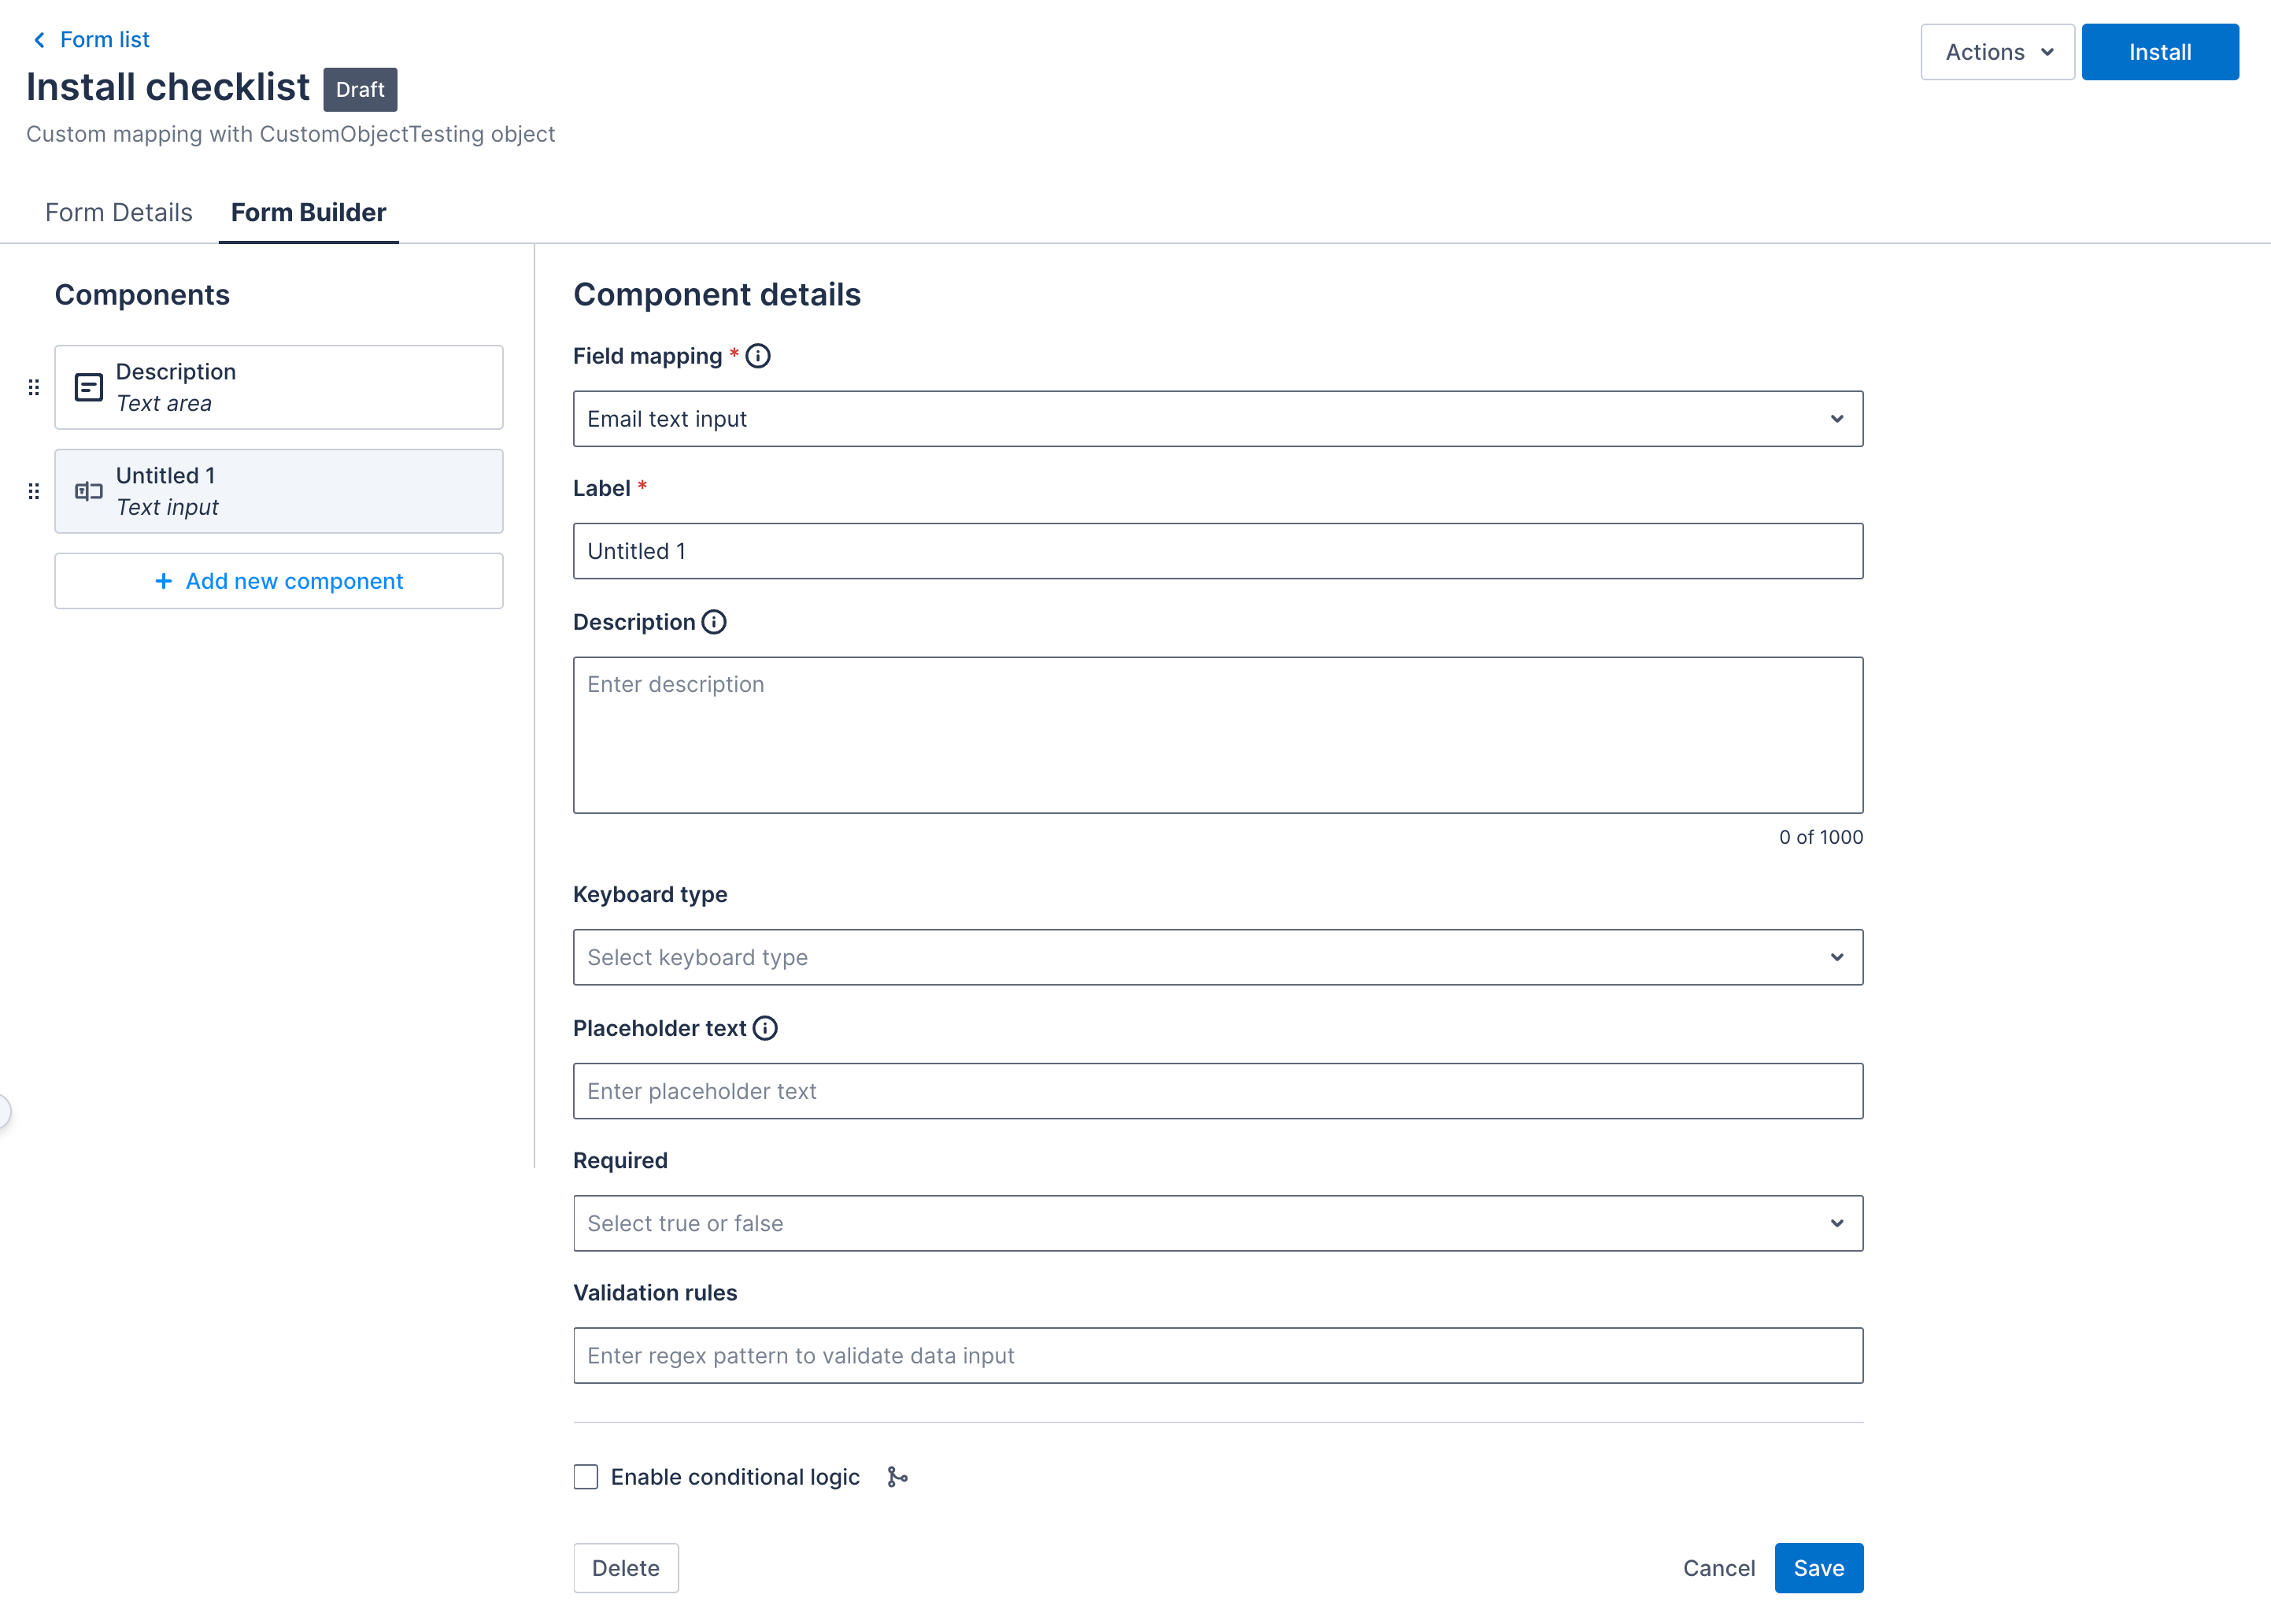
a. From the Field mapping drop-down, select the field to map. You can only select fields that have the field type compatible with the component you are working on.
b. Enter a Label and configure the other fields, as required, according to the component type. For an example of how to configure a component, see Build a Skedulo Plus form with Form Builder components.
c. Click Save.
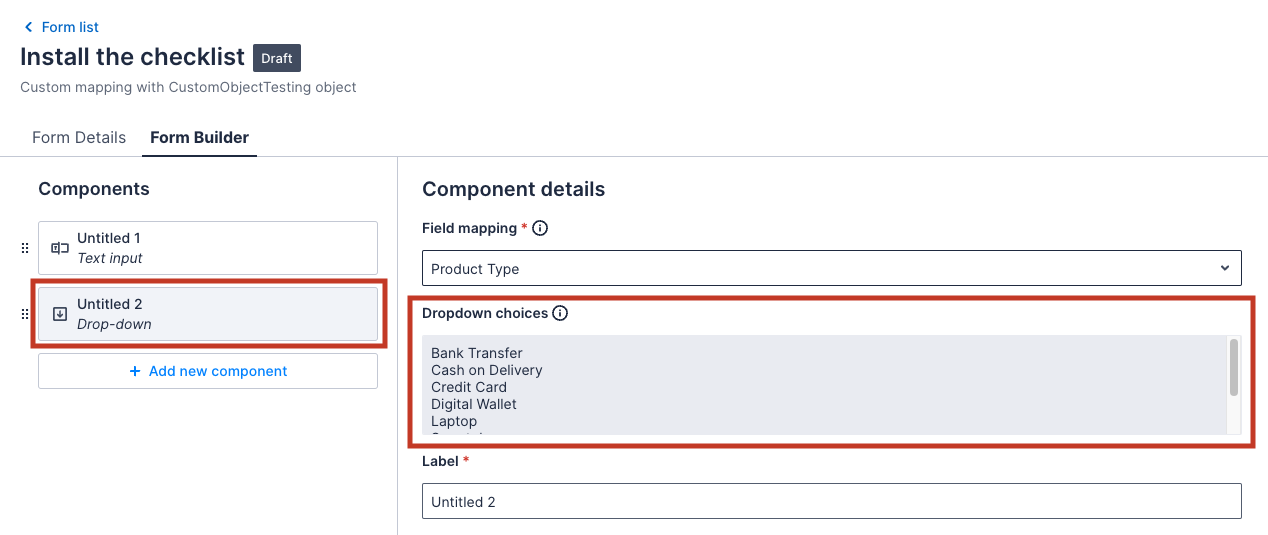
When adding a drop-down or multi-dropdown component, the options will be populated automatically from the picklist values of the field you select.
Important
If the mapping object has required fields, they must be mapped here and marked in the component configuration as required.-
Add all the components you need. They can be reordered by dragging and dropping and conditional display logic can be configured, if required. See Set conditional display logic in Form Builder for details on how to do this.
-
Install the form to make it available to resources in the mobile app.
When users fill and submit the form, you will be able to access the data by navigating, in Salesforce, to the list of records for the object to which the form was mapped. For details, please see View form data.
Feedback
Was this page helpful?